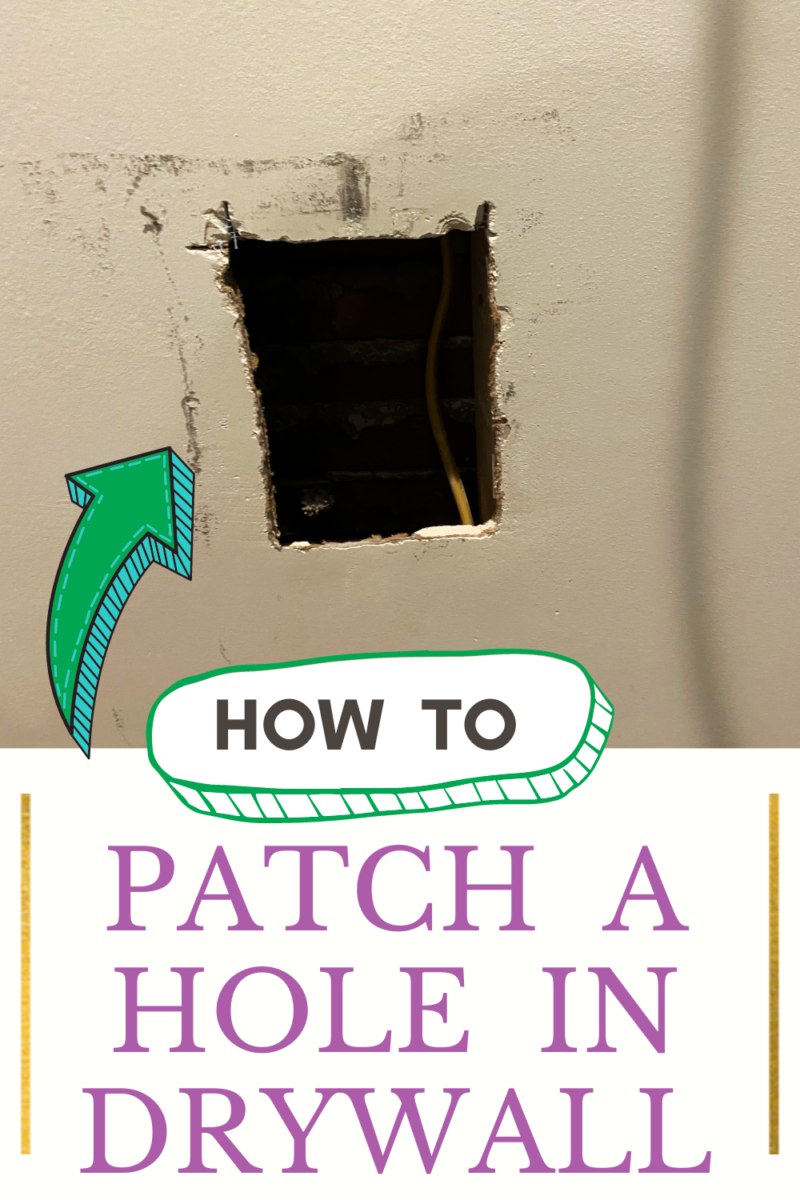
How To Patch A Hole In Drywall
How to properly patch a small or large hole in drywall using a self-adhesive patch, putty knife, spackle, and sandpaper. This method works to permanently repair damaged walls or ceilings.
We recently needed to move a water line in our kitchen to accommodate for our kitchen renovation. The kitchen configuration changed and the refrigerator moved to the other side of the room, therefore, the water line needed to be moved.
In this tutorial I will show you the step by step process to properly fix a large hole in the wall. This same method can be used to properly fix a hole in the ceiling as well. In both situations, the final sanding is the most important step. A good blending job is key otherwise you will see the patch lines.
Supplies Needed
- Drywall Repair Patches
- Wallboard Joint Compound
- Putty Knife
- Fine grit sandpaper, 220 is a good option
- Tip: if you are purposefully cutting your drywall to check behind it, etc, save that piece of drywall to fill back in with later

Wallboard Joint Compound vs Spackle
Wallboard joint compound is a better option for larger hole filling. The consistency is much thinner and spreads very easily, almost like a room temperature butter. For smaller projects, like nail hole filling, spackle is a better option as it dries quickly and resists shrinking when it dries. Both wallboard joint compound and spackle come in different consistencies. Wallboard joint compound comes in lightweight and a setting compound. Spackle comes in lightweight and all-purpose. Your project will dictate which type you need.
This post may contain affiliate links, which means I’ll receive a commission if you purchase through my link, at no extra cost to you. Please read full disclosure here.
How To Patch A Hole In Drywall
- Place the self-adhesive mesh drywall patch over the hole (if the hole is small enough, joint tape will work), making sure the entire hole is covered. If the hole is very large, you can buy a piece of sheetrock drywall at your local hardware store and cut it to size to fit inside the hole. Proceed with the steps below (we opted not to do this, even though the hole is large, because this particular hole is behind our built in column refrigerator)

2. Using a smaller putty knife, begin to apply wallboard joint compound over top of the drywall patch. Use a large drywall knife to smooth out any lines and feather out the edges. Be sure to cover all of the edges of the patch.

3. Allow the wallboard joint compound to dry and reapply if necessary

4. Let wallboard joint compound dry
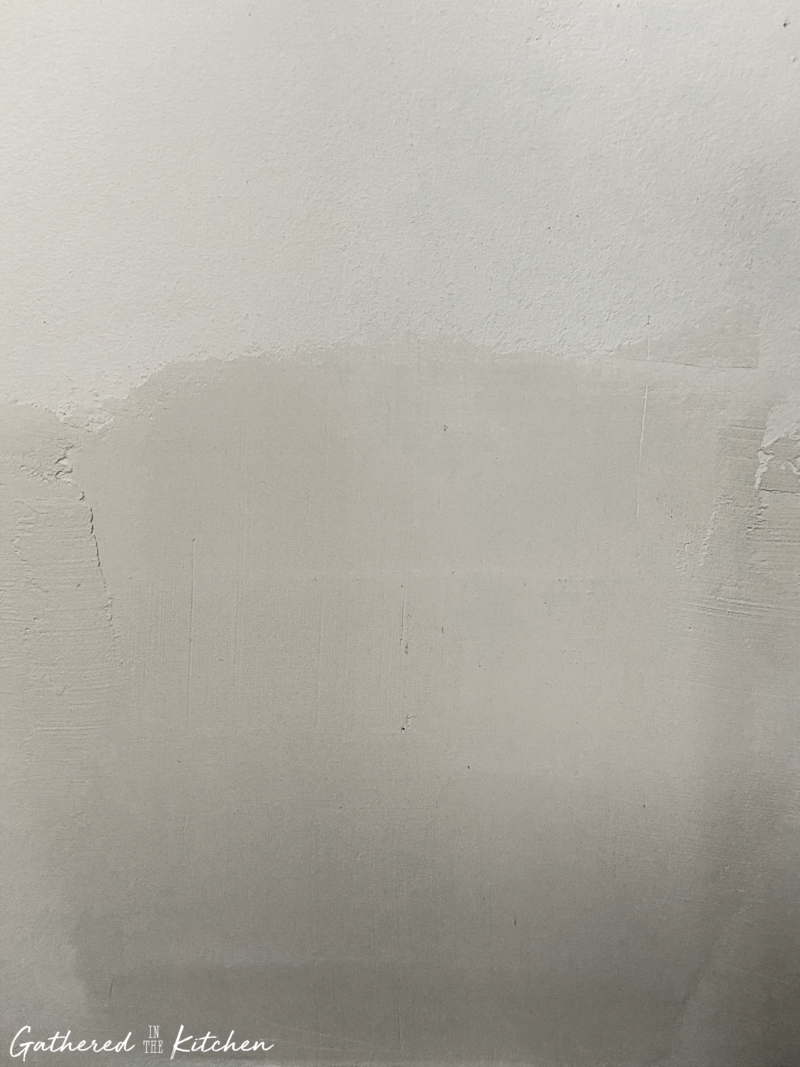
5. Sand smooth with a fine grit sandpaper, 220 is a good option. Sanding is likely the most important step in making sure that you do not see trace marks of a patch job. Take your time and sand smooth, leveling where needed. It may be possible that an additional coat of wallboard joint compound is necessary.

6. A good patch job is only noticeable because of the color difference. Prime and paint when ready!
More Helpful “How To” Tutorials
How To Remove Oil Based Paint on Sink Bowl
How To Remove Hard Water Stains on Sink Faucet Sprayer
How To Remove Stains and Smoke Smells from Fabric without harsh chemicals
How To Clean A Glass Oven Door
How to Use A Heat Gun To Remove Paint From Wood
How To Test For Lead Based Paint – Part 1
How to Fix Rusty Paint Cans That Won’t Seal


Stephanie—home cook, DIY addict, seasonal decor fanatic, and proud chicken wrangler living in a Victorian house that’s always a project. Whether I’m cooking with garden-fresh ingredients, herding mischievous chickens, or tackling another DIY, I’m here to share the fun (and chaos).


