DIY Scrap Wood Block Pumpkins
Looking for a creative (and free!) way to decorate for fall? Grab those leftover wood scraps sitting in your garage and turn them into adorable rustic pumpkins!
This easy DIY project adds instant seasonal warmth to your porch or entryway — no carving, no mess, just simple, cozy autumn style. Keep scrolling to see how to make your own scrap wood pumpkins in just a few steps!
Welcome to Day 10 of the 12 Days of DIY Fall Crafts Series!
Thanks so much for joining me for day 10 of our 12 Days of DIY Fall Crafts series! Today we are going to make cute pumpkins for outside with scrap pieces of wood!
I have a HUGE pile (it’s not even really a pile, it’s a wall!!) of scrap wood that is from my house during our rebuild. I have used several pieces of the wood for various projects around the house: DIY Porch Stool, Wooden Blanket Ladder, this easy Barn Door, Wooden Porch Signs, and this Wooden Centerpiece Box but truth be told, I haven’t made a dent. In an effort to keep using up some of the scrap wood, I decided to make pumpkins!
This post may contain affiliate links, which means I’ll receive a commission if you purchase through my link, at no extra cost to you. Please read full disclosure here.

Stephanie’s Project Rundown
Why You’ll Love It: A quick and inexpensive way to use up leftover wood and add cozy fall style to your porch Project Time: About 30 minutes to an hour Skill Level: Beginner-friendly — simple cuts and painting! Pro Tips: Mix different wood sizes for variety and lightly distress the paint for a rustic look Would I Make This Again? Absolutely! They’re easy, durable, and look adorable every yearxoxo Stephanie
How to Make Scrap Wood Pumpkins for Fall
Making these scrap wood pumpkins is such a fun and simple project — the kind that makes you want to dig through your garage for leftover wood and get a little creative. Using just a few supplies and about 30 minutes, I was able to whip up the cutest fall décor that looks great inside or out!
Supplies:
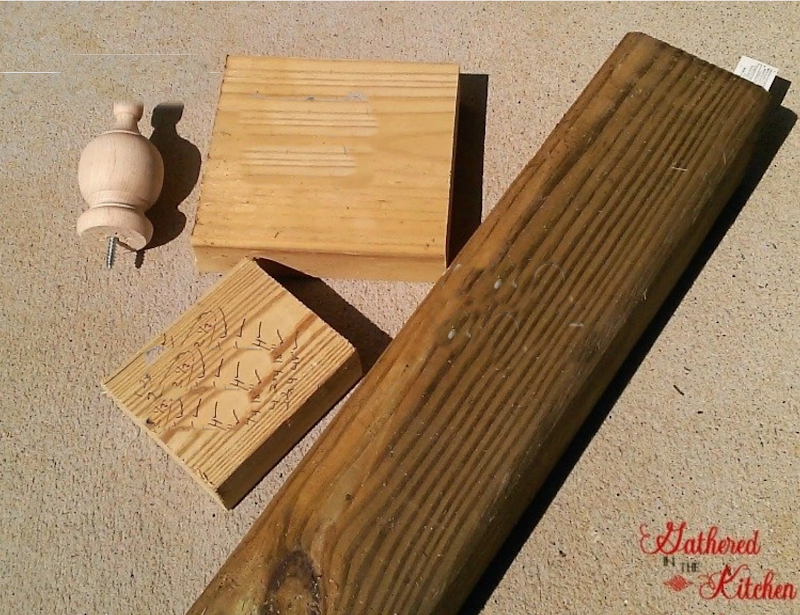
- Scrap Wood – I used many different sized pieces of scrap wood
- Tree Branches – thinner ones work best for the pumpkin stems
- Powder Drill and large drill bit – I used 3/8″ drill bit
- Paint – I used Terracotta (orange) and Fluff (white)
- Natural Raffia – this is the decorative grass around the stem
- Hot Glue Gun – this rechargeable glue gun is great for quick projects like this!
- Miter Saw – used to cut the scrap pieces of wood to the desired sizes or decorative angles at the top of each pumpkin
Step-by-Step Tutorial
1. Gather Your Scrap Wood and Cut It to Size
Choose scrap wood in different sizes, then cut to the height of your pumpkins. To give them shape, use a miter saw to create 45° angles at the top.

Once you’ve cut your wood pieces, line them up to see how they’ll look together. I like mixing different heights so the pumpkins have a little more personality.

2. Drill a Hole for the Pumpkin Stem
Use a 3/8” drill bit to make a small hole in the top of each wood block for the stem.
Optional: You can skip this step and simply attach the stem later with hot glue.

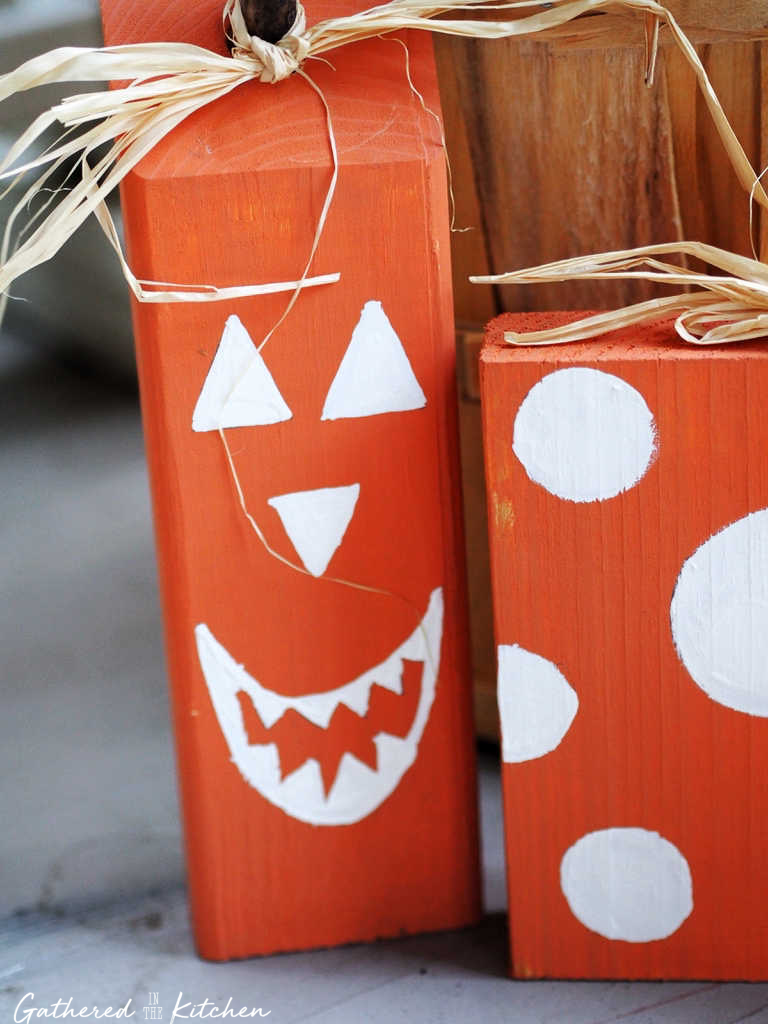
3. Paint Your Pumpkins
This is the fun part! Add a coat or two of paint in your favorite fall colors. I used Dixie Belle Chalk Paint – my go-to for smooth coverage and a beautiful matte finish! Once the base coat is dry, you can get creative with designs using white paint — try adding simple stripes with blue painter’s tape or make polka dots by tracing a water bottle cap and filling in the circles.

4. Attach the Stem
For the stems, I went out to my wood pile for campfires and found the perfect-sized branch, but you can also look around your yard for small sticks or fallen branches. Cut each one to your desired height, making sure it fits into the hole you drilled. Add a bit of hot glue inside the hole, then press the stick in place to secure your pumpkin stem.

5. Attach the Raffia
Once the stems are in place, tie a piece of raffia around each one in a simple bow. If it doesn’t stay put, add a small dab of hot glue to secure it. If you have a hard time finding raffia (it can be tricky!), I’ve always had good luck picking it up at Walmart in the floral and wreath-making section near the craft aisle.


And that’s it — your scrap wood pumpkins are done! These little pumpkins turned out so cute! They look really sweet sitting on my porch next to my mums!
Not only is it great to use up scrap pieces of wood (especially because wood is so expensive right now!) these pumpkins are a great alternative to carving pumpkins, if you’re not about touching pumpkins guts!

These pumpkins are durable enough to stay outside through the entire fall season, and they make decorating your porch so simple. I love pulling mine out each year — and they hold up year after year!
If you’re worried about your painted pumpkins holding up to the elements — like rain (or snow, if you’re in Wisconsin like me!) — just brush on a water-repellent sealer to help them last even longer.

Video Tutorial

Check out: Before & After Projects Using Dixie Belle Chalk Paint
12 Days of Fall Crafts!
Love this project? You’ll find even more easy and creative ideas in my 12 Days of DIY Fall Crafts series — perfect for getting your home ready for the season!
Day 1: How To Make Fabric Pumpkins with Goodwill Shirts
Day 2: How To Make A Fall Table Centerpiece
Day 3: How To Make A Dollar Tree Witch Hat Wreath
Day 4: Potted Jack-O-Lantern Mums
Day 5: How To Style A Wooden Tray for Fall
Day 6: How To Make Fabric Swag
Day 7: How To Fold Napkins & Make A Napkin Ring
Day 8: How To Make A Mailbox Swag for Fall
Day 9: How To Make Scented Pinecones
Day 10: Scrap Wood Block Pumpkins
Day 11: How To Make Stenciled Tea Towels for Gift Giving
Day 12: Pumpkin Topiaries


Stephanie—home cook, DIY addict, seasonal decor fanatic, and proud chicken wrangler living in a Victorian house that’s always a project. Whether I’m cooking with garden-fresh ingredients, herding mischievous chickens, or tackling another DIY, I’m here to share the fun (and chaos).


