Master Closet Makeover | 48-Hour Flip Episode
I transformed my master closet into a functional and stylish room in the house! Wallpaper, shelves, hooks and cubbies gave this room a whole new look!
Have you ever completed a DIY project that you wished you wouldn’t have waited so long to complete?
That is the story with our master closet.

When we bought our 1886 Victorian home, we had two closets in our master bedroom. One as a walk-in and one was a regular sized door closet. Both closets were finished and usable! Who knew that would be such a “luxury”!
This post may contain affiliate links, which means I’ll receive a commission if you purchase through my link, at no extra cost to you. Please read full disclosure here.
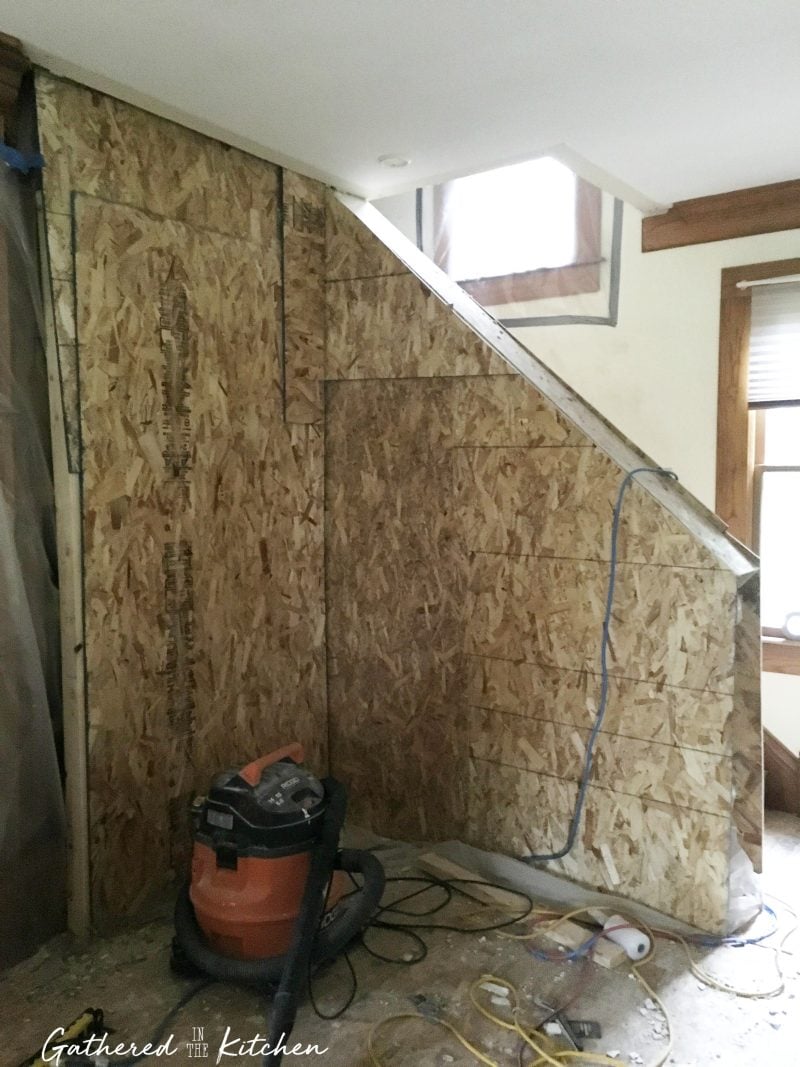
Unfortunately, three months after moving in, our home was struck by lightning and caught fire. During the demo phase, my husband and I decided that we wanted to remove the 2nd Master Closet in our bedroom because it oddly blocked the top portion of our gorgeous staircase. Here’s a photo of the staircase covered during the demo. The ceiling above the top portion of the OSB was our 2nd closet. You can see more photos of the changes we made in my house update #13 beginning of rebuilding.
When a turn of events happened, and our home was turned back over to us unfinished, our master closet took the back burner. It became a collection point of boxes turned sideways to create drawer space. I did however, paint the ceiling and my dad installed the light fixture so we at least could see in the closet!
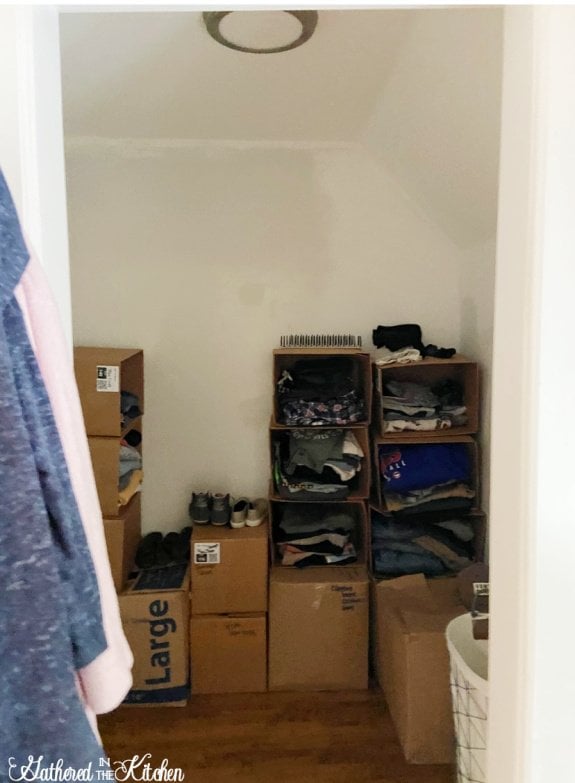
Initially we kept it pretty clean and organized. But over time, the boxes started to collapse and our laziness took over. The closet became a total disaster and finding our belongings was like fishing for a needle in a haystack. *You’ll see it in the video below! Please promise me we can still be friends!
Although we have been moved back into our house about a year and a half now since, we’ve been busting our butts in other rooms making the house livable. But, the time had finally come where we both could no longer function without an organized closet!
That’s where my 2nd episode with Hometalk’s 48-Hour Flip comes in! I pitched my closet makeover and they loved it! My husband and I designed the space on paper and got busy renovating! While we didn’t completely stick to the drawing design, we ended up with a fantastic closet makeover!

Clearing out the closet
It really felt like Christmas morning going through all of the boxes of clothes. There were clothes that had been packed in these boxes since I brought them back from the clothing restoration company in 2019!

Painting the walls
I love to incorporate color wherever possible. Not always crazy, bright colors. But just something more fun than white! I painted our closet walls using the same color we had our bedroom painted. Sherwin Williams Pearl Gray. While the color is supposed to be gray, it definitely is along the lines of a light, minty green. It’s super pretty!

Custom built shelving
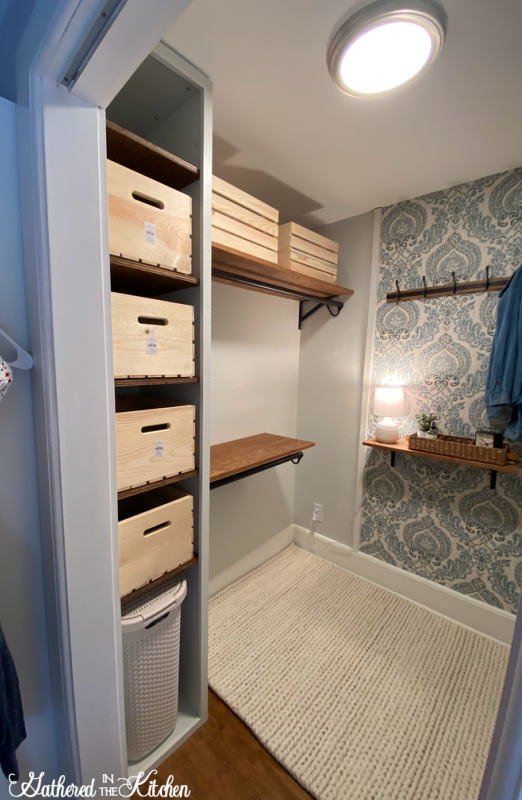
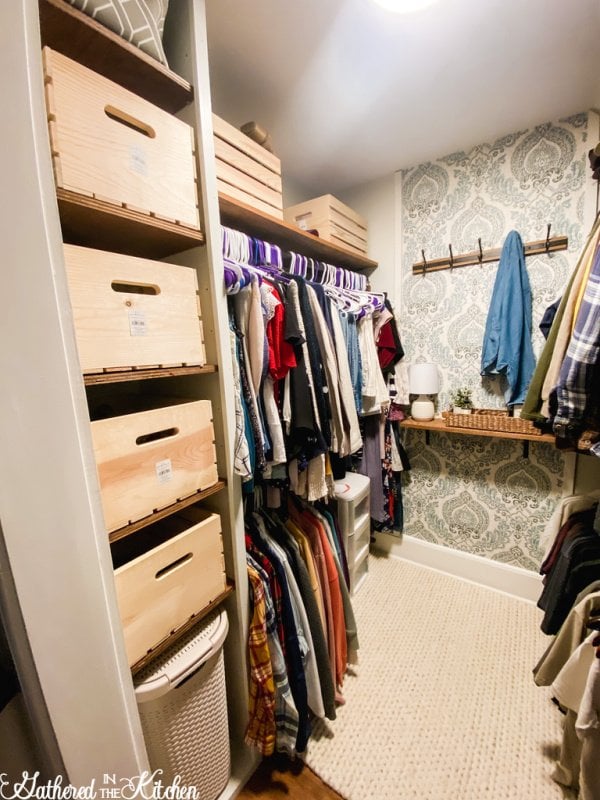
My husband built all of the shelving out of oak sheets of plywood. I then stained the shelves in Early American oil based wood stain (my all-time favorite stain color) and painted the built-in the same color as the walls. I added iron-on wood edging to the face of the shelves, but I ran out and the stores don’t carry the size we need anymore! I ordered some from Amazon but it was the wrong dimension, so I’m back on the hunt so I can finish up the shelves in the cubby.
I purchased wooden crates to act as drawers/storage cubbies for sweaters, extra sheets, etc. I added felt feet to the bottom on them so they won’t scratch the wooden shelves when we slide them in and out. To be truthful, I don’t totally love them, that’s why I haven’t stained them yet to match the shelves. I have been looking for an alternative basket (that is the same size as a wooden crate) but haven’t found anything I love yet. Let me know if you have a large basket you love!

Installing hardware and hanging rods
I decided to repurpose the wooden dowel rods that were in our closet before the fire by giving them a fresh coat of oil rubbed bronze spray paint. The paint matched perfectly with the hanging brackets we purchased from Home Depot.
We utilized the closet to its max height and gave my husband a hat shelf above his hanging rods. We played around with the rod height and spacing by testing out our clothes hanging on hangers. His rods are spaced differently than mine because his clothes are longer than mine. However, we both have a space for “long hanging” clothes like his pants and my dresses.
Adding wallpaper
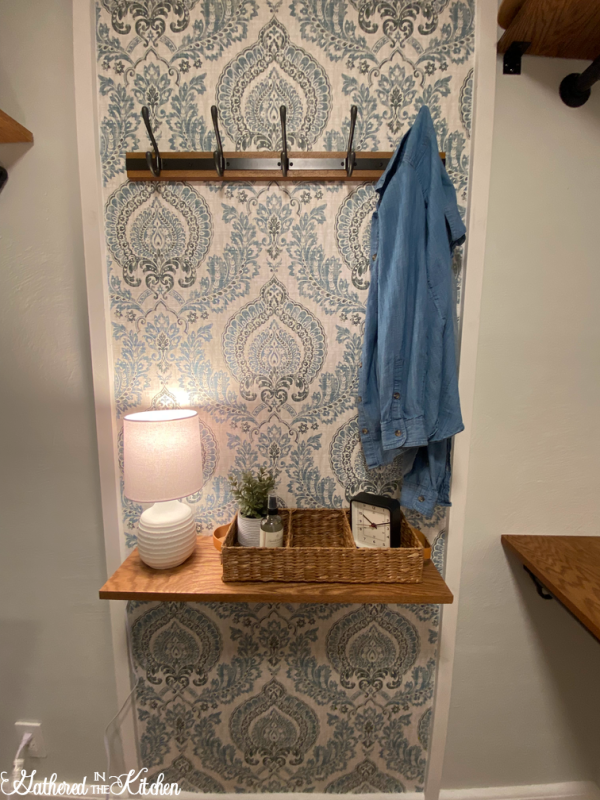
I loooove pops of design in places you would least expect them, like in my laundry room! When my husband and I started to plan our closet, the very first thing I said to him was that I wanted to use wallpaper on the wall and make it a design focal point. I bought this Kensington Damask Peel & Stick Wallpaper and totally love it! I framed it out with white 1x2s and trimmed off the excess wallpaper on from the sides and bottom with a box cutting knife.

Adding hooks and decor
Next it was time to start adding some fun decor items to our closet. I wanted hooks so we can hang items when we don’t want them mixed back in with our clean clothes and I definitely need a drop zone for my husband. Prior to the fire, he had a cubby in the closet that he always emptied his pockets into. So, making sure I had a similar solution was a must!
I bought the hooks, lamp, basket, plant, clock and room spray at Target.
Adding privacy
Outside of our closet, inbetween the closet and our bathroom, is a small room that I call our dressing room. It has two super cute cottage-like windows (that is also duplicated on the other side of the room) but there is no privacy. I solved this issue by ordering custom cordless Roman Shades that provide privacy but still allow light to filter in! I love them! Check out our dressing room makeover for more details!

Watch Our 48-Hour Flip Episode!
In my video, I go into detail about the entire makeover process each step of the way! I hope you enjoy watching it!

The Big Reveal!
I love love love the way our closet turned out! It’s definitely one of those projects that needed to happen to maintain sanity. You never really realize how useful an organized closet is until you don’t have one! Man…that lighting strike just keeps on teaching us lessons. lol!
My husband loves wooden hangers, so I splurged and ordered a ton of wooden hangers from Amazon. When I had taken this photo, the wooden pant hangers hadn’t arrived yet, hence why his pants are not filling the entire space that was designed for them.

I, on the other hand, am not picky and actually prefer plastic hangers. So my side is filled with non-matching colored hangers, haha! I so wish I didn’t have to actually put clothes in the closet! It looked way better without the clothes!
I found the perfect basket weave laundry basket that was narrow enough to fit inside our built in shelving unit. I love that it has a lid and is easily be slid in and out!

I also cozied up the room with a 4×6 braided wool rug that is gorgeous and so soft under our feet!

We are both so happy with the overall design and function of our newly remodeled closet! I only wish I didn’t have to fill it with clothes! I donated 5 large bags of clothes, but am planning on going through our closet again in the next couple of months and filtering out even more! I’m setting a new rule for us, if we don’t wear it in the appropriate season, then it’s time to donate it!
I have a lot of house updates I need to share with you all…the master bedroom, more about the changes we made, kitchen updates, and more! Let me know which one you want to see first!
More House Renovating Projects
- 48-Hour Flip Pilot Episode
- How to Paint A Chalkboard Backsplash Wall
- Garage Door Makeover | How To Install Carriage Door Hardware
- Laundry Room Makeover with Wallpaper | Before & After
- DIY Stained Glass Windows
- Kitchen Renovation: Before & After for Under $7,000
PIN This Project!
I’d love for you to PIN this makeover and share it with your friends!


Stephanie—home cook, DIY addict, seasonal decor fanatic, and proud chicken wrangler living in a Victorian house that’s always a project. Whether I’m cooking with garden-fresh ingredients, herding mischievous chickens, or tackling another DIY, I’m here to share the fun (and chaos).


It looks so good! Great jib
Enjoy!!
thank you so much, Debbie!!