How To Install Cordless Roman Shades Inside Mount
My husband and I recently did a complete renovation of our master closet. But like all good projects, it always extends into other projects!
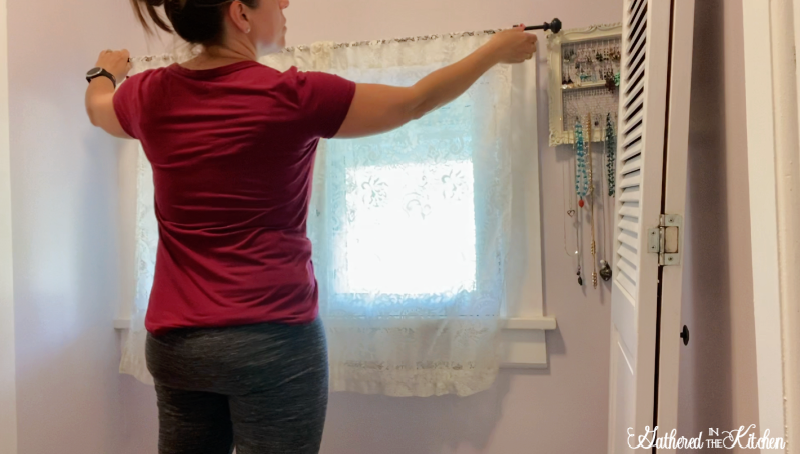
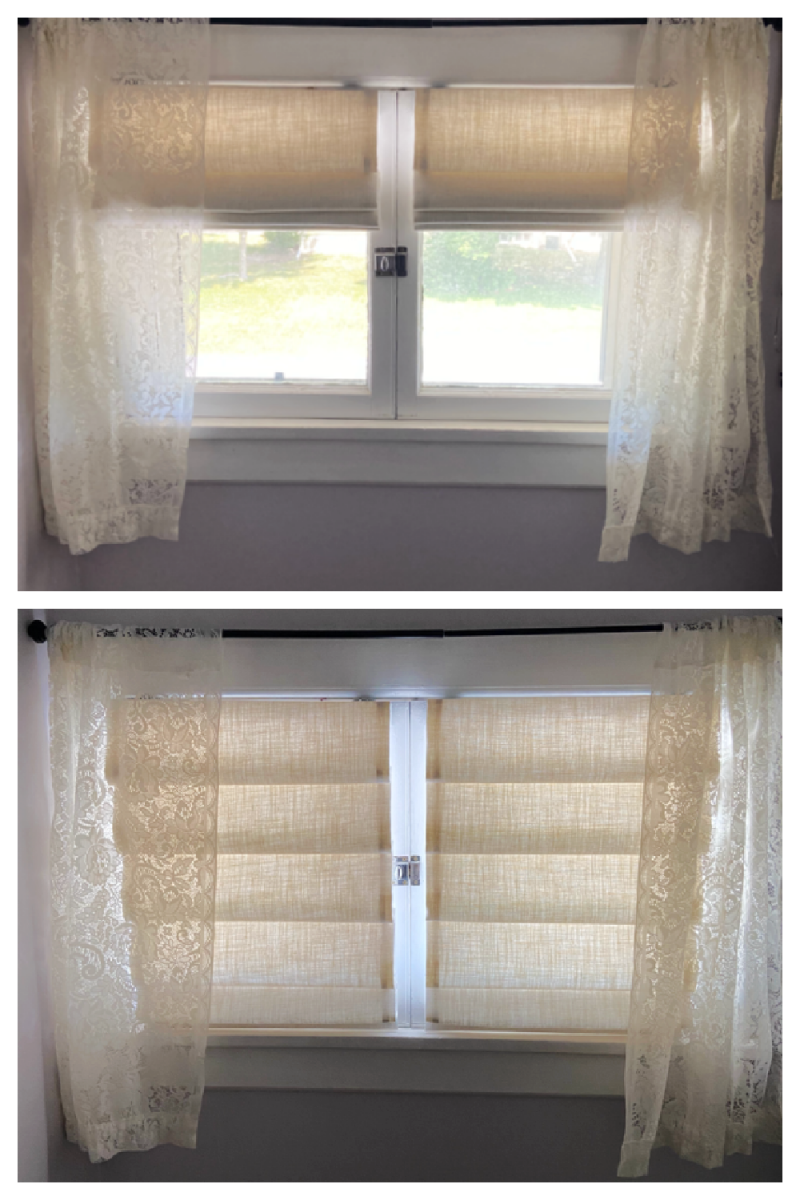
Outside of our master closet is a dressing room that has two windows. Two windows that yield absolutely no privacy!
When we bought this 1886 Victorian house, there were lace curtains on every single window on the first floor and in our bedroom and dressing room.

For some reason, I haven’t had the brain power to figure out what type of window treatment would work better and provide more privacy than the lace curtains! Sometimes I find myself in a box because I don’t want to deviate too far off of the Victorian look and feel in my decor.
This post may contain affiliate links, which means I’ll receive a commission if you purchase through my link, at no extra cost to you. Please read full disclosure here.
But I desperately needed a solution that provided privacy and would look good!…and still let me keep my lace curtains that I just can’t get rid of! That’s where these custom, hand sewn, premium, light filtering Roman Shades from Blinds To Go came in!

Let’s go over everything I needed to decide for my Roman Shades.
How To Determine Which Roman Shades To Order
Before purchasing your Roman Shades, it’s important to determine if your shades will be an inside mount or an outside mount.
I’ve made a graphic to help show what the difference is between the two different type of mounting options.
Inside Mount = when the Roman Shades are installed inside the window frame or casing
Outside Mount = when the Roman Shades are installed above the window frame or casing or wall above your window

Because my windows are super cute cottage-like windows that open with a little latch in the middle and swing out, I had to go with two shades (one for each window) and went inside mount and mounted the brackets to the window frame.
Corded or Cordless Roman Shades?
This is all a matter of look preference. I personally love the fact that you can buy window treatments now that do not include a cord! I think shades look so much cleaner with out a string attached…and not to mention safer! I always think back to when my babies were young and keeping the cords our of reach.
Fabric Color?
There were so many different fabric colors and patterns to choose from, all that were so lovely! As much as I would have loved to of chosen a really pretty and bold pattern, I decided to go with a neutral color, so they wouldn’t be competing with with my wall paint colors, wallpaper or bedspread! I went with the color linen.
How To Hang Roman Shades
Step 1: Unboxing – Carefully unpack each Roman Shade and ensure that all of the necessary mounting hardware is included.

Step 2: Remove old window treatments
Step 3: Measure windows for bracket placement

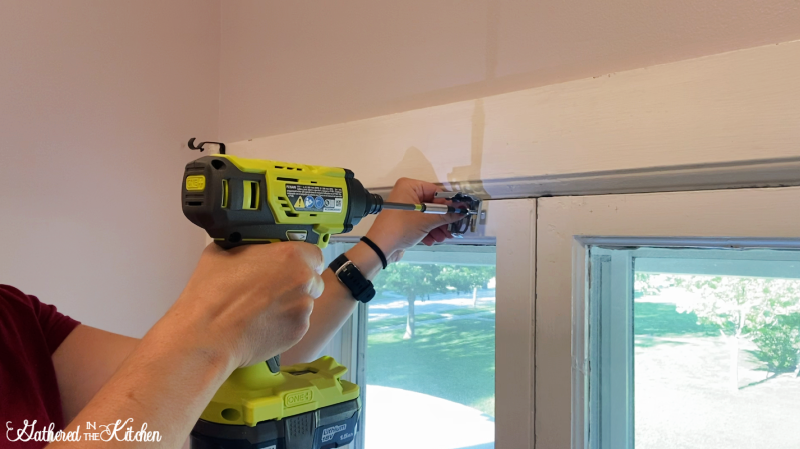
Step 4: Place the brackets on the window frame and mark the holes for the screws with a pencil

Step 5: Using an electric drill and drill bit, pre-drill the holes in your window frame for the mounting screws
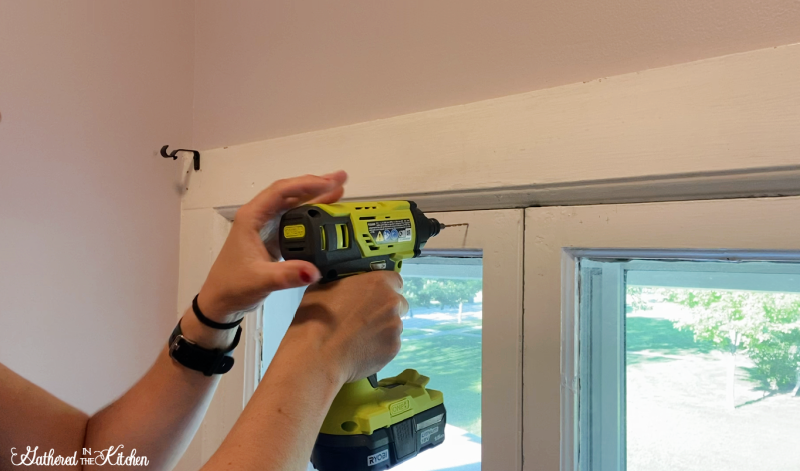
Step 6: Attach mounting brackets using an electric drill
Step 7: Attach Roman Shades to brackets
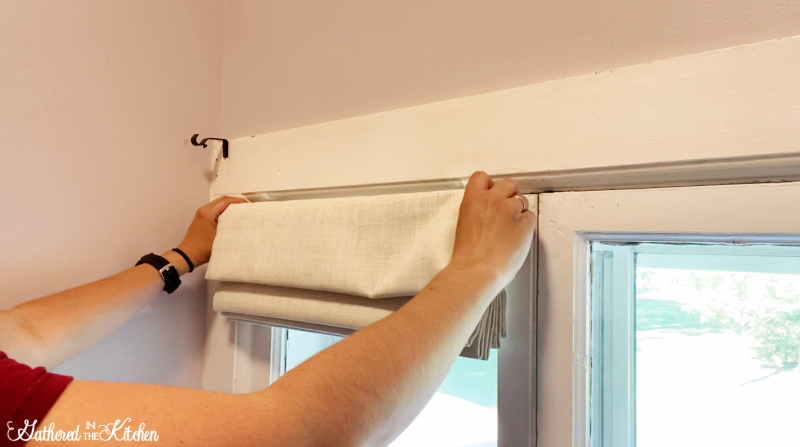
That’s it! Hanging Roman Shades is actually really simple and takes only a few minutes! I absolutely love how my shades turned out!
I hung my lace curtains back overtop my Roman Shades because my home in an in-town 1886 Victorian and I like opening the shades but still feeling a little bit of privacy from the lace curtains.


Stephanie—home cook, DIY addict, seasonal decor fanatic, and proud chicken wrangler living in a Victorian house that’s always a project. Whether I’m cooking with garden-fresh ingredients, herding mischievous chickens, or tackling another DIY, I’m here to share the fun (and chaos).