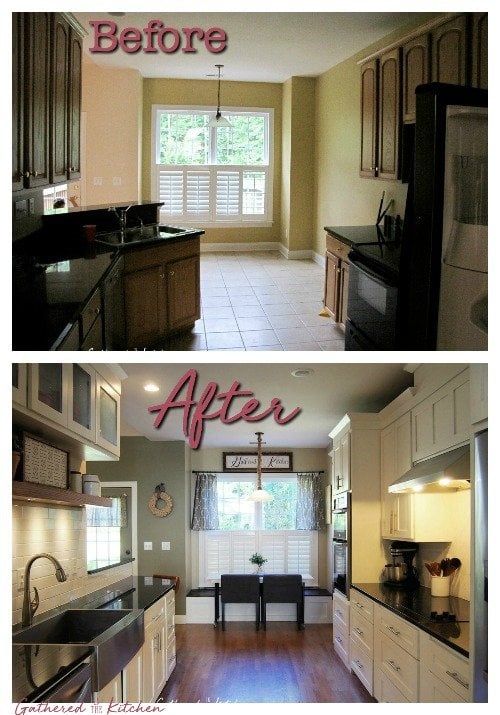
Kitchen Renovation: Before & After for Under $7,000
A walk through of our FULL DIY kitchen renovation for under $7,000 including granite, new cabinets, appliances, floors and more! Learn my tips for the trade on saving a buck while overhauling an entire kitchen from top to bottom!
I’ve been meaning to write this blog post for forever. But for some reason, actually sitting down and writing it seems just as painful as it was to renovate it! So I’ve been totally putting it off…so much, that we’ve now already sold that house and bought another one! HAHA!
NOTE: I will be writing a blog post for every single room at this house because the entire thing was overhauled! So be sure to check back as the posts will be coming later this week!
Our kitchen renovation was the largest project to date that we have tackled out of the 4 homes we’ve owned – and it yielded the largest results. (we did fully renovate our house #1 kitchen, but this one went a lot farther!) I’m a firm believer that the harder you work for something, the more you appreciate and gain from it. And that is exactly how it turned out. Every single penny we made on that house was from our very very very hard work. The best part; Craigslist was our very best friend!
This post may contain affiliate links, which means I’ll receive a commission if you purchase through my link, at no extra cost to you. Please read full disclosure here.
The Back Story
We bought house #3 when it was 8 years old. Definitely not old or even outdated. However, the house had pretty much been trashed, so honestly the entire thing needed some sort of renovating in every single space. These before photos that I will share are from when we first looked at the house. It wasn’t even on the market, but through the grapevine we learned that it was sitting half-way vacant and was probably going to go into foreclosure – so of course we looked at it and immediately said no freaking way! …and then, after looking and looking at houses that were also a definite no (because they were all cookie cutters) we decided to make an offer on it because it was a custom built home in a lakefront community and had a large lot. So…it became ours and we spent the next 6 years pouring our love, sweat, blood and tears into it.
Before Photos
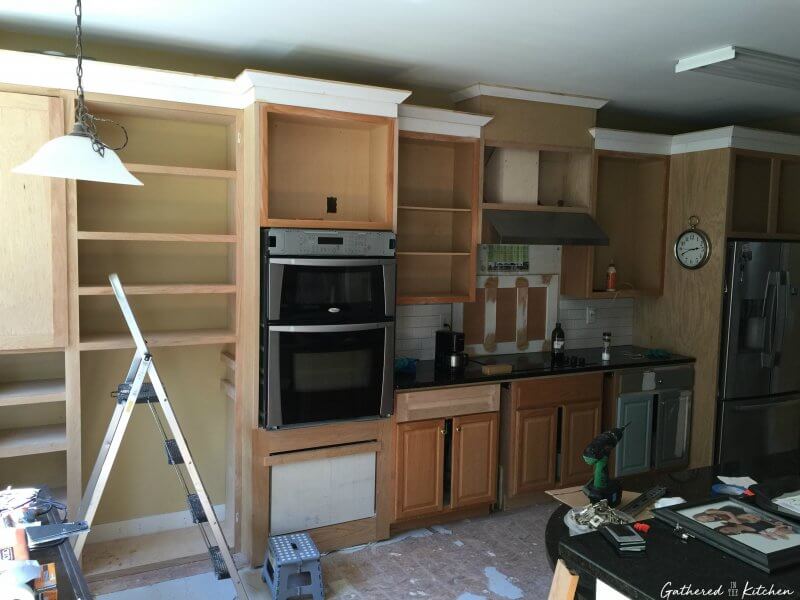
The kitchen was nothing special to look at other than the extra tall solid oak cabinet. Howevvvver, they seemed dated to us because of the color of stain, the arches and the tacky gold knobs. I totally know that sounds even stupider than 1st world problems, so please know, I almost hesitate even sharing the before photos. I also know that we could have easily just painted the cabinets and avoided a lot of headache, however, the layout was not ideal by any means, so it had to go.

The appliances were a mix of stainless and black and in awful shape. The microwave was missing, however, the metal hanging plate was still there left for viewing purposes ;-p

The counters were a gross laminate that just felt yucky to me.


The kitchen had neutral colored ceramic tile floors, which weren’t bad, but it wasn’t super comfortable on your feet. When we first moved in, I learned very quickly how to clean dirty tile grout! Check out my recipe for the best homemade grout cleaner for tile floors and walls!
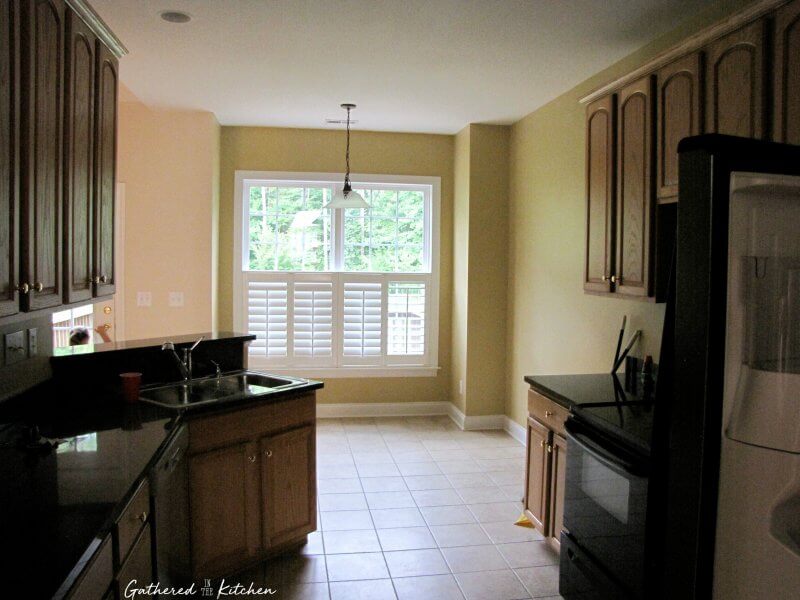
The layout was awful! It felt and looked much smaller than it really was. The sink was angled into the kitchen dividing the eat-in area with the rest of the kitchen causing it to feel cramped.
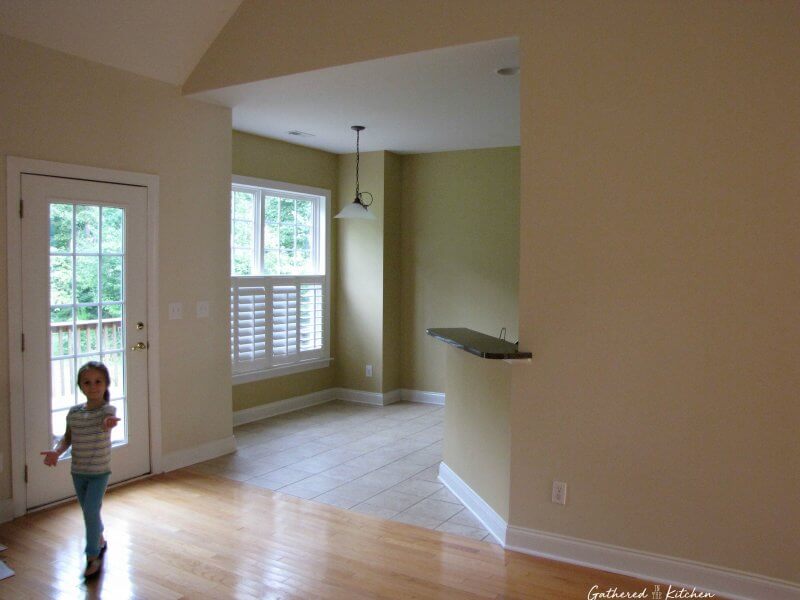
In the eat-in area, there was tons of wasted space and a traditional table just looked so silly in the space. In addition, we didn’t want tile flooring! There was nothing wrong with it…but, of course it had to go 🙂
Let The Updating Begin
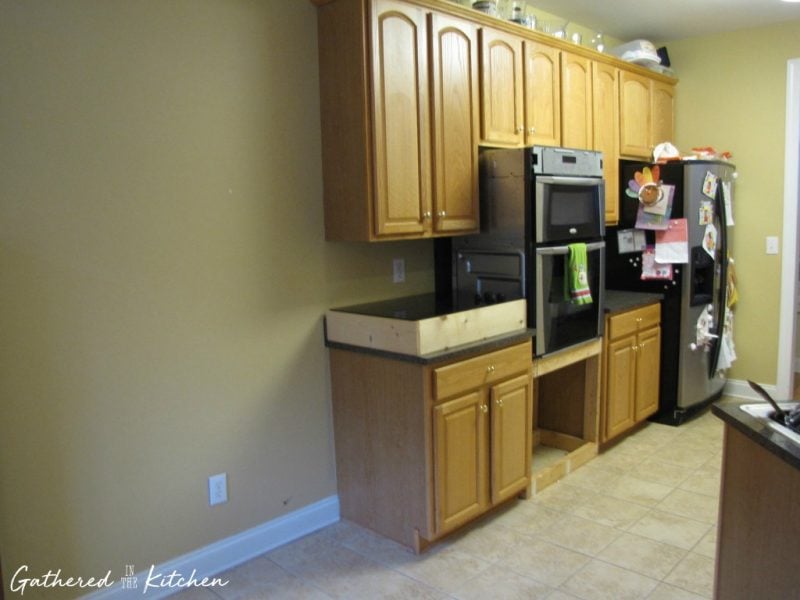
Our kitchen renovation began way sooner than we would have liked due to impatience on my part. As I mentioned, there was no microwave. Normally this wouldn’t force someone to start an overhaul of a kitchen – but we had a 4 and 2 year old and I was pregnant with baby #3 (of which I found out 3 weeks after we moved in!) So with little kids who took forever to eat and would need their meals reheated and a pregnant mama, a microwave was necessary. Because I didn’t want to waste money on a cheap microwave, I decided that we should just buy one that would match the appliances we would buy down the road. While scrolling Craigslist one day I found a stainless steel Whirlpool Gold in-the-wall oven and microwave combo that looked super nice. The price was so reasonable that I felt better with wasting money on that than a cheap microwave that we would definitely donate down the road. When we went to go pick it up, we got the vibe that the couple was heading into foreclosure and was trying to sell every last thing in their house. So we also bought their glass cooktop! As sad as it made me for them, it was a huge gain on our part. *Tip: look for appliances on Craigslist and save big!
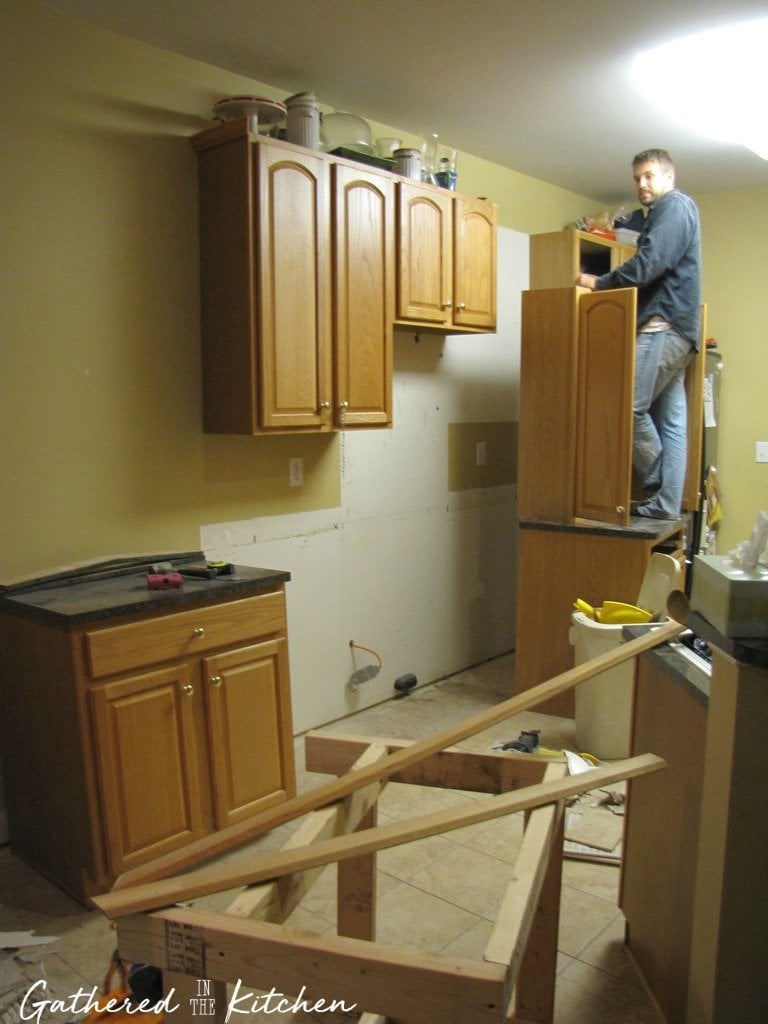
Cooktop & Oven Base
We pulled out our black stove and sold it and built a temporary base for the in-the-wall combo and an elevated box for the cooktop. (p.s. I built the oven box! and we kept it and framed it out with a huge drawer down the road). It was super classy living! (p.s. if I know you personally, this is why I never had anyone over!!! Our house looked like a construction zone for all those years!) You can see more photos of this in being built in progress HERE.
Building The Bench
Next we built a built-in bench seat under the window to make the most of the space. The bench opened on top with hinges and had a ton of storage room inside. Clayton built a flip top recessed outlet on either side of the bench to allow for computer chargers, etc while working at the table.


You will notice in a lot of photos that things changed or were modified as time went on – because everything was truly custom built, we got to play around with things before we finalized all of the details. So in the above photo, you can see that we had tested out making the one side of the bench longer. Then below, you see that we nixed that idea and made it even with the other side.

Building The Kitchen Table
Because the eat-in was custom dimensions, we built a custom fit table. We bought chairs first that worked as multi-room: they dressed up the kitchen but could easily be moved into the family room for additional seating. The table was built based off of these chairs, the eat-in bench and our plates (for depth purposes). Initially we built a pipe leg table with a granite top (more on the granite later) but then later we changed out the top with a solid wood piece with routered edges.


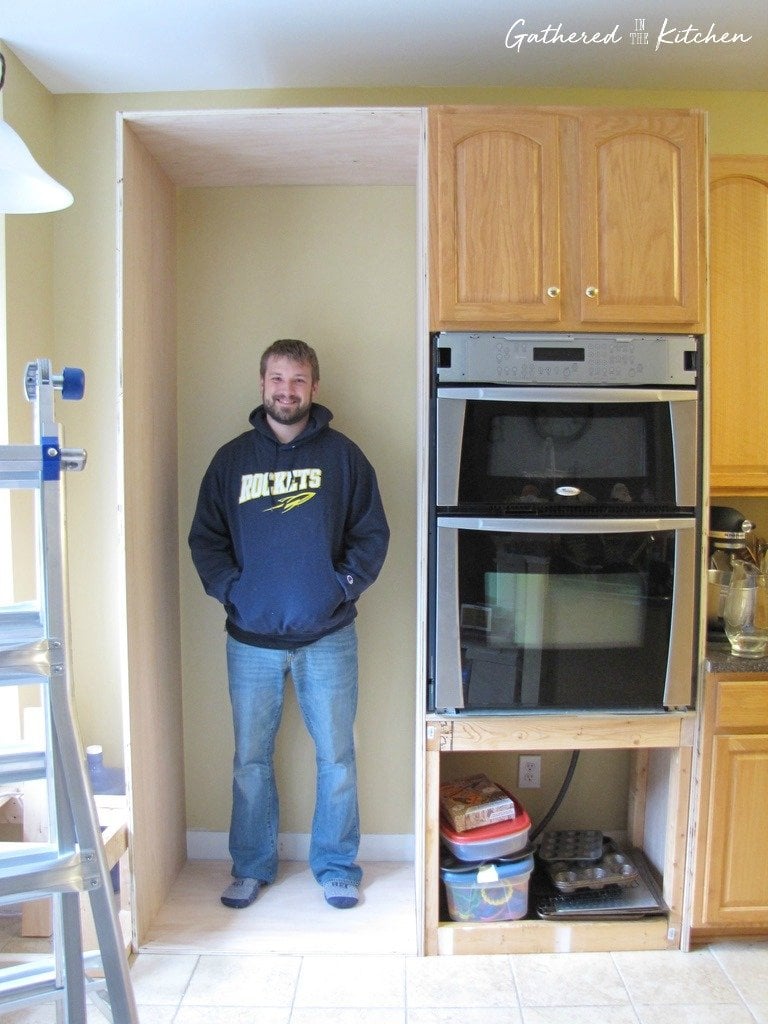
Building Refrigerator Enclosure
Rearranging the kitchen began with taking down the cabinets and building a refrigerator enclosure. We did this at house #1 and it is still one of my favorite ways to make a kitchen look a million times better!


Growing Kids/Real Life

Although this photo doesn’t show any kind of kitchen renovation progress – it shows that during this entire process we had kids. Kids who wanted and needed attention. This photo was taken after Clayton got back from a trip overseas and surprised the kids with candy from a different country. I have to honestly applaud my hubby for this – he never once “put the kids aside” for lack of better terms to work on this house. He always prioritized them over the kitchen…this may be partly why it took so long – but in the grand scheme of things, that is totally fine!
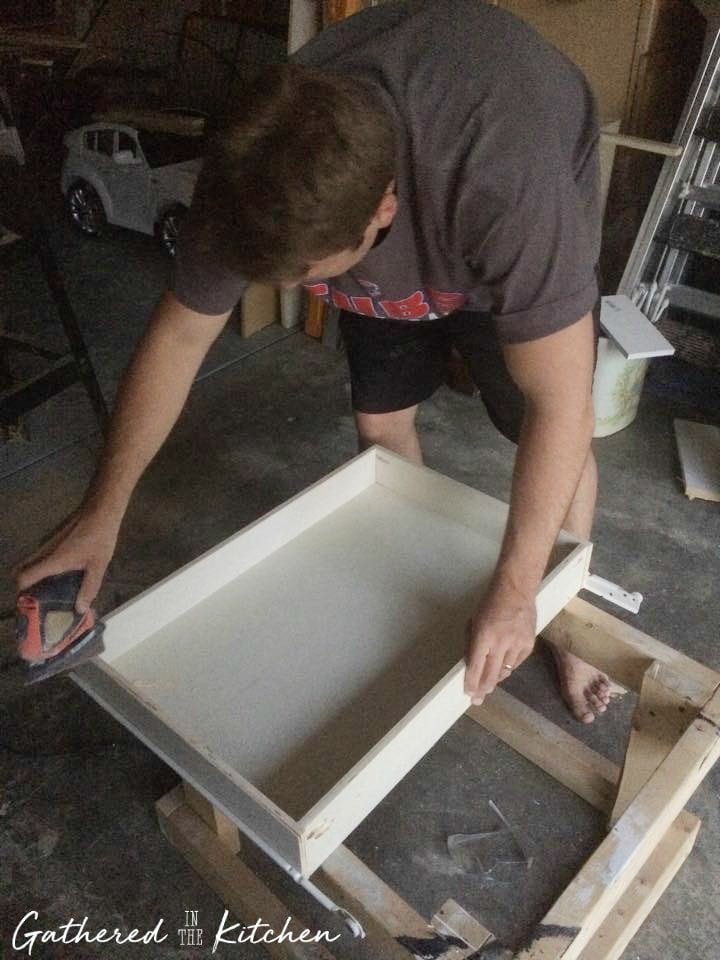
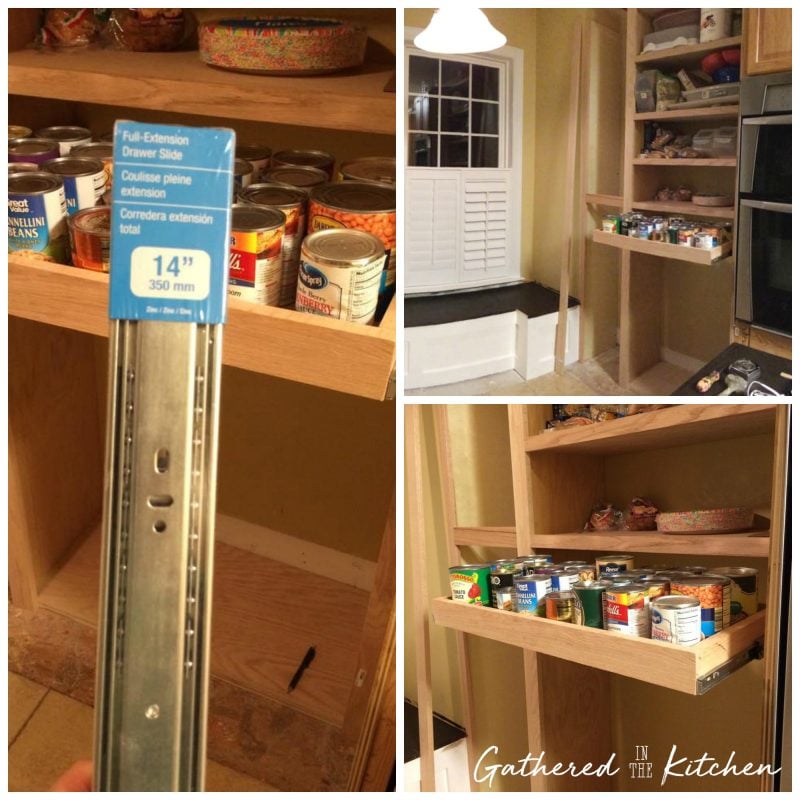
Building The Pantry
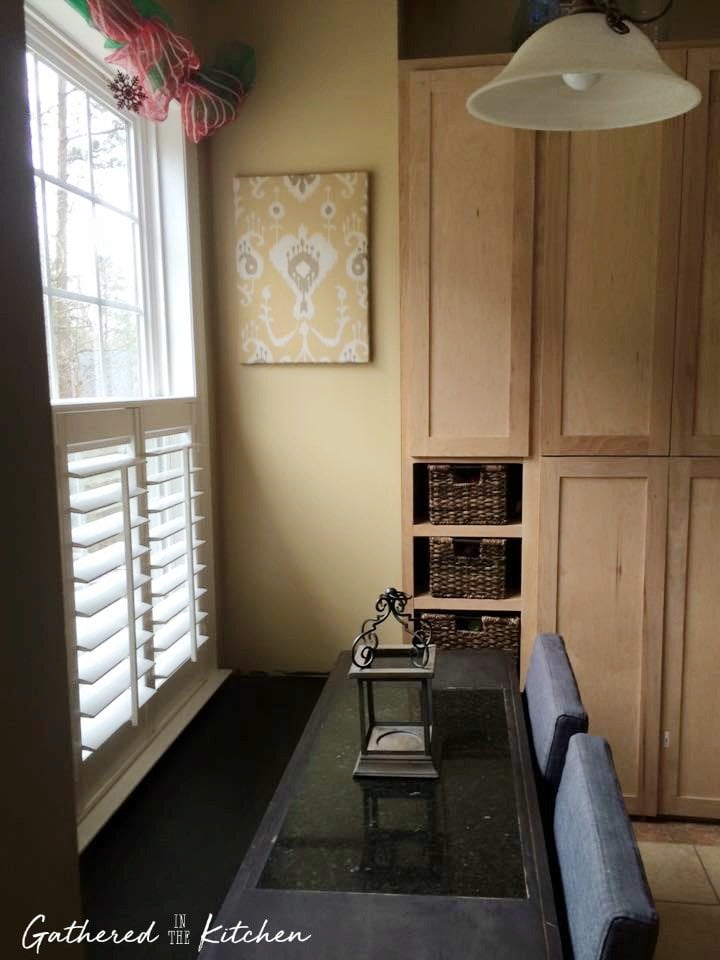
We wanted to make the most of every square inch in our kitchen, so we pushed everything down on the one wall and added cabinets and built a massive pantry. To the left of the pantry we built the most amazing ever cookbook cabinet and shelves with wicker basket – photos towards the end of this post.
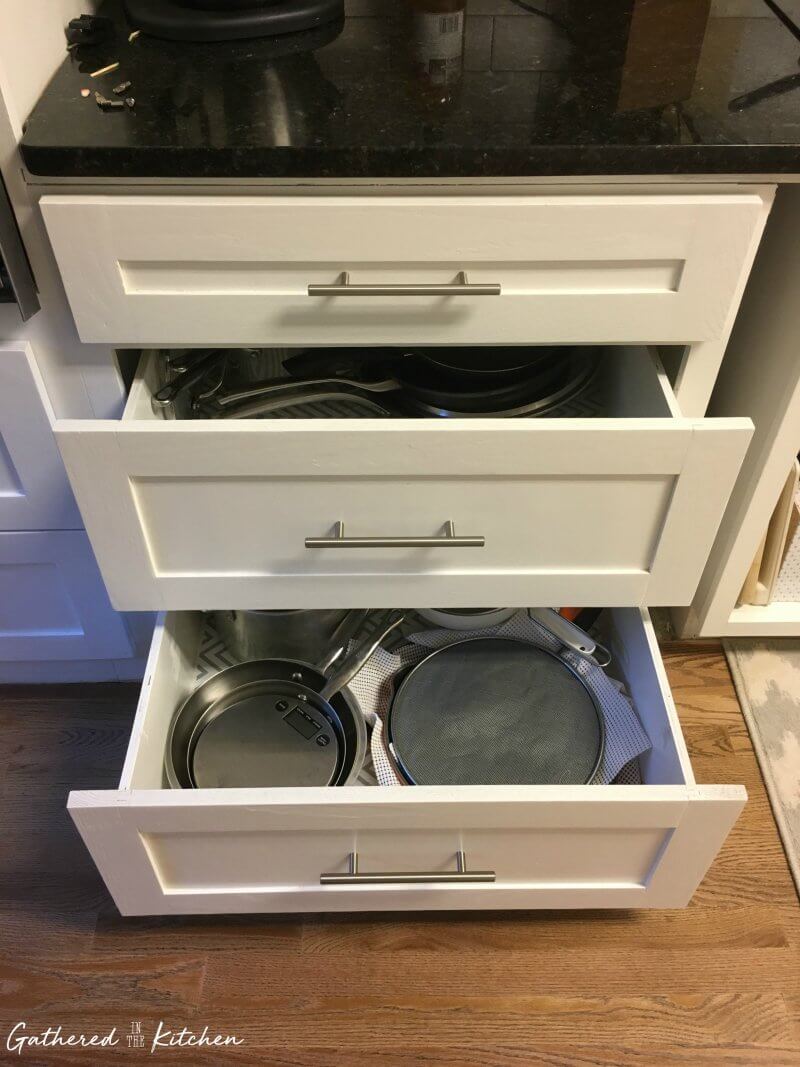
The pantry itself had 4 large doors with shelving on the top and pull out drawers on the bottom half. The drawers were spaced appropriately for canned goods, literally – again, another plus of custom building everything. We used ball bearing drawer glides so you could load the drawers up with 100lbs and never worry!

Building The Bar
The kitchen sink was angled and divided the room. So out came the sink (yes, I had to wash our dishes in the bathtub for quite a while!!) We completely moved the wall making it in line with the existing wall.


My hubby made it beautiful by building columns on both sides of the bar and I tiled it with AirStone, a faux stone tile, in Spring Creek color. (I also did this around our fireplace surround). The stone made it look so classy!

Installing the Stainless Farmhouse Kitchen Sink
I bought an oversized single bowl, stainless farmhouse kitchen sink and a stainless faucet.


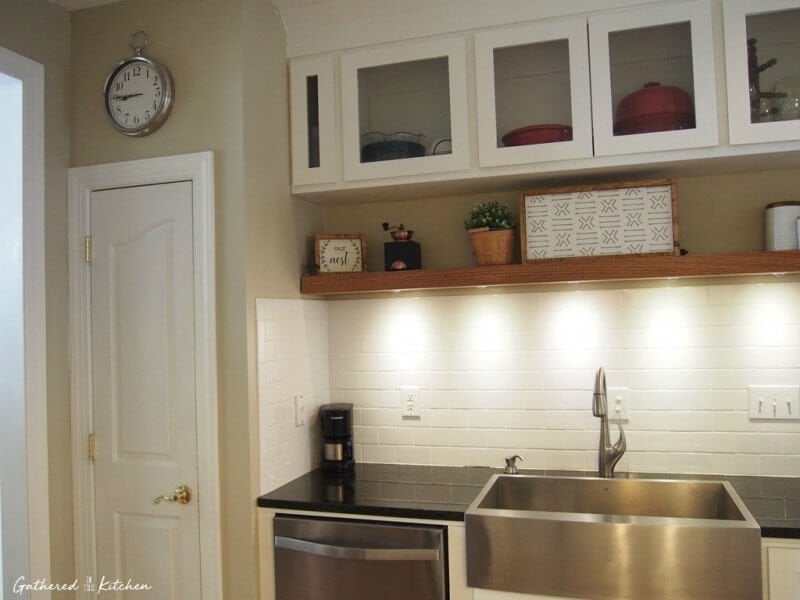
The sink really was HUGE! We decided that the wall opposite from the oven, cooktop, fridge, etc would be our sink wall. We moved the dishwasher and installed the sink. The cabinets that were originally there, were later taken down and replaced with an awesome wooden shelf with recessed lights and glass cabinets. …gotta keep reading to see! I know, it’s painfully long! Think about living it in real time!


Installing The Granite
Another amazing Craigslist find! I had woken up one night to nurse baby #3. For some reason, I decided to get on my phone and look at Craigslist at 3am. I searched for granite and to my surprise I found 75 square feet for $200!!! Oddly enough, the kitchen it was coming out of was galley style and literally matched to what we were doing with our kitchen designs. I texted it to Clayton and he looked at it the next morning while at work and then called me immediately, almost in a panic, and said “GO BUY THAT GRANITE!!!” He figured, even if we totally botched it all up, it was $200 and that it was not a huge deal if it went down the crapper, worst case scenario, we would just pay Lowes to come install new granite. In all truth, the we bought the granite over a year before we were ever ready to install it, it just sat in our garage. Turns out the reason the people were selling it was because they had moved down to North Carolina from New York, however, they lived in NY while their house was being built here so they just went with what the builder decided to use. But once they were here, they wanted cream…so again, lucky us!!

We enlisted all of the help we could get to haul and unload the pieces at our house. Some of the pieces were so large, they were over 500lbs. It was kind of terrifying watching them! We cut the granite ourselves and drilled the holes for the faucets, etc then installed it.
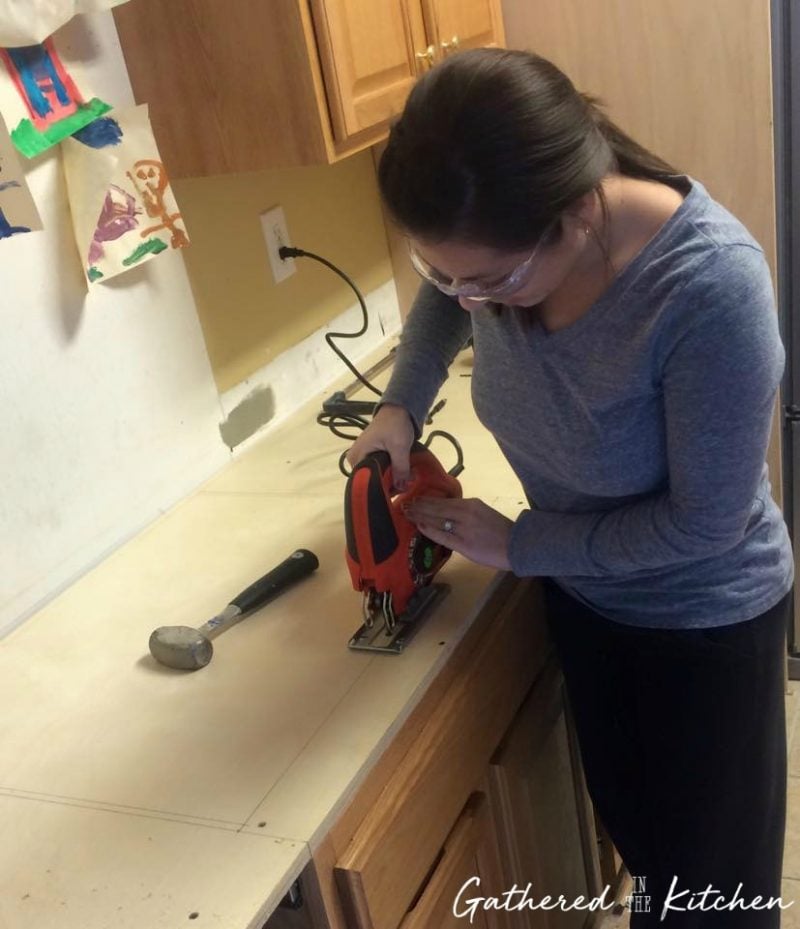
When we were finally ready to install the granite, we built a base for the granite to lay on top of. Using my jigsaw, I cut out the hole for the glass cooktop to be recessed in.


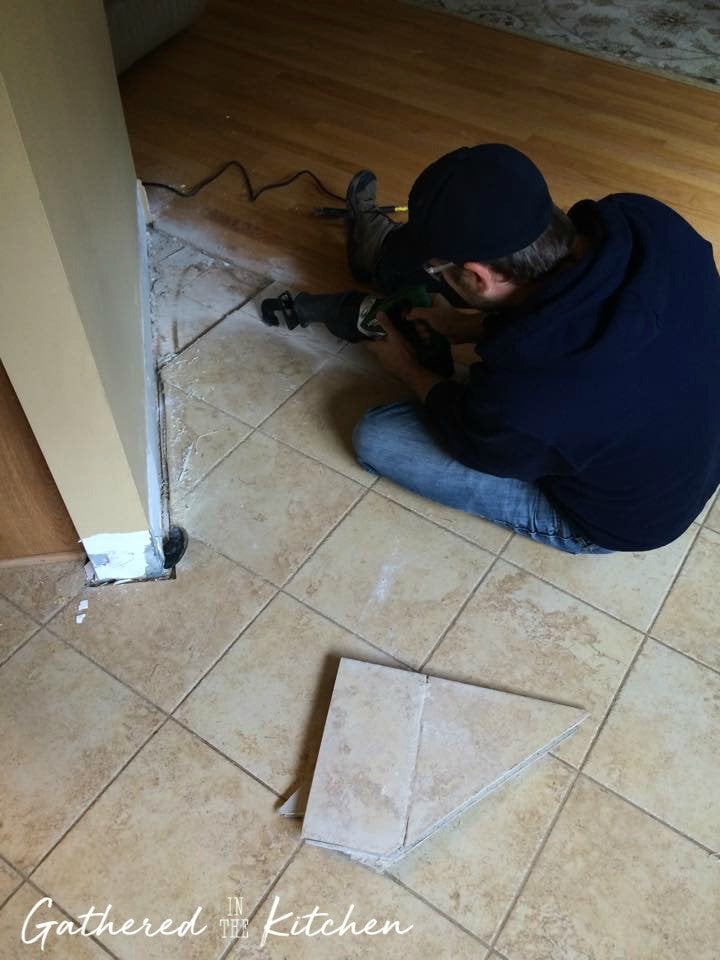
Tearing Out The Ceramic Tile Flooring
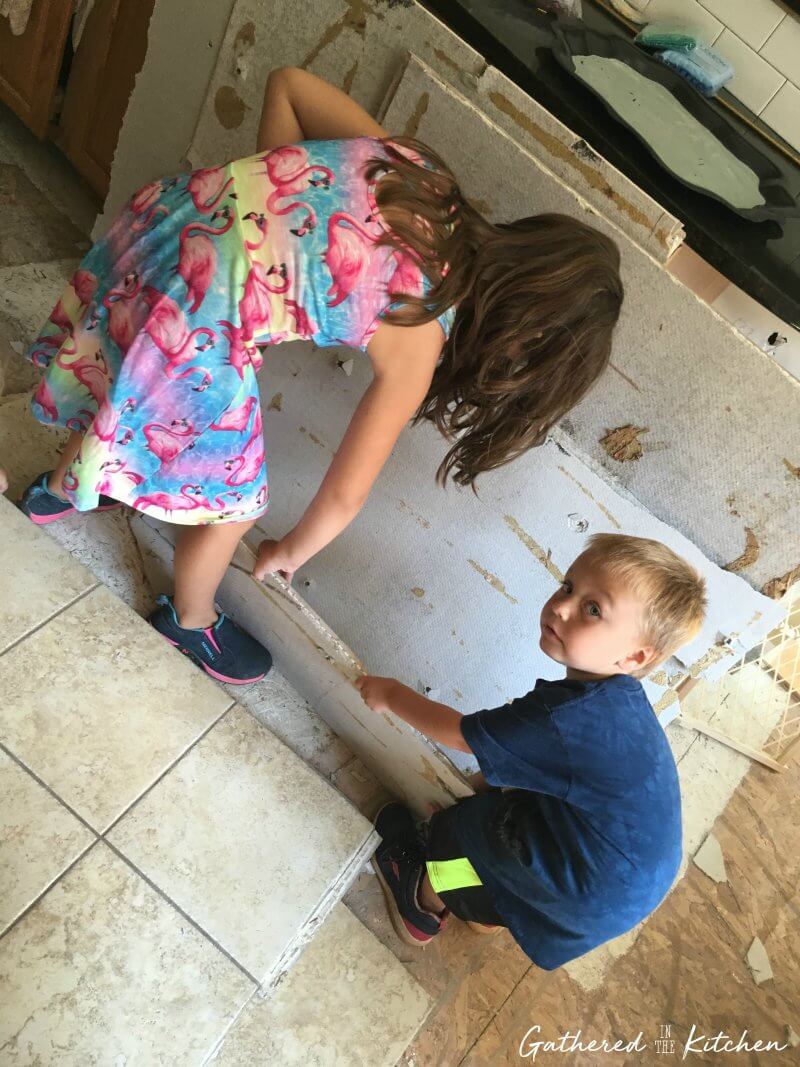
As happy as I was to see this tile go, it really put my blog on the map, especially in those early Pinterest days!! I had created a DIY grout cleaner recipe to clean the nasty grout when we first moved in and it took off…so, thanks old tile! You can also tell that our little baby was no longer a tiny baby – he was actively helping in this part of the reno!
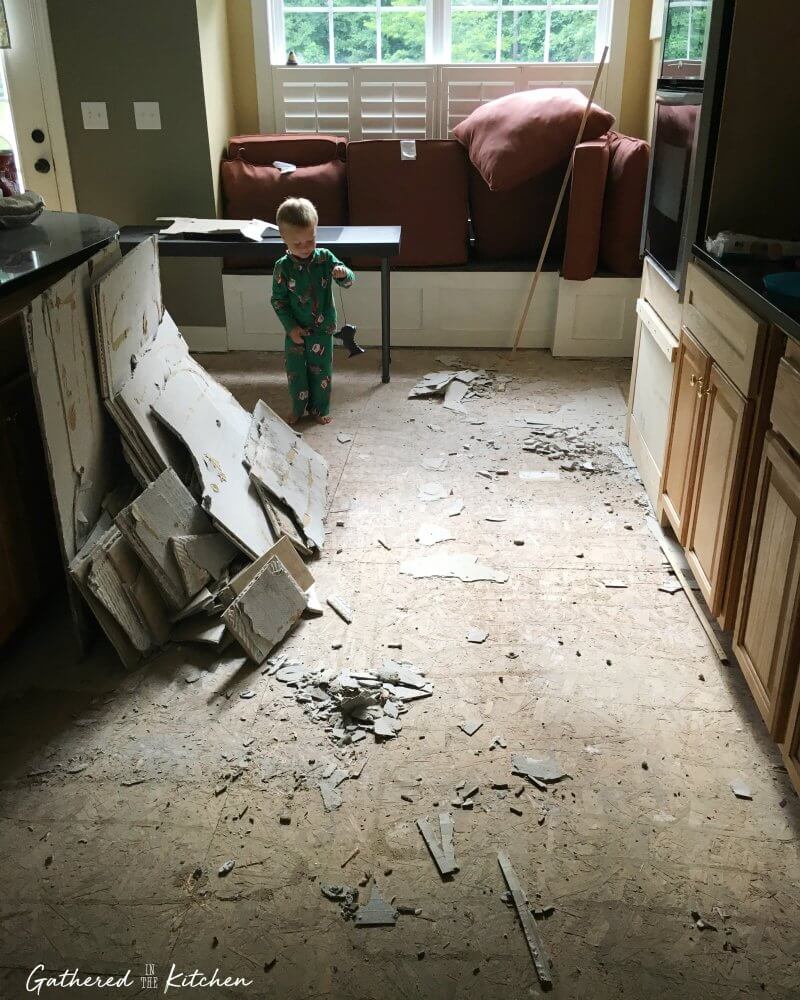
This reno was a full on family project. Everyone pitched in and got the job done.

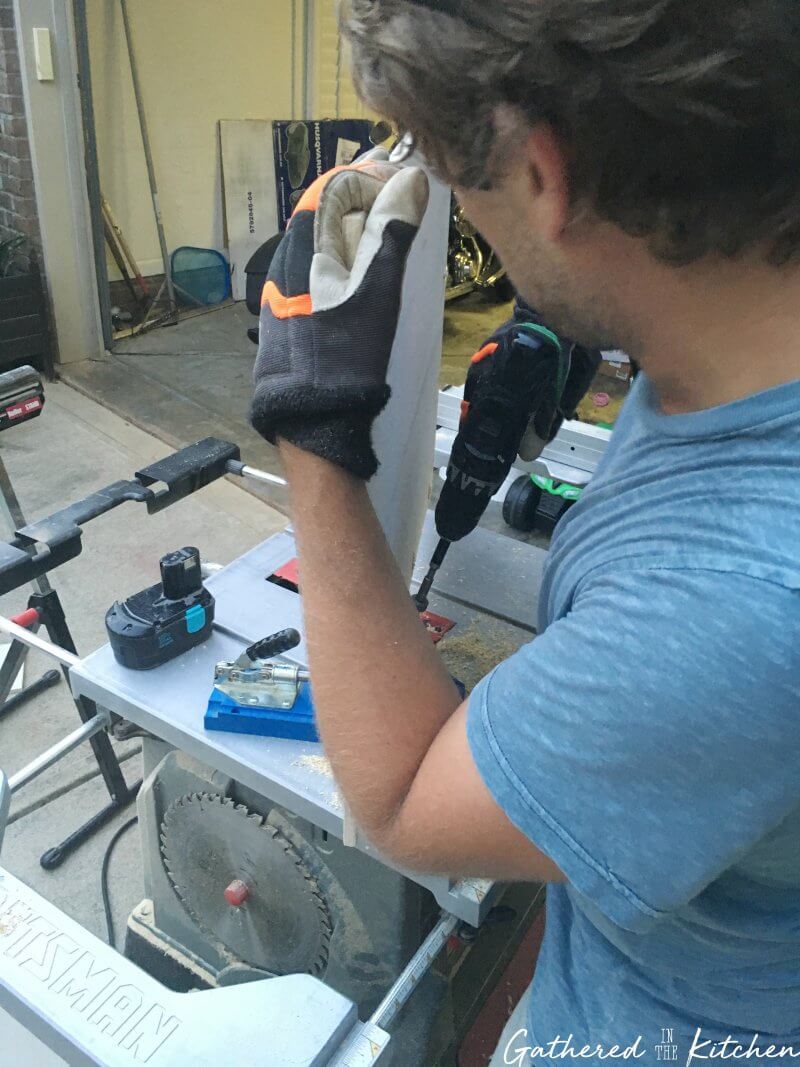
Building Cabinets & Doors
We used as many of the cabinet bases as we could but we also had to build a bunch because we added so many! Every single cabinet door was also completely hand built by my hubby out of solid oak. We used recessed _______ door hinges and designed them shaker style.


Building Cabinet Drawers
Building Oak Floating Shelf with Recessed Lights
Remember all of those cabinets above the kitchen sink? We took those all down and built a floating oak shelf. My hubby wired it with small recessed lights and hard wired it to an outlet switch. It was super awesome! Finished photos further down.

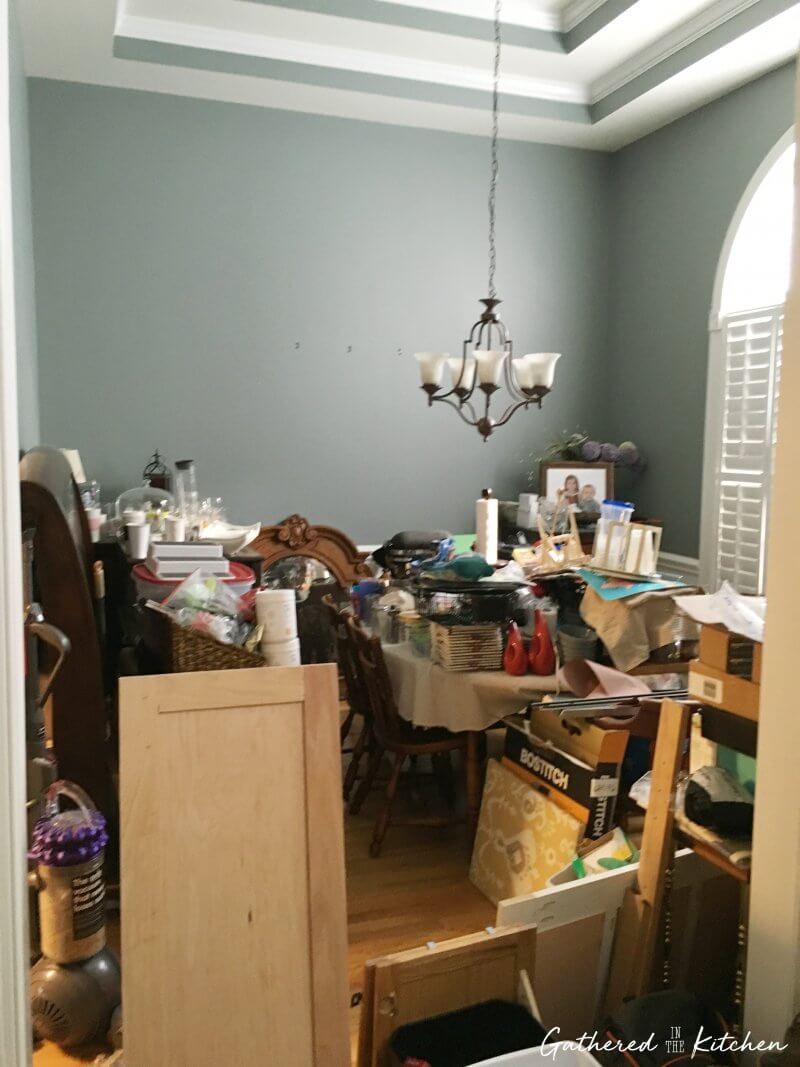
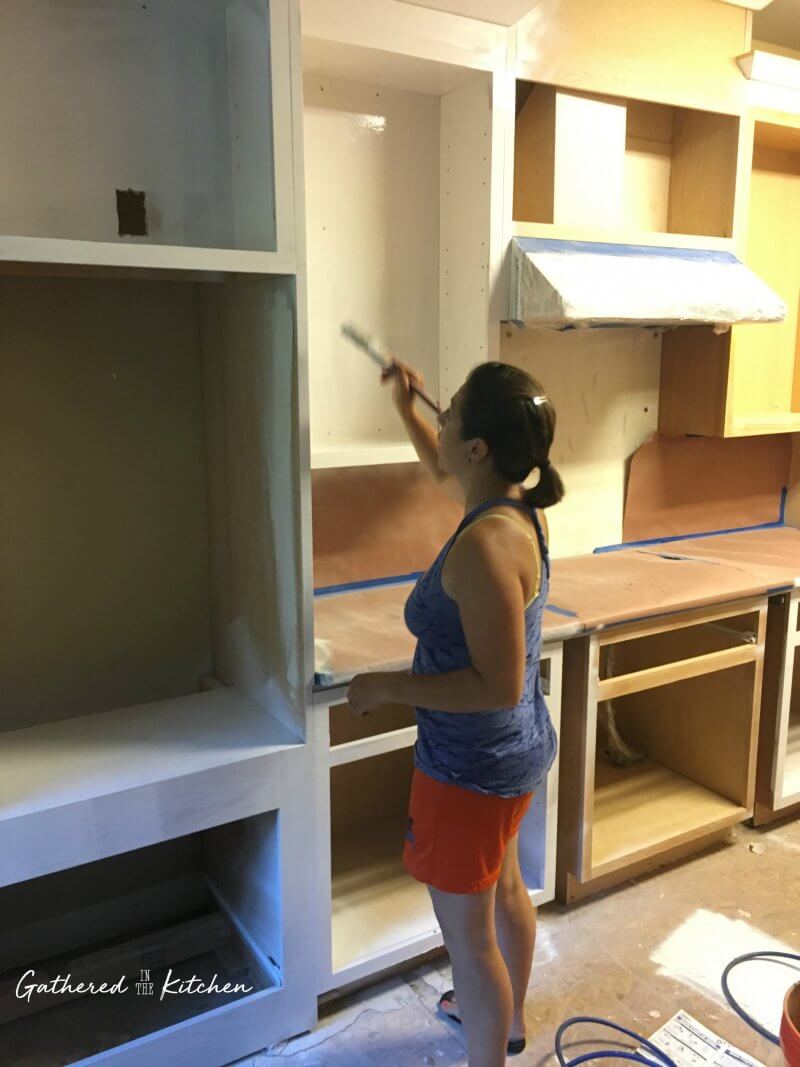
Moving Everything Out to Paint
If living in a total construction zone for 3 years wasn’t bad enough, when it was time to paint, everything had to vacate the kitchen! UGH!!! –> again, why I never had people over!

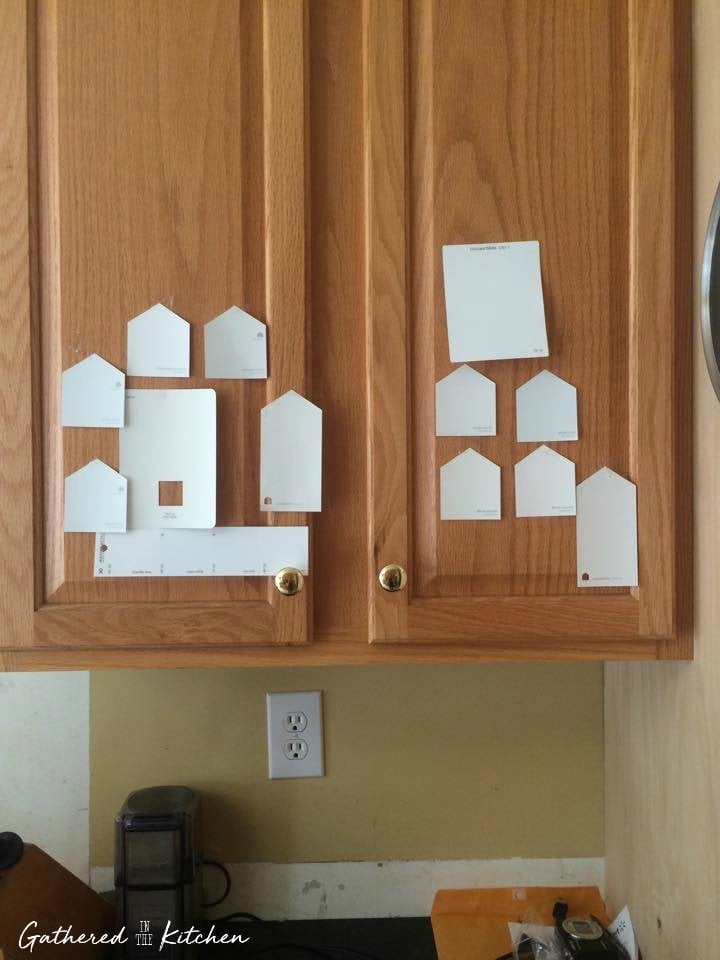
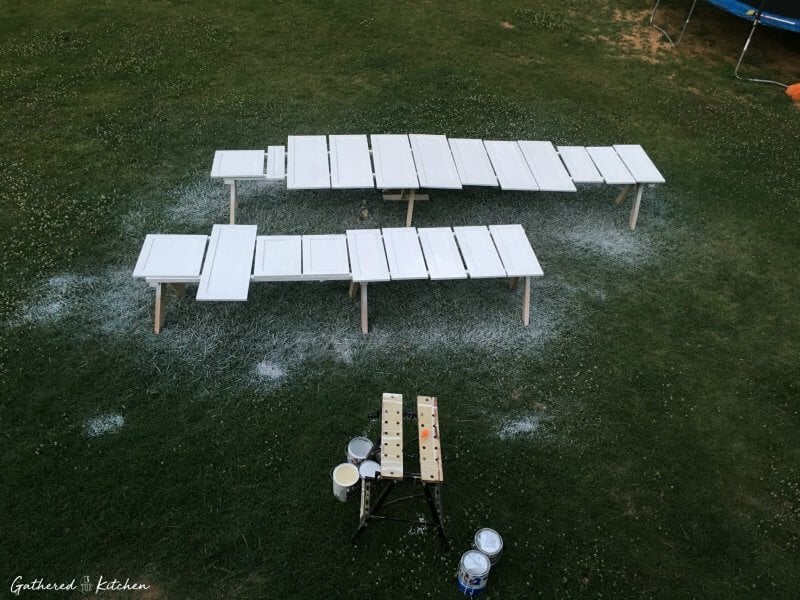
We tested tons of different whites and chose Simply White from Benjamin Moore.


We bought a paint sprayer and my hubby sprayed while I came behind and got rid of any overspray or drips with a brush and roller. I also had a few spots that required sanding from where we had joined wood pieces together. The paint job turned out beyond amazing. The cabinets and doors were perfect!


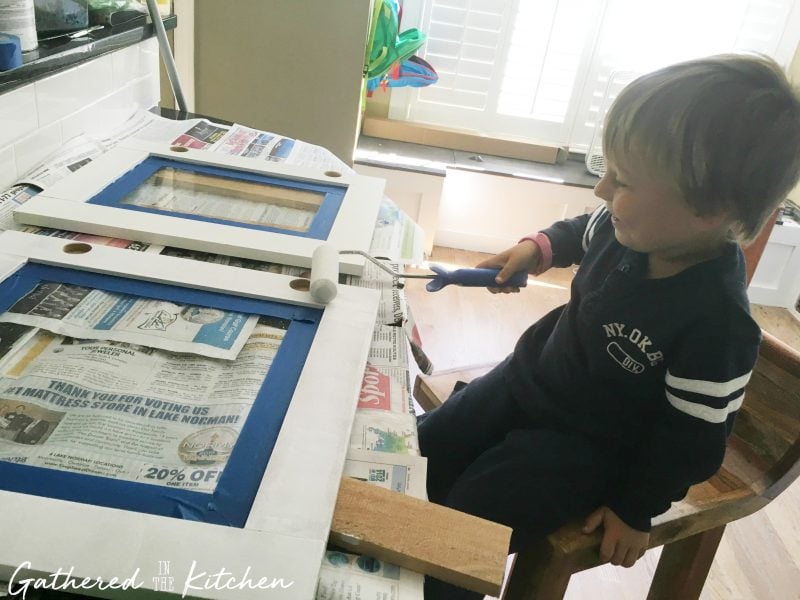
Above the sink and wooden flooring shelf, we built glass faced cabinets. I found a local glass shop in Charlotte that custom cut the bubble glass for each door. We then installed the glass and painted the cabinets!
Wood Floors
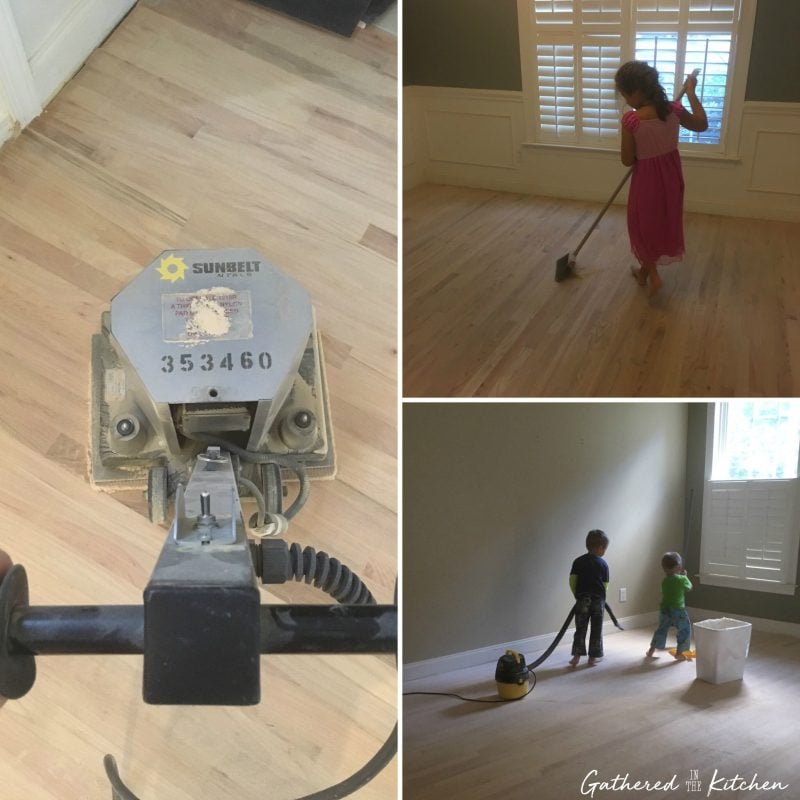
Once the cabinets were done, we were finally ready to lay the hardwood floors. The light at the end of the tunnel was finally getting a little brighter!!
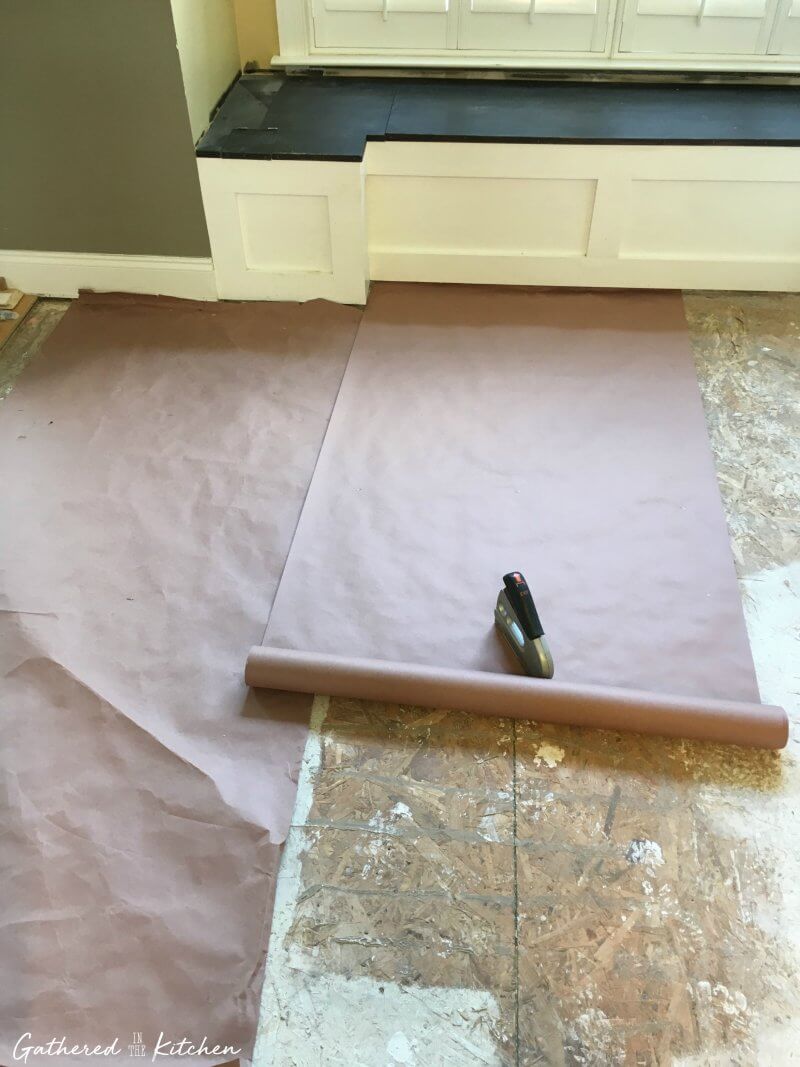
When laying hardwood floors, you begin by laying and stapling down Red Rosin Paper Roof Underlayment. It helps act as a moisture barrier and dampen/prevent creaks.
I’m honestly not exactly sure what the big smile was for? HAHA! possibly just because we were really coming along in the renovation at this point. In this photo you can see the sink and faucet were installed, the flooring had begun, the base for the oak shelf was installed and the subway tile backsplash was going up. The cabinet doors were still off and we had no dishwasher – but, in the grand scheme of things, and when your’e living in a full reno, this was major progress!

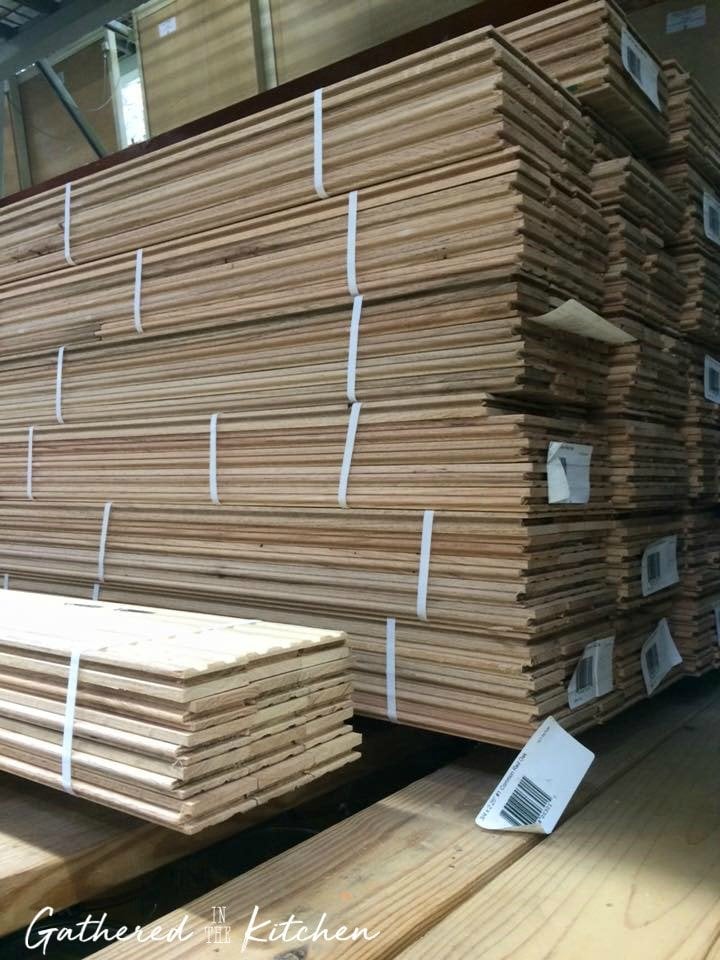
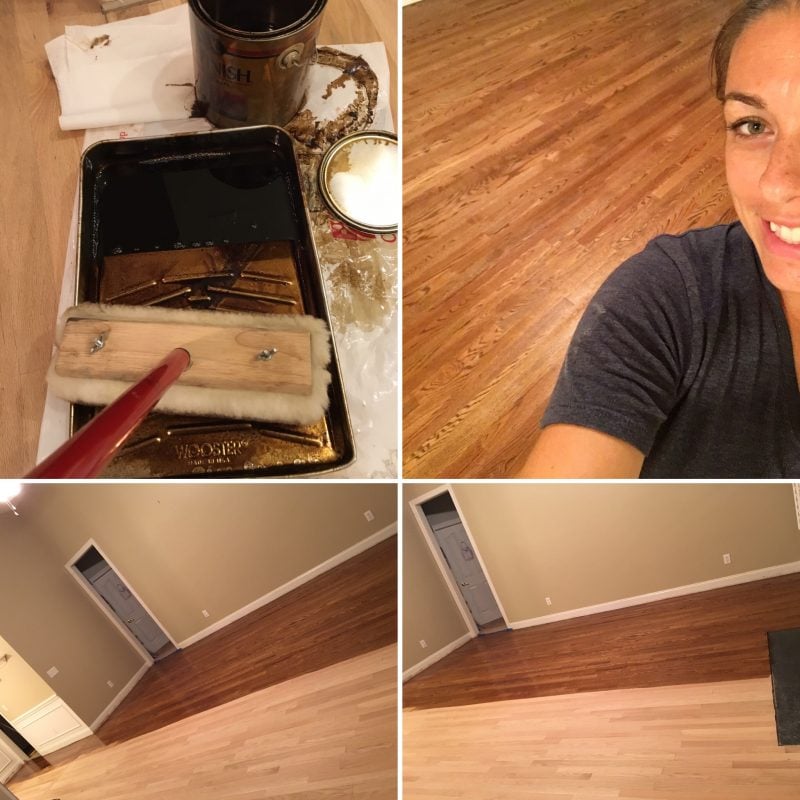
We had existing hardwood floors in the family room, living room, foyer and hallway. It was red oak so we needed to install red oak in the kitchen. We bought unfinished red oak, installed it, sanded it, stained it and polyurethaned it. (We also laid the hardwood in our master bedroom and refinished all of the other existing hardwoods at this time…so this was a MAJOR project – especially because then almost our entire house had to emptied or placed into the kid’s bedrooms!!!)
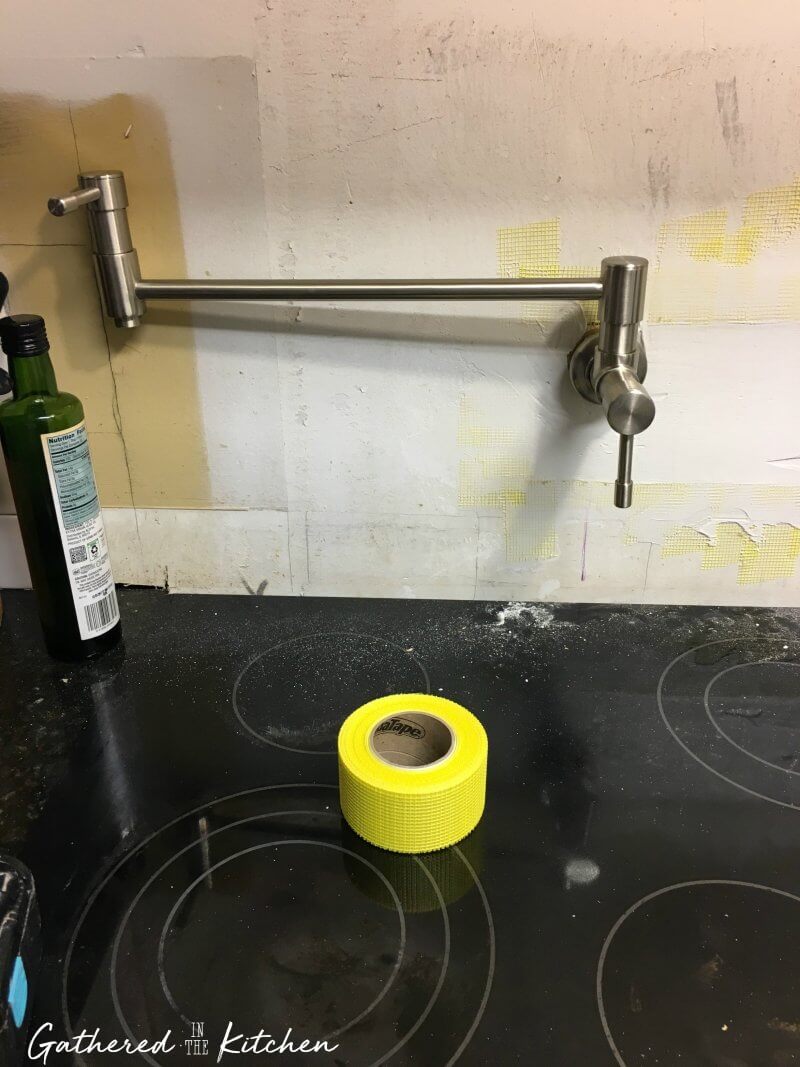
Installing The Pot Filler
By this point we had begun putting the doors and hardware up, the floors were done and it was time to install our pot filler over the glass cooktop.

Installing the pot filler was pretty simple for us because our house sits on a full walk-in entry crawl/unfinished basement. So we worked as a team to figure out where the water line needed to be run – with Clayton in the basement and me in the kitchen. Once we had the location down, he installed a water line and then hooked up the cooktop pot filler. It was ah-mazing!

Installing Subway Backsplash Tile


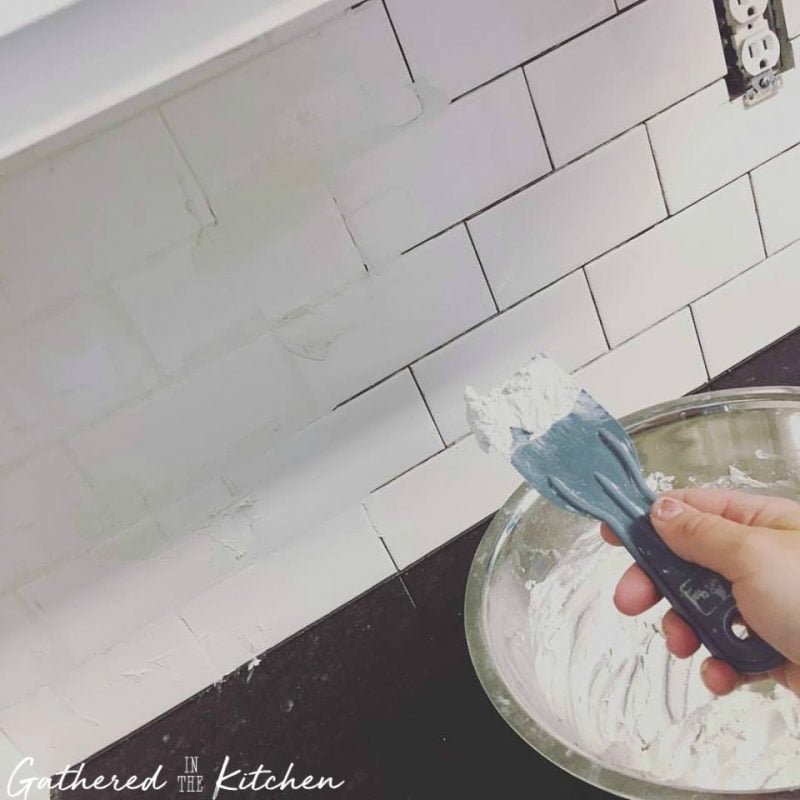
Next up was starting to cut and install the herringbone backsplash over the cooktop. This required absolutely too much match for my brain, so this one was definitely all on the hubs! He’s a math genius, so it turned out absolutely perfect!


We added a USB wall outlet in the kitchen which helped so much with charging tons of devices!

Installing Recessed Can Lighting
One of the last things we did was remove the box ceiling light, painted the ceiling and installed 4 can lights (recessed lights) – for a total of 5 because we had 1 already.
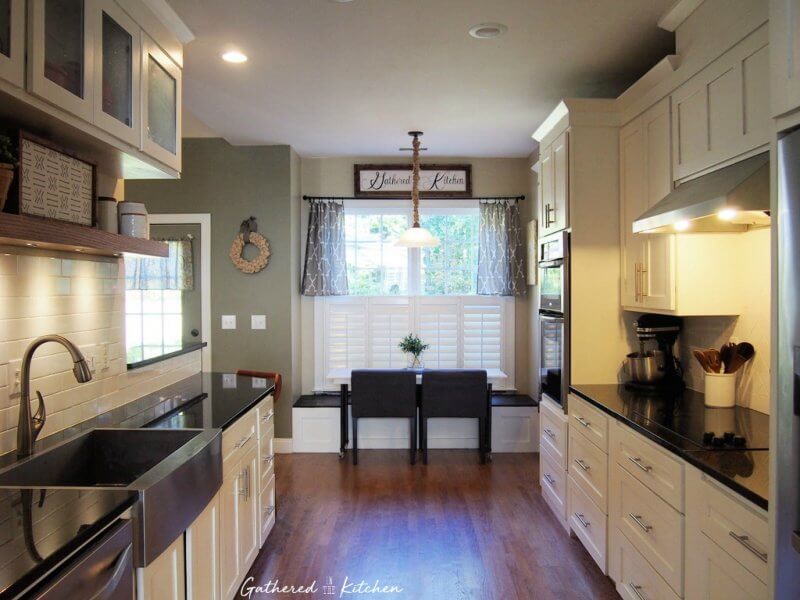
The AFTER!!
This renovation began in 2012 if we’re being super technical and ended literally right before we sold it in November 2018.


This post contains affiliate links. See my disclosure here.
The Cost Breakdown
- $500 wood for cabinets, doors, crown molding
- $180 pot filler (Amazon)
- $220 Delta kitchen faucet (Amazon)
- $200 cabinet hardware
- $200 granite (Craigslist)
- $300 stainless farmhouse sink (Amazon)
- $1,800 fridge (Lowes)
- $500 dishwasher (Lowes)
- $600 Whirlpool in-the-wall oven & microwave and cooktop (Craigslist)
- $200 Ikea chairs
- $125 canned lights – 4
- $180 glass for cabinets
- $40 vent / exhaust hood (Restore)
- $25 shelf lights
- $150 paint
- $750 unfinished red oak wood floors (Home Depot)
- $50 stain and poly (Lowes)
- $200 22″ deep ball bearing drawer glides (Amazon)
- $65 Rev-A-Shelf garbage slide (Lowes)
- $100 Airstone Faux Stone & Veneer Adhesive (Lowes)
GRAND TOTAL: $6,385
Costs Not Included:
- $250 paint sprayer
- $200 flooring nailer
- I’ll gladly give $1,000 in misc stuff like caulk, router bits, etc
Before & After!
It really was a huge overhaul, but it was worth it in the end. I loved cooking in this kitchen and the design and flow was absolutely perfect. Although I didn’t get to enjoy it for that long all complete, I’m excited for our next kitchen overhaul at the new house! Be sure to check back regularly as I will post about that once we move in … as well as update about every room in this house that re did (it was every.single.room!)


Stephanie—home cook, DIY addict, seasonal decor fanatic, and proud chicken wrangler living in a Victorian house that’s always a project. Whether I’m cooking with garden-fresh ingredients, herding mischievous chickens, or tackling another DIY, I’m here to share the fun (and chaos).


Wow! Not only is your husband handsome……he is so very talented as well! Having just had a kitchen & master bath reno done….by a contractor…..I am amazed you did all the work yourselves. Bravo!! Absolutely beautiful❣️
P.S. Our reno cost $45,000. So you saved
Iike almost $40,000. ?
Thanks Andrea!! It was a lot of hard work BUT the $$ savings was worth it! We just signed ourselves up for another full kitchen Reno with house #4!!! We must be crazy! Although this time we are possibly switching the kitchen to a whole new location so we may be in for a lot more fun than the last one! lol
I bet your kitchen and master is gorgeous!!! Feel free to tag photos to @gatheredinthekitchen I’d love to see them!