How To Paint Buffalo Check on Wood Porch Signs
Learn how to effortlessly create charming wooden porch signs with Buffalo Check patterns using two paint colors, stencils, and a paintbrush. Follow my step-by-step guide for a delightful DIY project that will transform your front porch. Discover the art of painting Buffalo Check on wooden signs with style and ease!
I absolutely love decorating my front porch for every holiday and season! It’s a creative outlet that adds a touch of charm and warmth to my home. And when it comes to porch decor, one of my all-time favorite elements is the classic porch sign. There’s just something about those wooden signs that instantly transform the look of your front entrance.
But you know what’s even more special? Making those homemade wooden signs yourself! Trust me, it’s not only fun but incredibly satisfying. The best part? It’s easier than you might think! I find myself diving into DIY projects to create these lovely signs all the time.
Not only is it fun and satisfying to create your own sign, by making the signs yourself, you can customize your decor to match your style, the season, or any holiday you’re celebrating. Whether it’s the cozy warmth of autumn, the festive spirit of Christmas, or the playful colors of summer, porch signs have the power to set the tone and create a welcoming atmosphere for everyone who visits!
This post may contain affiliate links, which means I’ll receive a commission if you purchase through my link, at no extra cost to you. Please read full disclosure here.
So, if you’re a lover of DIY projects, just as I am, you’re in for a treat! In this post, I’ll walk you through the step-by-step process of creating beautiful porch signs with a charming Buffalo Check pattern. You’ll be amazed at how easy it is to add a touch of plaid to your front porch with just a few simple supplies! Let’s dive in and make your front porch the envy of the neighborhood!
DIY Porch Signs
–Joy | Christmas Painted Wooden porch Sign
–DIY Wooden Fall Front Porch Sign
–Stay Home | DIY Wooden Porch Sign
–DIY Wooden Fall Front Porch Sign
–DIY Christmas Themed Winter Wooden Signs
–Rustic Personalized Family Wooden Sign
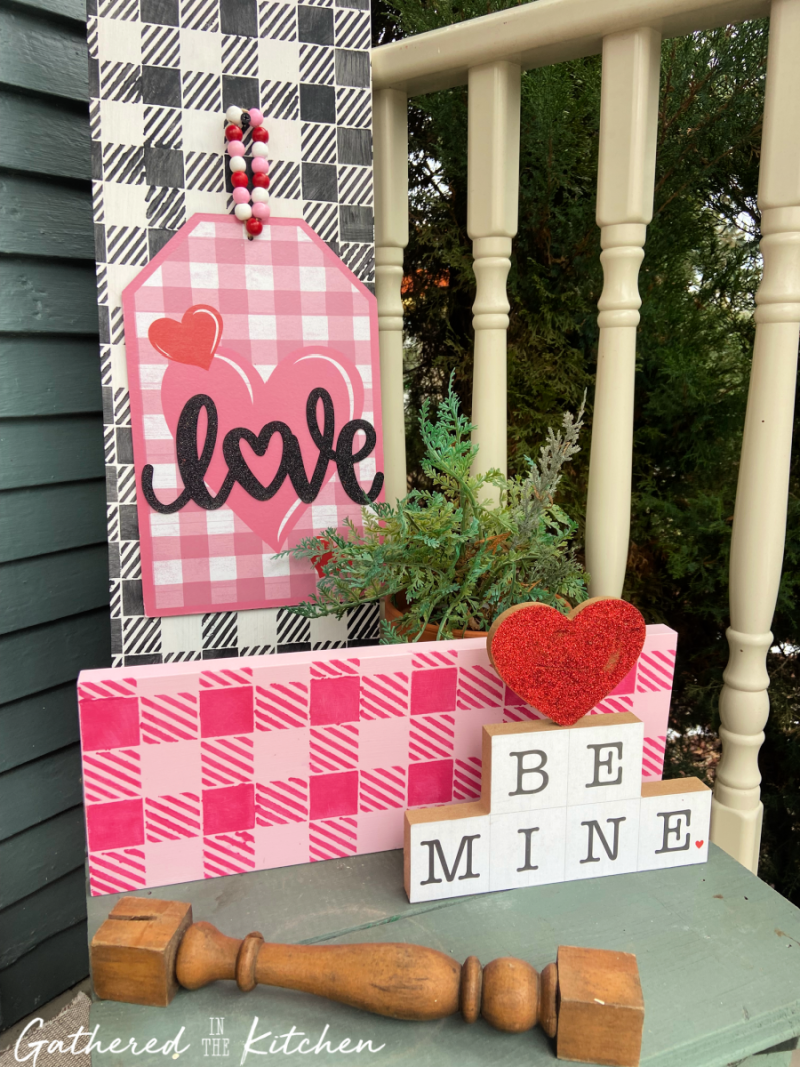
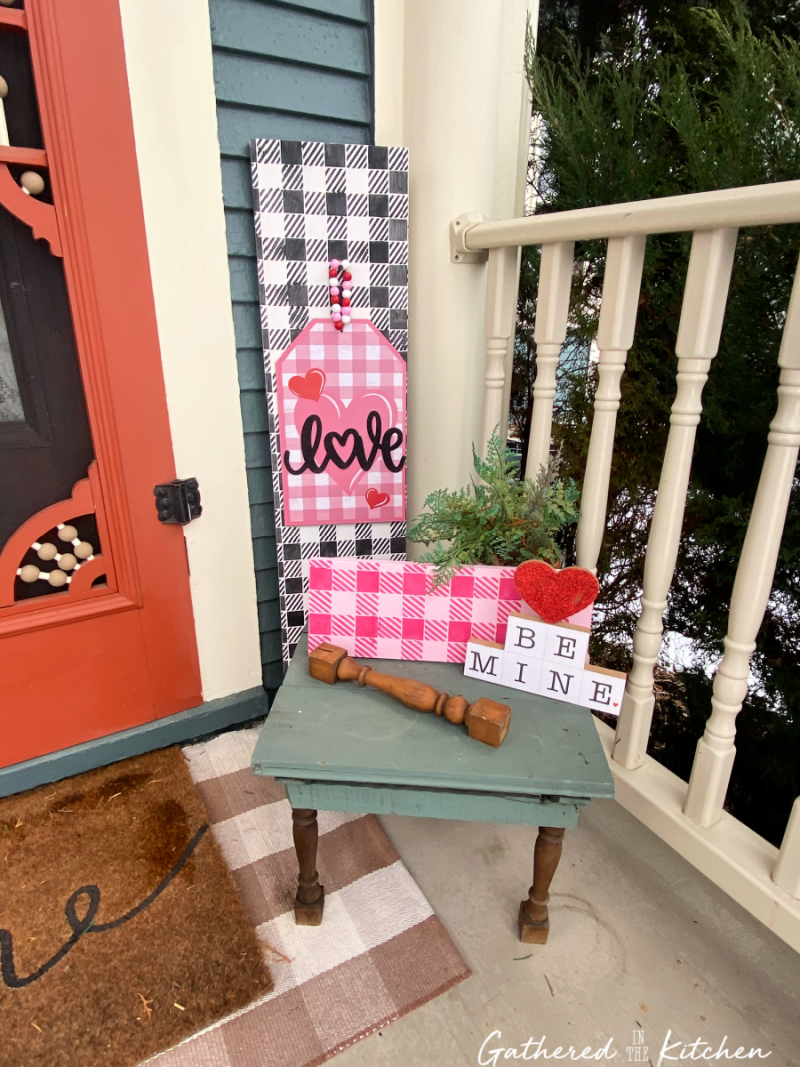
I recently received the buffalo check stencil from Dixie Belle and shared in my Dixie Belle Paint December Unboxing. I was so eager to give this stencil a try that I decided I would decorate my entire front porch for Valentine’s Day in Buffalo Plaid! I painted pink buffalo check hearts to go on a wreath and made black and white and pink and light pink porch signs!

Supplies Needed:
- Buffalo Check stencil
- Fluff chalk paint
- Caviar chalk paint
- small paint brushes
- craft dryer
- 1″x8″x6′ pine wood
Why Choose Dixie Belle Chalk Paint

How to paint buffalo check step by step
Step 1: Paint the pine board in color number one
I purchased a 1″x8″ 6 foot tall pine board at my local hardware store. I always look for boards that have minimal knots or blemishes. I then painted the entire board white using Dixie Belle chalk paint in the color of Fluff, this is my color #1. Allow the paint to fully dry.

Step 2: Place buffalo check stencil on the board and carefully paint over the stencil in color number two
Gently lay the buffalo check stencil onto the painted surface, ensuring it’s properly aligned and securely in place, you may choose to use blue painter’s tape to help secure the stencil.
Using a smaller bristle paint brush, begin painting over the stencil with color #2. Take your time to ensure that every nook and cranny of the stencil design is coated evenly. This meticulous approach guarantees that the final result will be a well-defined buffalo check pattern.
note: the pink paint on the stencil was from pink sign I had just made prior to this black and white buffalo check porch sign (shown below)

Step 3: After applying the black paint, carefully remove the stencil ensuring that you do not smear the wet paint
Once you’ve applied the black paint, it’s time for a delicate yet crucial step—meticulously lifting the stencil off the surface while taking extra care not to smudge the still-wet paint.
note: I missed taking a picture of this step, please reference my post for How To Paint Buffalo Plaid on Wood Hearts for more references

Step 4: Use a craft dryer to dry the paint quickly to reposition the stencil further down the pine board
I am always very impatient when it comes to letting things dry, particularly paint! I used my craft dryer to help speed the drying time up!

Step 5: Repeat the same process until the entire board is painted in the buffalo check design
Although my pine board measured 6 feet in length, the stencil itself was only 20 inches long. This size disparity meant that I had to repeat the stencil pattern multiple times across the board. Navigating this phase can be a bit challenging, as it requires careful consideration to determine which section of the stencil should be painted each time.

Once all of the paint has fully dried, it’s time to put it outside on your porch! My porch is covered, so I did not seal my porch setter, however, if your sign is going to be exposed to the elements, I would recommend sealing it with Gator Hide. Gator Hide is a clear, non-yellowing topcoat that repels water.
More Awesome Stencil Projects!


Stephanie—home cook, DIY addict, seasonal decor fanatic, and proud chicken wrangler living in a Victorian house that’s always a project. Whether I’m cooking with garden-fresh ingredients, herding mischievous chickens, or tackling another DIY, I’m here to share the fun (and chaos).