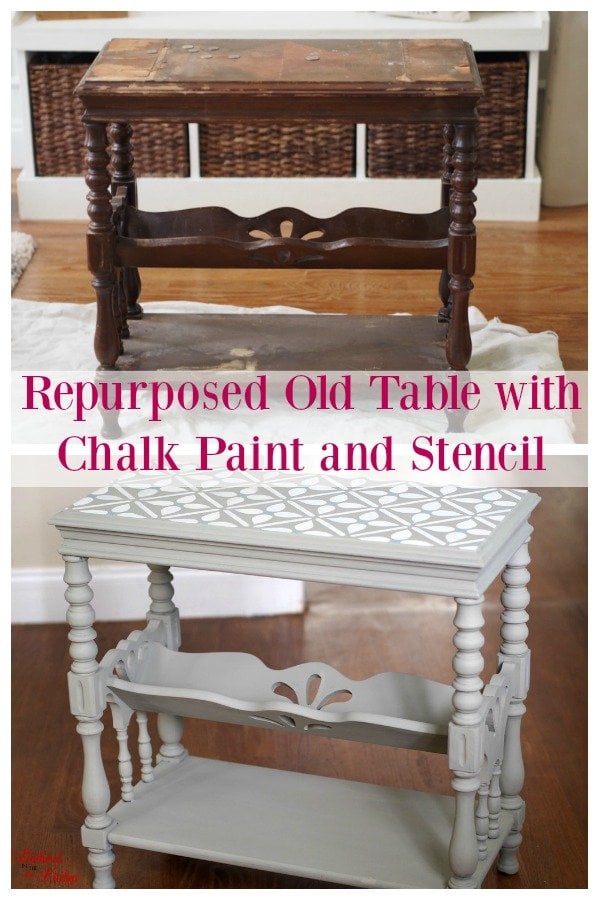
Repurposed Old Table with Chalk Paint and Stencil
Update old, damaged furniture with a little bit of chalk paint and a stencil to bring it new life!
I was given this piece of furniture from my mom and to be truthful I’m not exactly sure what kind of end table, side table, magazine table it is. However, it had a beautiful top that was water damaged but that was it. The rest of the table was in great condition. So I knew with a little bit of love and paint, I could have it looking gorgeous again, just like this entrance table!
Check out 10 Ways to Make Over Furniture with Chalk Paint

I began asking my readers on Facebook and Instagram which color was their favorite choice.
This post may contain affiliate links, which means I’ll receive a commission if you purchase through my link, at no extra cost to you. Please read full disclosure here.


Preparing The Wood
Once I had the color nailed dow, my son and I got to chipping off the top water damaged piece one bang at a time…
I really love that my little man WANTED to help! I have always always always tried involving my kiddos in my projects because it actually makes it more fun and I want them to be capable adults and know how to do stuff, rather than hire everything out. #truth
Creating A Stencil Design
I created my stencil using my Silhouette Cameo. You can find several of my other Silhouette inspired https://gatheredinthekitchen.com/how-to-cut-heat-transfer-vinyl-using-a-silhouette-cameo-beginner-tutorial/creations using my cameo.

This post contains affiliate links. You can read my disclosure here.
Then I got busy painting!
I recently partnered with Dixie Belle Paint and I can honestly say I am in love. I have painted a lot of everything in my life and have used so many different kinds of paint, so I feel I am a pretty good judge of paint. I always shy away from painting furniture or large pieces because it’s so much work. The prep needed before you can paint is such a pain in the butt and time consuming. Plus, then when you are finally ready to paint and start applying it, it always shows paint strokes (even if you use certain products to hide the brush marks), and the paint always pulls back up when you go back over it with the brush. So, you can understand my excitement when I finally found a product that required no prep work and applied like butter!!
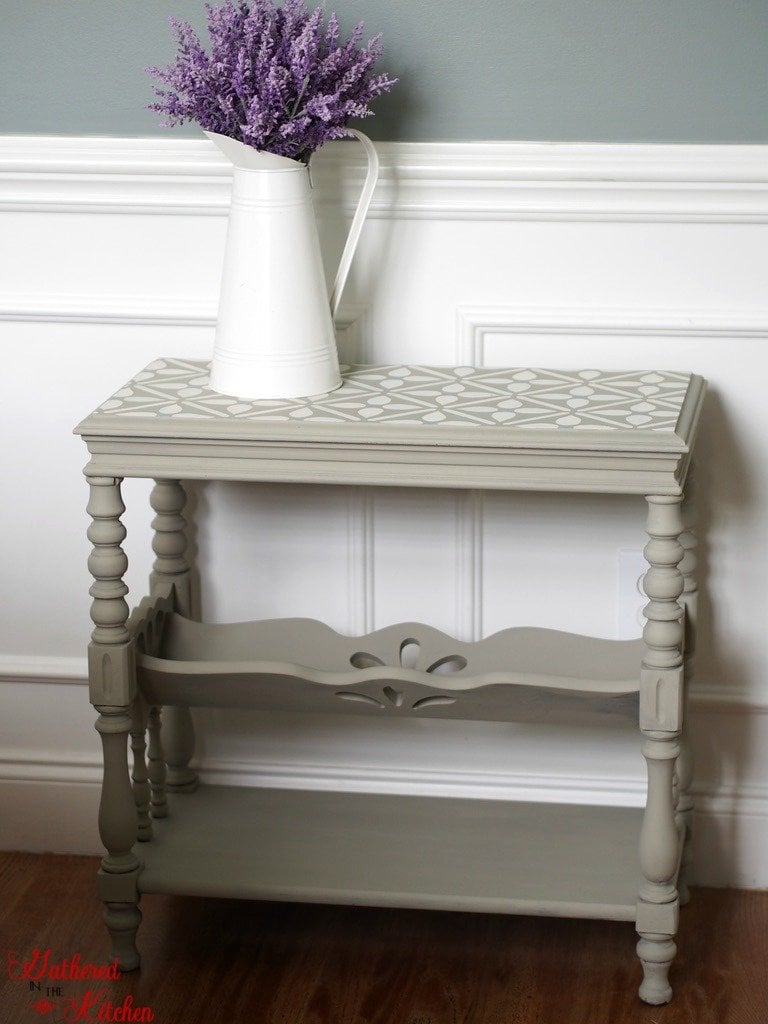
I painted the entire table in Dixie Belle Dried Sage. Which is paint color #1 on the sample photos above. I think I am literally in LOVE with this color! It’s the perfect combination of gray and tan mixed together. I originally thought it would have a green hue to it because of the name “sage” but honestly it doesn’t.
You can purchased Dixie Belle Paint HERE using my special promotion code just for my readers and save some extra money!
Why I Love Dixie Belle Paint
- Beyond easy to use! I mean, literally
- Creates a flat rich finish that is easily distressed on furniture or crafts
- No sanding or priming. No VOC’s
- Creates no brush marks
- Doesn’t “peel” off wet paint when applying more
- Requires only one coat
- Water based so only water is required to wash out your brushes
- Dries within minutes
- A little goes a realllly long way!
- And again…no sanding or priming required!!! Super win for a busy mom!

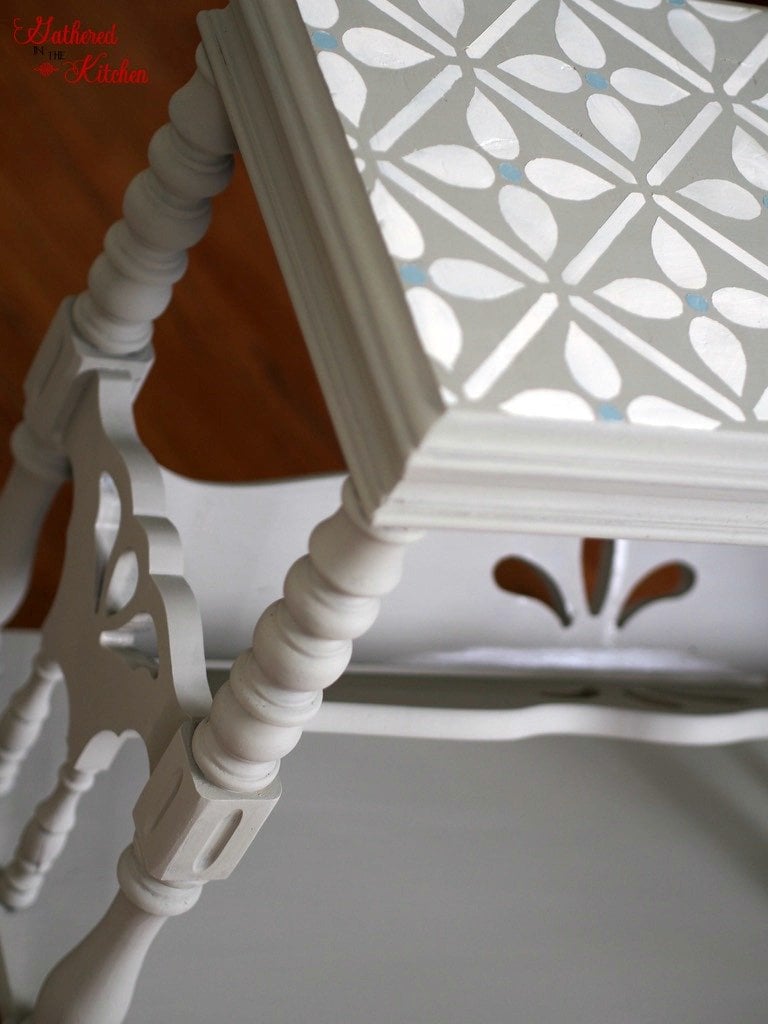
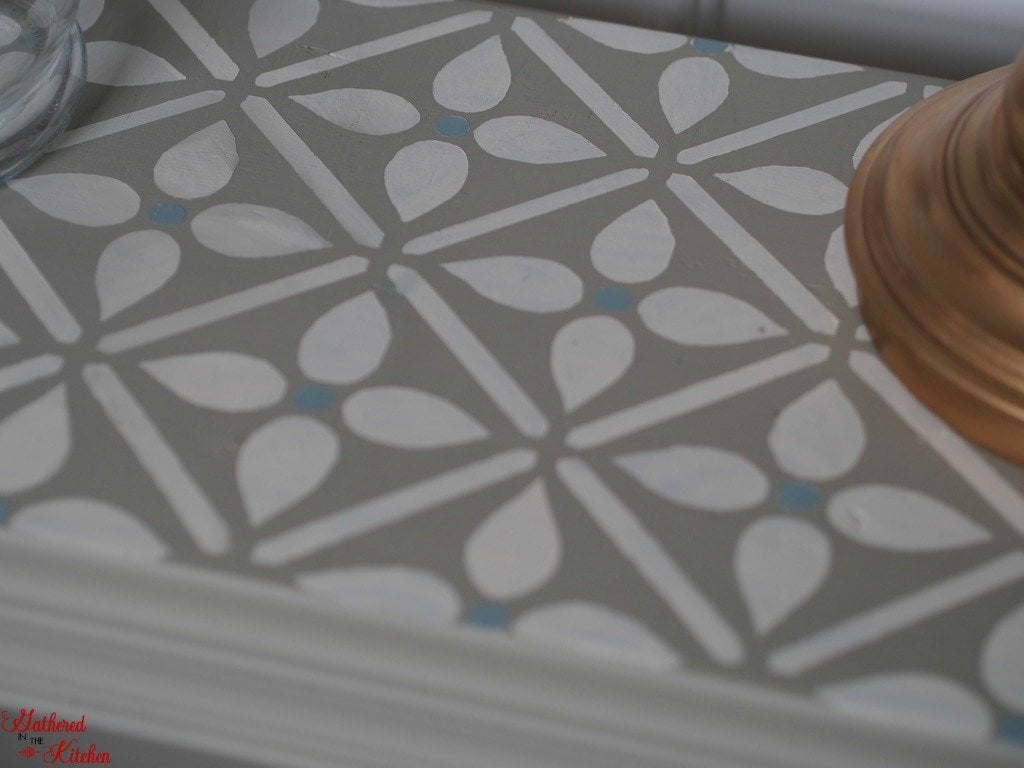
Painting A Stencil on Wood
- Apply stencil (again I created mine using my Silhouette Cameo)
- Paint over entire stencil the base coat color (ie: mine was Dixie Belle Dried Sage)
- Let base coat dry
- Apply stencil color (ie: mine was Dixie Belle Drop Cloth and Dixie Belle Vintage Duck Egg)
- Let paint dry
- Remove stencil
- Apply a wax or satin finish if desired


I am absolutely in love with how pretty it looks!!


Check out: Before & After Projects Using Dixie Belle Chalk Paint
If you loved this project, I would love for you to share it on Pinterest!


Stephanie—home cook, DIY addict, seasonal decor fanatic, and proud chicken wrangler living in a Victorian house that’s always a project. Whether I’m cooking with garden-fresh ingredients, herding mischievous chickens, or tackling another DIY, I’m here to share the fun (and chaos).


This turned our so AWESOME!!!!
thank you so much!!! I am absolutely in love with it!…now I’ve got so many ideas for more projects!!
Generally, the glue they used to apply veneer will melt with heat – this means you can use your iron to easily heat – either to re-apply or to remove – old veneer. It does a neater and tidier job than a hammer and chisel. If the veneer isn’t in too bad of shape you can iron it on – and flat – and patch the holes left with new veneer before either refinishing or painting.
Happy happy!
Absolutely ADORABLE! Great Job and I LOVE the video of your son helping you! So Sweet!!
thanks!! He’s the best little helper! 🙂
Wow!! Love the color… and the stencil! One of kind!
thank you!!