Budget-Friendly Kitchen Makeover with Spray Paint & Shelves
Transform your kitchen with this budget-friendly DIY wall decor makeover! Learn how to repurpose floating shelves, spray paint accents, and create stylish personalized decor. A simple and affordable way to refresh your space!
I had an area on the side of one of the windows in our kitchen eating area that was begging for attention. I started brainstorming and decided to use two wooden ledge shelves that I had laying around from our old house in Georgia. I sprayed them Oil Bronze and hung them at a stagger. I am still working on putting decoration items up but for now this is what it looks like:

The small candle stick holder needs to be sprayed Oil Bronze as well still but I ran out of spray paint and need to buy more. I’m not set on keeping the candle stick holders up there but for now they are kind of a filler. I plan on putting holiday decor items up in the future!
This post may contain affiliate links, which means I’ll receive a commission if you purchase through my link, at no extra cost to you. Please read full disclosure here.

The kind of scalloped edge frame is from Goodwill that I sprayed Oil Bronze (can you tell I’m a fan? It’s just a little fancier than a black, swoon!) The littler mother plaque was a gift from my mom for a Christmas a couple years ago. The letter B I sprayed, yep, Oil Bronze and then covered it in fancy scrapbook paper. I picked a light green to match the green in the plaque.

Spray painted

Traced and cut out paper letter. I just used spray glue to adhere it to the wooden letter. I didn’t want to use Modge Podge because I may decide in the future to change the paper.

This was another Goodwill frame that I sprayed and lined with fun scrapbook paper. The colors are more vivid but do “kind of match” the curtains that I made for all of the kitchen windows. The little B I bought from Hobby Lobby and sprayed it.

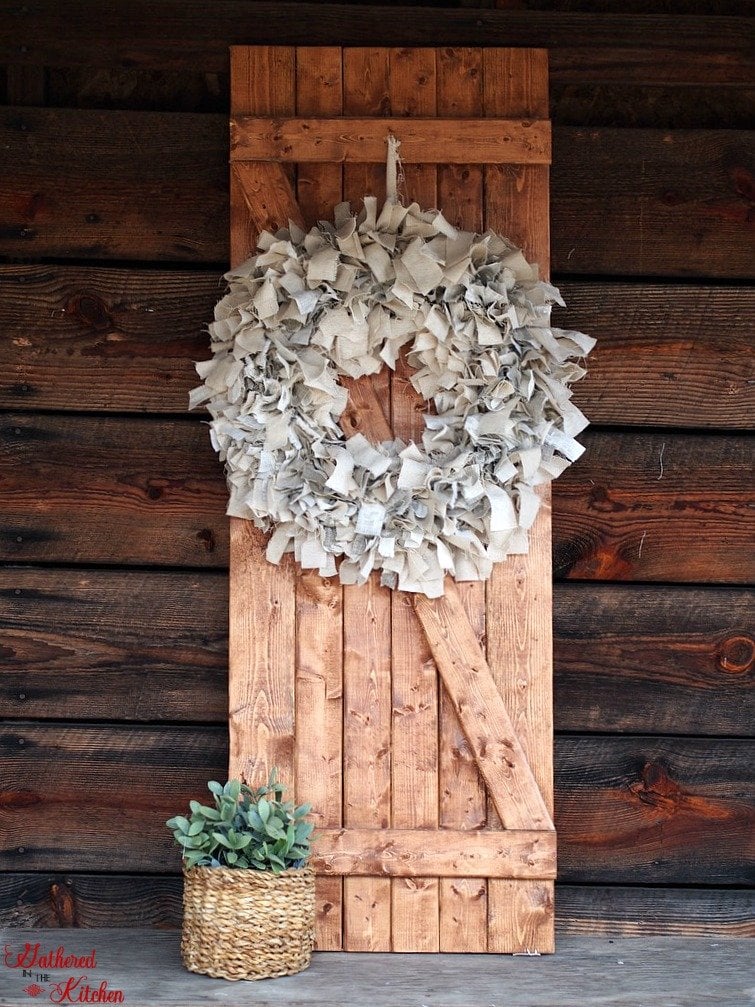
I brought down the Burlap Bubble Wreath I had made for our guest room and hung it on the wall beside one of the cabinets.
(Ignore the red paint behind the cream…yes, we still need to make our own crown molding and hang it).

🔹 Looking for the perfect dining table makeover? This table was a total transformation with a mix of stain and paint! It started out looking completely different, but with a little DIY magic, I turned it into the beautiful centerpiece of our kitchen eating area. Check out the full table redo tutorial here! 👉 Table Redo: Stain & Paint
DIY Floating Shelves & Wall Decor Makeover
Transform an empty wall into a stylish focal point with these easy steps!
Materials Needed:
- Wooden floating shelves
- Sandpaper (120 & 220 grit)
- Oil Bronze spray paint (or preferred color)
- Decorative frames & scrapbook paper
- Wooden letters or monograms
- Spray glue or adhesive
- Small décor pieces (candlesticks, bowls, plaques)
- Screws, anchors, and drill
Step-By-Step Instructions:
1️⃣ Prep & Paint the Shelves:
- Lightly sand the shelves to remove any old finish.
- Wipe them clean and apply 2-3 coats of Oil Bronze spray paint.
- Allow them to dry completely before mounting.
2️⃣ Install the Floating Shelves:
- Use a level to mark where you want the shelves.
- Secure them to the wall using anchors and screws for stability.
- Stagger the shelves for a visually appealing look.
3️⃣ Customize the Wall Decor:
- Monogram Letter: Spray paint a wooden letter and cover it with scrapbook paper for a personalized touch.
- Picture Frames: Spray paint thrifted frames and insert patterned scrapbook paper for an easy DIY art piece.
- Candlesticks & Small Décor: Spray paint any existing pieces to match the aesthetic.
4️⃣ Style & Arrange:
- Place framed artwork, decorative accents, and seasonal décor on the shelves.
- Swap out items for different holidays to keep the look fresh!


Budget-Friendly Kitchen Makeover with Spray Paint & Shelves
Materials
- Wooden floating shelves
- Sandpaper (120 & 220 grit)
- Oil Bronze spray paint (or preferred color)
- Decorative frames & scrapbook paper
- Wooden letters or monograms
- Spray glue or adhesive
- Small décor pieces (candlesticks, bowls, plaques)
- Screws, anchors, and drill
Instructions
- STEP 1: Prep & Paint the Shelves:Lightly sand the shelves to remove any old finish. Wipe them clean and apply 2-3 coats of Oil Bronze spray paint. Allow them to dry completely before mounting.
- STEP 2: Install the Floating Shelves:Use a level to mark where you want the shelves.S ecure them to the wall using anchors and screws for stability.Stagger the shelves for a visually appealing look.
- STEP 3: Customize the Wall Decor:Monogram Letter: Spray paint a wooden letter and cover it with scrapbook paper for a personalized touch.Picture Frames: Spray paint thrifted frames and insert patterned scrapbook paper for an easy DIY art pieceCandlesticks & Small Décor: Spray paint any existing pieces to match the aesthetic.
- STEP 4: Style & Arrange: Place framed artwork, decorative accents, and seasonal décor on the shelves. Swap out items for different holidays to keep the look fresh!


Stephanie—home cook, DIY addict, seasonal decor fanatic, and proud chicken wrangler living in a Victorian house that’s always a project. Whether I’m cooking with garden-fresh ingredients, herding mischievous chickens, or tackling another DIY, I’m here to share the fun (and chaos).


It turned out beautiful! Thank you so much for sharing at Mix it up Monday, I hope you’ll stop back often and share some more 🙂
Cute! I am moving soon, and you gave me some inspiration for my new kitchen!
Oooh, I love how it turned out. I always love staggered shelving (but mostly because I don’t hang things very straight which later bugs the hell out of me). I love your entire kitchen, the dark flooring with the light walls. Mmm,…so pretty, Stephanie. Thanks for sharing your shelves at our party this week.
Glad you stopped by on Busy Monday to link with A Pinch of Joy! It all turned out very nicely — I would loooooove to have all those windows! Hope to see you again soon!