How To Make A Sourdough Starter from Scratch
Making a sourdough starter can be a fun and rewarding process, and there are many reasons why you might want to try it out. Besides the incredible, tangy flavor, there are many health benefits to sourdough. The fermentation process has the ability make it easier to digest and increase nutrient absorption.
A sourdough starter is a mixture of equal parts flour and water. When mixed together and left to rest, the mixture will begin to ferment from the natural yeast found in your home. The yeast is then digests the flour and water creating carbon dioxide. Once active and bubbly, the sourdough starter is then used in bread recipes to create a natural rise/lift, as would recipes that require baking yeast.

Supplies Needed
- glass jar – I prefer to use a regular mouth mason jar
- lid – a mason jar lid or a tea towel and a rubber band
- all-purpose flour – I use unbleached flour
- filtered water – water that does not have chlorine is required, as the chlorine will kill off the good yeast you are trying to grow
- wooden spoon – true sourdough enthusiasts suggest using glass jars and wooden spoons as these will not alter the properties of the sourdough fermentation process. I use a wooden spoon, because the mixture is quite dense and a sturdy wooden spoon works best at incorporating the flour and water
- rubber band – to help gauge how much your starter has “grown” once it becomes active
How To Make A Sourdough Starter
The process of making a homemade sourdough starter is really simple; it’s equal parts flour and water. *always use lukewarm filtered water (that doesn’t have chlorine) and use unbleached all-purpose flour. If all goes well, you should have an active sourdough starter at the end of 7 days.
The ingredients of flour and water are mixed together in a glass jar, covered and then set out on the kitchen counter. Each home has different good yeast and different temperatures, so the amount of days it takes for your starter to become active and bubbly may differ. Mine actually took 14 days. I’ll go into more of these details later in this post.
This post may contain affiliate links, which means I’ll receive a commission if you purchase through my link, at no extra cost to you. Please read full disclosure here.
Sourdough Starter Feeding Schedule
Important Notes:
- *always store your sourdough starter on the kitchen counter, not in the refrigerator
- *discard = throw away
- Day 1 = 1 cup flour, 1 cup water. Stir and cover with a tea towel
- Day 2 = Discard 1/2 of the mixture and add 1 cup flour, 1 cup water. Stir and cover with a tea towel
- Day 3 = Discard 1/2 of the mixture and add 1 cup flour, 1 cup water. Stir and cover with a tea towel
- Day 4 = Discard 1/2 of the mixture and add 1 cup flour, 1 cup water. Stir and cover with a tea towel
- Day 5 = Every 12 hours Discard 1/2 of the mixture and add 1 cup flour, 1 cup water. Stir and cover with a tea towel
- Day 6 = Discard 1/2 of the mixture and add 1 cup flour, 1 cup water. Stir and cover with a tea towel
- Day 7 = Discard 1/2 of the mixture and add 1 cup flour, 1 cup water. Stir and cover with a tea towel. By the end of day 7, your sourdough starter should be “active” = bubbly and grown in size. **If by the end of 7 days your starter is still not active, keep the feeding process going, but do it two times per day (an A.M. and P.M. discard and feeding). Also, see below for more troubleshooting tips!
In a glass canning jar, add in all-purpose flour.

Next add in lukewarm, filtered water.
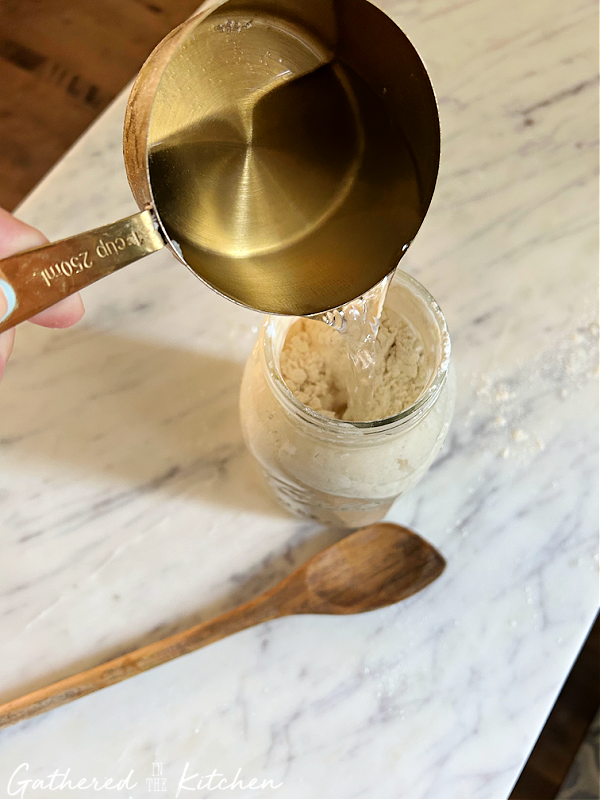
Stir with a wooden spoon. It will take about one minute of stirring until the flour and water are incorporated.

Once incorporated, the mixture will be similar to a thick pancake batter. There will be small clumps, that is ok. Just do your best to scrape down the sides of the jar and break up as many of the clumps as possible.

Cover with a tea cloth and rubber band or a regular canning jar lid. Set out on the counter, in a warmer spot and let rest until the following day.

Here is a photo of what my starter looked like on day 5. Small air bubbles had been starting to form, meaning it was becoming active!

Why is My Sourdough Starter Not Getting Bubbly?
This could be for many reasons. But the biggest reasons I found when making my own starter were:
- Using cold water. I use filtered water straight from my refrigerator, because our fridge filter filters out chlorine. However, it comes out super cold. After about 7 days, I realized that I needed to warm my water up just a tad (only warm to a lukewarm temperature) before adding it to my flour mixture. The best way to think about it; when making hot chocolate, the powder mix dissolves in hot water much faster than it does in cold water. Think about this as a way to start activating the fermentation process quicker.
- Room temperature matters. Sourdough loves warmth! It grows, doubles, bubbles and becomes active when it is warm. It will happen while it’s slightly colder, but in general, it prefers warmer temperatures. Depending on where you store your sourdough starter on your counter it may need more heat (not hot, ever hot! just warm). A lot of people find success placing their glass jars on the countertop over their dishwasher, where the warmth radiates up through the counter. I on the other hand like to keep mine near the stove because that is always a warmer spot in my house.
- Allowing too much gas to escape. When I first started making my starter, I had covered the glass jar opening with a tea towel and secured it with a rubber band. After about 1 (one) week of my starter struggling to take off, I decided to change up the type of lid on my jar. I switched out the tea towel for a regular mason jar lid. To my surprise, this worked fantastic! The next morning, my sourdough starter was bubbly and active and begging to be used! I think what happened was that the tea towel was too porous and it allowed too many of the good gas bubbles to escape, rather than ferment my starter.
- Not feeding it enough flour or water. After so many days, I stopped measuring and just started eyeballing how much starter I removed each day and with how much flour and water I would add in. In the picture below, the jar on the left was fed the proper amount of flour and water, while the three jars on the right, were fed slightly under the amount of flour and water that it needed. *Pro Tip: always place a rubber band around the jar where the starter was mixed to, so you can see how much it rises.

While it may seem like a difficult process to get your starter to become active and bubbly, I assure you it is worth it! While it may take a couple days longer than someone else, you can find joy in knowing that your sourdough starter has been perfectly made from the yeast and bacteria in your own home!
Check out my post for How To Store & Keep Sourdough Starter Discard. I go into great detail about how to keep the discard and use it in other recipes rather than actually throw it away!
How To Tell When Your Starter Is Ready for Use
Knowing when your sourdough starter is ready to be baked with can be kind of a mystery. Only because not every time after being fed, will your starter become super bubbly and active. So active that it spills out over the top of the lid.
The best way to mark your starter to see if it has become active enough, is to mark your glass jar with a rubber band. Place a rubber band around the jar at the top of the sourdough mixture after being fed. Place jar in a warm space and ideally after 4-8 hours, the mixture will have doubled in size, which you’ll be able to tell because it will have risen above the rubber band.
Here’s a great visual to help you decide what stage your starter is at after 4-8 hours after being fed.

If by chance, the mixture has not quite doubled in size, but has risen some and active bubbles are seen on the top of the jar, you can still bake with this. Just note, that the starter may not yield as big of a rise/lift in your bread when baking. But trust me, it will still taste just as amazing! I’ve baked with my starter less than doubled many times!
Once your starter is ready to be baked with, check out this post for How To Make Sourdough Bread for the First Time | Video Tutorial. I go into great detail how to make your very first loaf of sourdough…as I made it my very first time as well!


Stephanie—home cook, DIY addict, seasonal decor fanatic, and proud chicken wrangler living in a Victorian house that’s always a project. Whether I’m cooking with garden-fresh ingredients, herding mischievous chickens, or tackling another DIY, I’m here to share the fun (and chaos).


