DIY Wooden Slice Ornaments
Giving gifts doesn’t have to be costly. These DIY Wooden Slice Ornaments are practically free and take only a few minutes to make!

I truly love decorating for Christmas. Usually every room in my house has some sort of Christmas decor – despite me saying every year I’m going to take it easy! Those will be “mom’s famous last words” one day! haha. While I love decorating every room, I love making items to fill each space. Handmade items have so much more meaning to them than any item you could buy in a store…even if it’s less pretty! For example, my main half bathroom has lots of handmade Christmas items in that I truly cherish!
I’m sure you’ve all been seeing wooden slice ornaments lately with the huge farmhouse crazy…so I had to join the bandwagon! I made these wooden slice ornaments from a branch in my yard! My hubby had previously cut down a tree and stacked it in our wood pile, so I helped myself to a piece and got busy crafting. P.S. You can purchase wooden discs HERE and save yourself a whole heck of a lot of time!
Supplies

Let’s Make It Together!
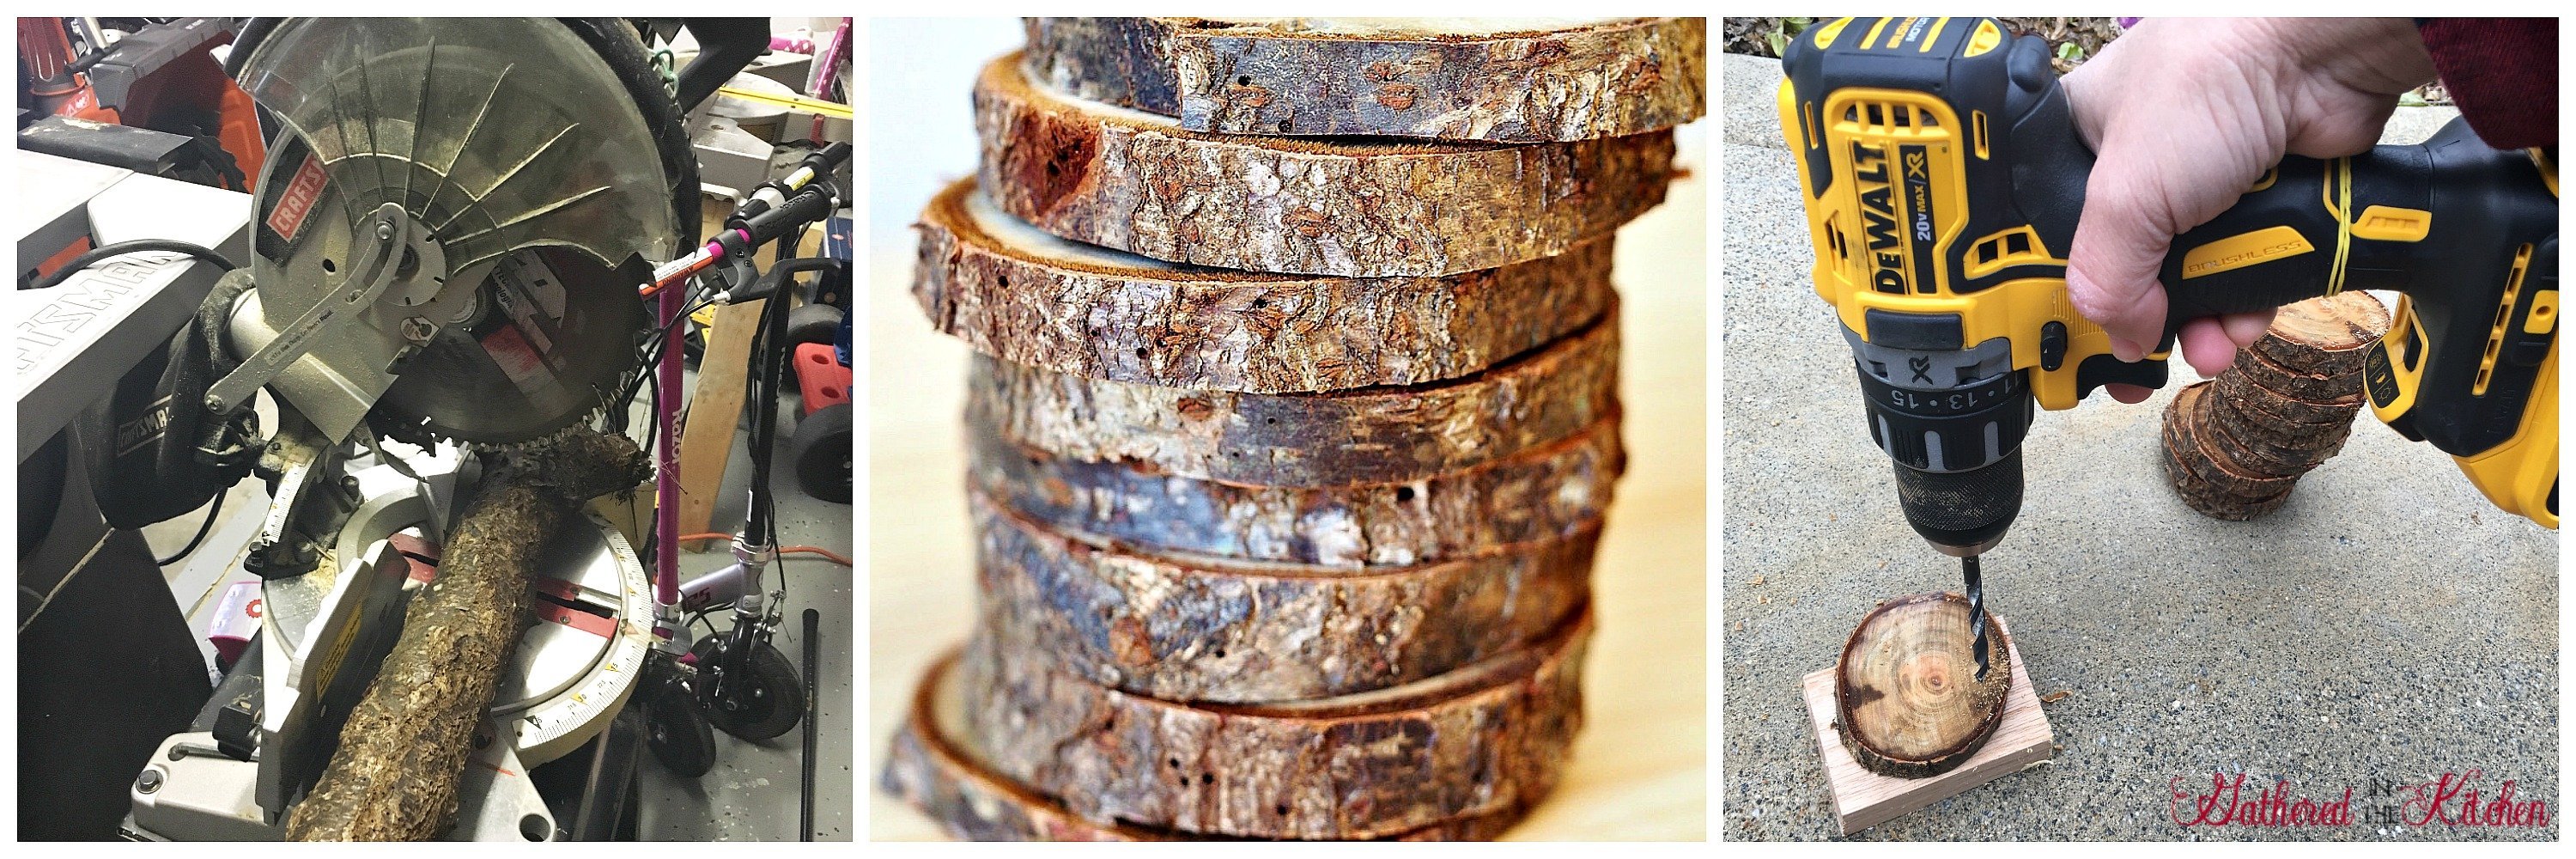
1. Cut disc slices
Using a miter saw cut your branch into 1/2″ thick discs
This post may contain affiliate links, which means I’ll receive a commission if you purchase through my link, at no extra cost to you. Please read full disclosure here.
2. Drill holes
Using an electric drill with 1/4′ drill bit, drill one hole in each disc

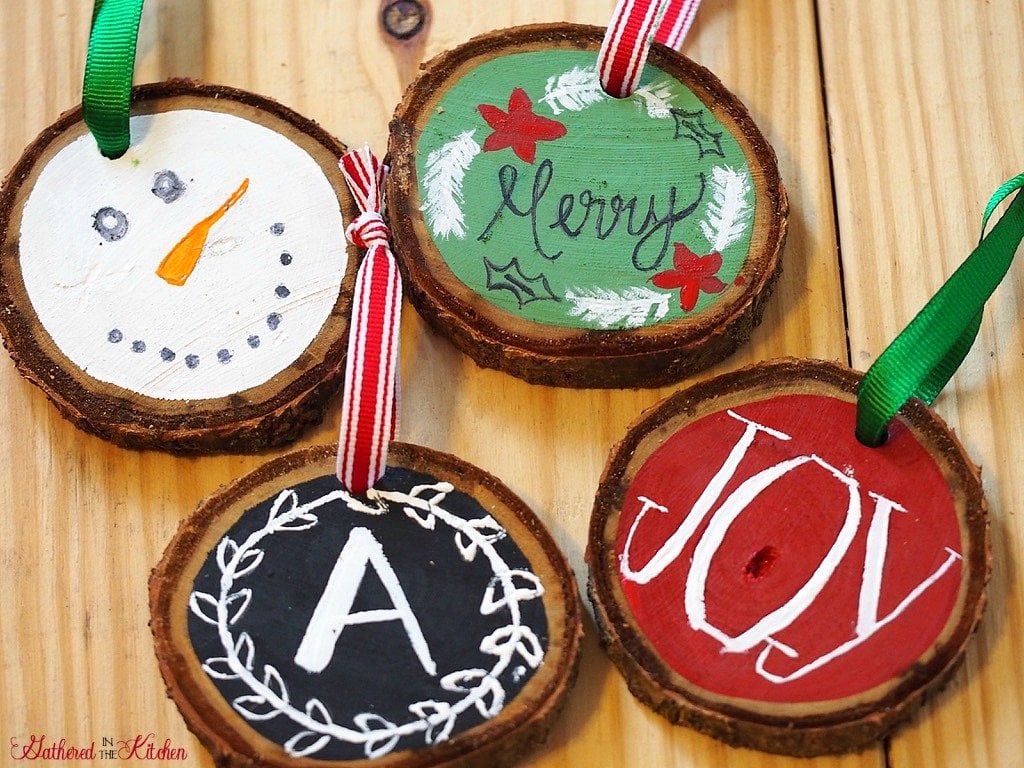
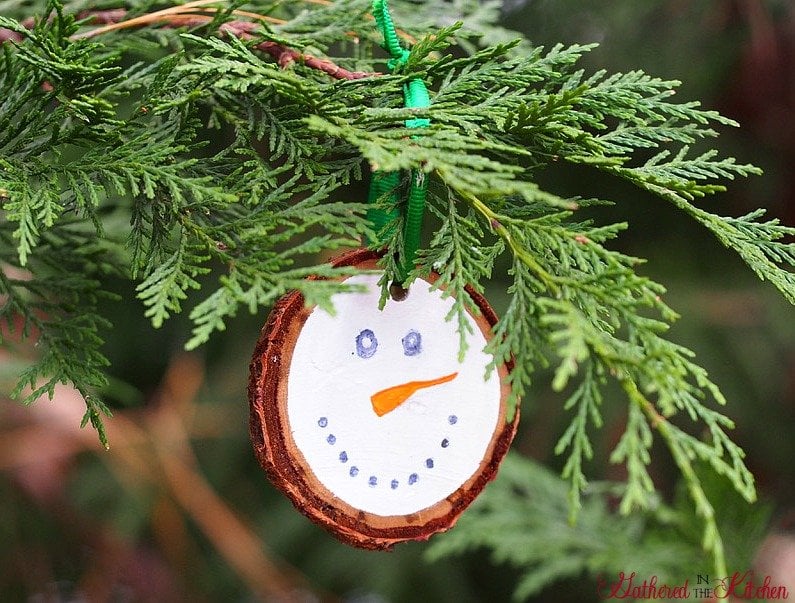
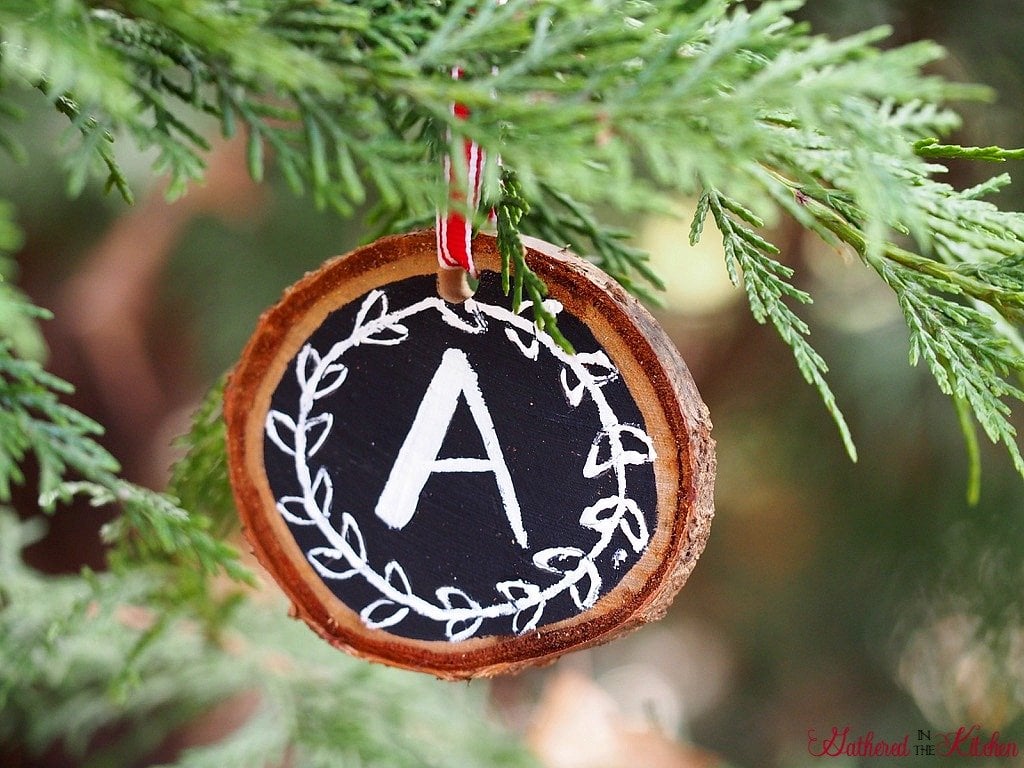
3. Pick out your paint colors.
I used my favorite paint, Dixie Belle Chalk Paint in Kudzu (green), Caviar (black) and Cotton (white). I didn’t have a red so I used an acrylic paint in red that I had on hand.

4. Outline with a pencil your paint marks

5. Paint!


6. Hang them or wrap them up and gift away!


I love the way they turned out…and I love even more that they were super cheap! These ornaments look so cute with Buffalo Plaid and our Farmhouse Wall Gallery as a backdrop!

More Ornaments and Gift Ideas:

Looking for more great DIY gift ideas? Check out thees great idea by my blogging friends!

More Fun Craft Projects!
How To Paint A Snowman with Dixie Belle Chalk Paint

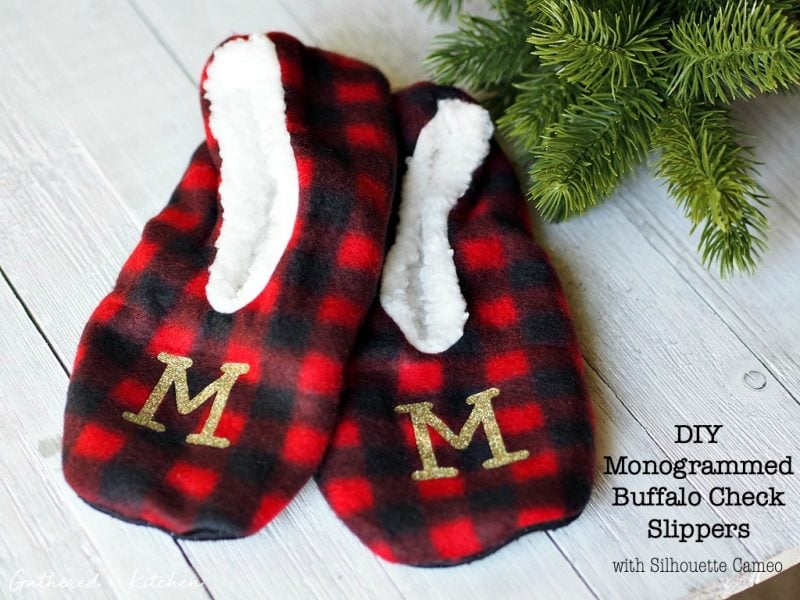
Monogrammed Slippers with Silhouette Cameo

Check out: Before & After Projects Using Dixie Belle Chalk Paint


Stephanie—home cook, DIY addict, seasonal decor fanatic, and proud chicken wrangler living in a Victorian house that’s always a project. Whether I’m cooking with garden-fresh ingredients, herding mischievous chickens, or tackling another DIY, I’m here to share the fun (and chaos).


Oh my goodness. Your ornaments are as cute as can be! I love that you had the wood in your yard! That makes it even more special!
I am OBSESSED with this!! We just got our tree two days ago and already I’m thinking of cutting it up! LOL Thank you for the inspiration!
I love that you made your own wood slices, it’s a cute DIY project from start to finish.
I love these! I like that you used wood from the yard and supplies that you had on hand. Very thrifty! And the hand drawn designs make them so personal.
I love these!
Love how cost-effective these are, and easy!
Your wood slice ornaments are so cute! I bet it’s fun painting the different designs 🙂
These turned out so cute. I can’t believe you painted them by hand! Amazing!
I have a bunch of old tree rings so I could totally make these! Such a cute idea!
Such a cute idea, I bet they would be cute with old Christmas Cards cut to fit the wood, and decoupage them, or just glue them and varnish over them. You could even burn the edges of cards to make them look old. I love things decoupaged on wood.
Hi Linda! What a great idea!!! I just may have to try creating this!!