Soft & Chewy Homemade Yeast Bagels (Why I Switched from Sourdough)
I’ve made sourdough bagels more times than I can count. And when they’re fresh out of the oven? Nothing beats them — chewy, flavorful, and absolutely delicious.
But if I’m being honest, that magic doesn’t last very long.
By the next day, those same sourdough bagels are often hard, dense, and just not very enjoyable to eat. I’ve tried reheating, toasting, even freezing them, but more often than not they end up sitting on the counter until no one wants them anymore — which usually means they go to waste. And that’s never my goal when I’m baking from scratch.
I wanted a bagel that tasted amazing and stayed soft enough to enjoy beyond the first few hours. Something practical for busy mornings, lunches, and leftovers — without sacrificing texture or flavor.
This post may contain affiliate links, which means I’ll receive a commission if you purchase through my link, at no extra cost to you. Please read full disclosure here.
When I came across this yeast bagel recipe from Little Village Homestead, I knew I had to give it a try. And let me tell you — they did not disappoint. These bagels are soft and tender on the inside, with just the right amount of crisp on the outside, and they stay that way far longer than any sourdough bagel I’ve made.
If you love homemade bagels but want a recipe that fits real life a little better, this one might just become your new favorite too.


Stephanie’s Project Rundown
Why You’ll Love It: These yeast bagels are soft, tender, and actually enjoyable to eat long after they’ve cooled. They keep that classic bagel texture without turning dense or hard like sourdough often does — which means less waste and more happy breakfasts. Project Time: About 2½–3 hours total, including rising time (most of it is hands-off) Skill Level: If you’ve ever made bread dough before, you can absolutely make these Pro Tips: Don’t over-flour the dough — softer dough = softer bagels*The quick boil is key for that classic bagel texture
*Avoid overbaking so they stay tender inside
*These store and reheat much better than sourdough bagels Would I Make This Again? Absolutely!! These have become my go-to bagel recipe for everyday life — especially for busy mornings, lunches, and make-ahead baking
xoxo Stephanie
Why Yeast Bagels Work Better Than Sourdough (For Everyday Baking)
As much as I love sourdough, yeast bagels are simply more forgiving and practical for everyday life. The yeast creates a lighter, softer crumb, which means these bagels stay tender longer — even after they’ve completely cooled.
These yeast bagels still have that classic bagel texture, but without the dense chew and rapid firming that often comes with sourdough.
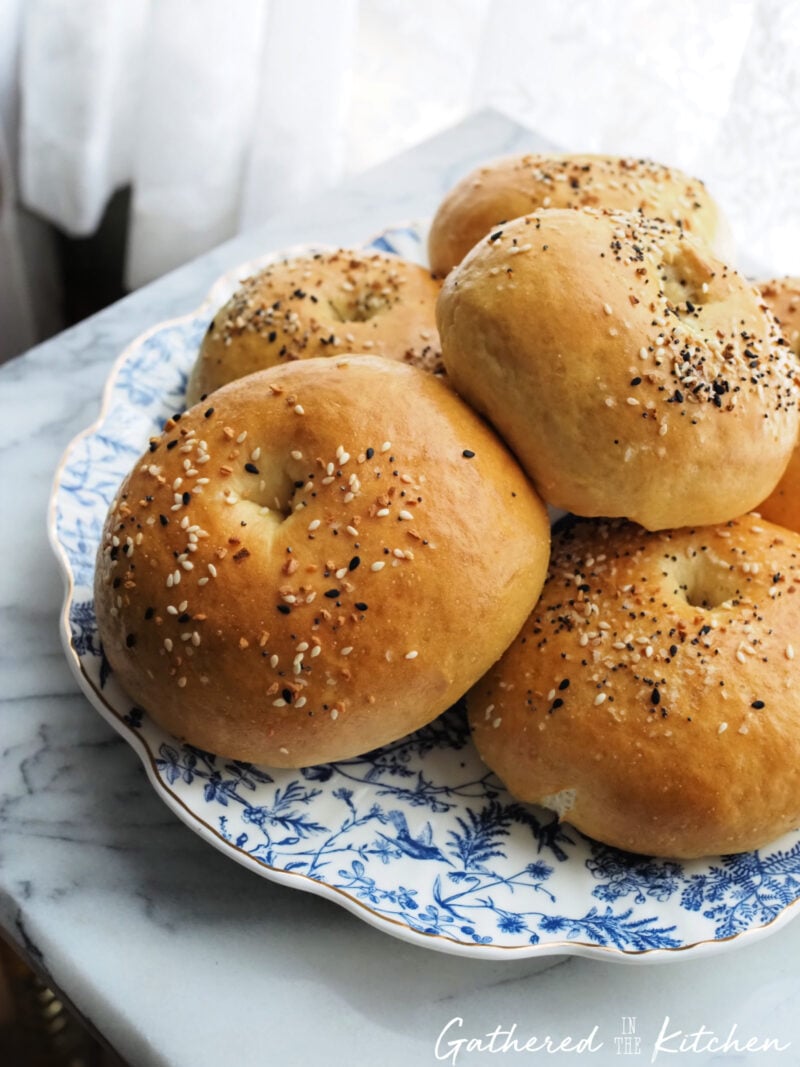
What Makes These Bagels So Good
The texture is really what sets these apart.
- Soft and tender on the inside
- Lightly crisp on the outside
- Chewy, but not tough
- Still delicious hours — and even days — later
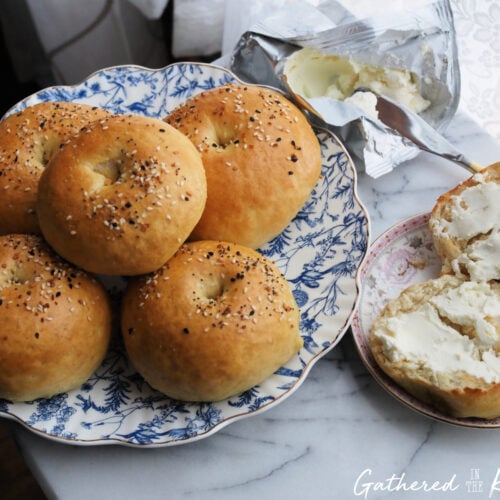
They’re perfect plain, toasted, or topped with cream cheese, butter, or your favorite spreads. And unlike sourdough bagels, they don’t require special timing or maintenance, which makes them ideal for everyday baking.
Ingredients and Supplies You’ll Need
You don’t need anything fancy to make these homemade yeast bagels — just a handful of simple, basic ingredients you probably already have in your pantry. A stand mixer with a dough hook makes the process easier, but you can absolutely make these by hand if you prefer.
How to Make Homemade Yeast Bagels
Making bagels from scratch might sound intimidating, but the process is actually very approachable.
This first step is all about setting yourself up for success. Blooming the yeast ensures it’s active and ready to work, and kneading the dough until it’s smooth and elastic helps create that soft, chewy texture we’re after. If your yeast looks foamy and your dough feels stretchy instead of sticky, you’re right on track.

After kneading, the dough is formed into a ball and allowed to rise. During this time, the yeast ferments and the dough increases in volume. Once risen, the dough is divided and shaped into smooth portions in preparation for forming the bagels.

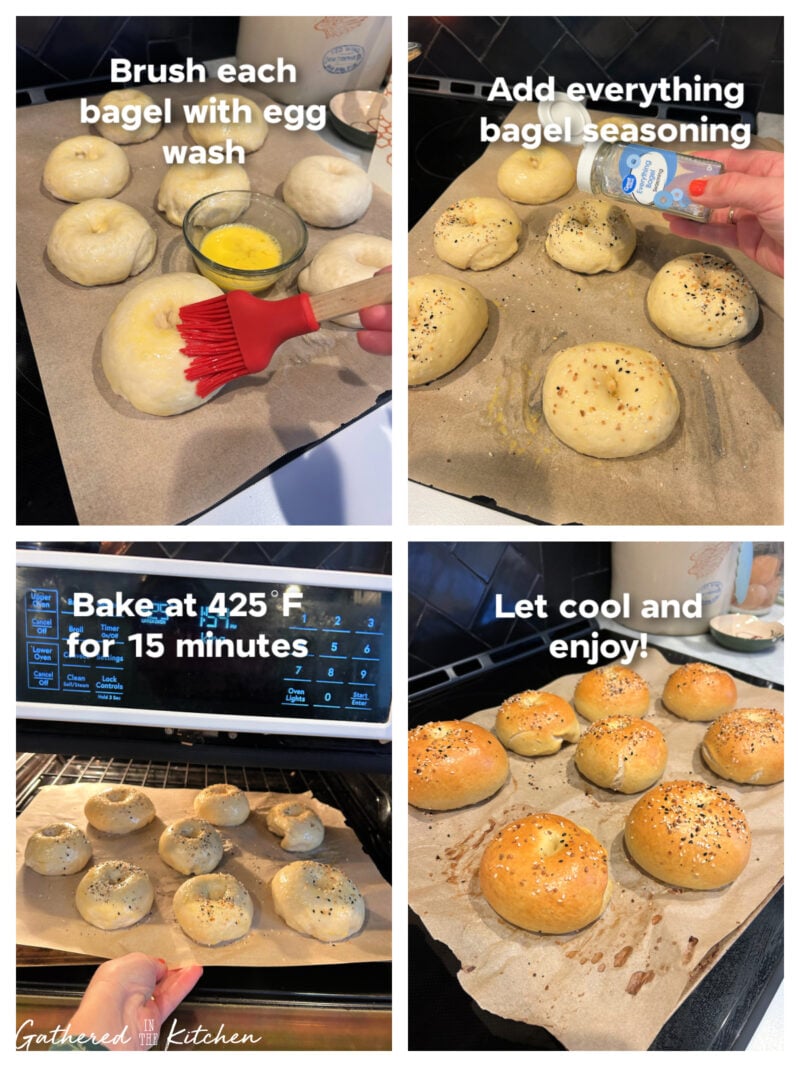
This is the step that gives bagels their signature texture. Boiling the dough briefly sets the outside, which helps create that classic chewy interior and golden crust once baked. It’s quick, simple, and makes all the difference.

A quick egg wash adds shine and helps the seasoning stick, while baking at a high temperature gives the bagels their beautiful color. Let them cool slightly before slicing — the inside will finish setting as they rest.
Tips for Soft, Chewy Bagels Every Time
- Don’t over-flour the dough — it should be soft, not stiff
- Boil the bagels just long enough to set the exterior
- Avoid overbaking, which can dry them out
- Let them cool fully before storing
A little attention to these details goes a long way in keeping your bagels tender and delicious.

How to Store Homemade Yeast Bagels
I stored mine at room temperature in a disposable brown paper lunch bag. This helps the bagels breathe while still protecting them, keeping the outside from getting soggy and the inside soft. They stayed fresh and enjoyable for a couple of days — perfect for grabbing throughout the week.

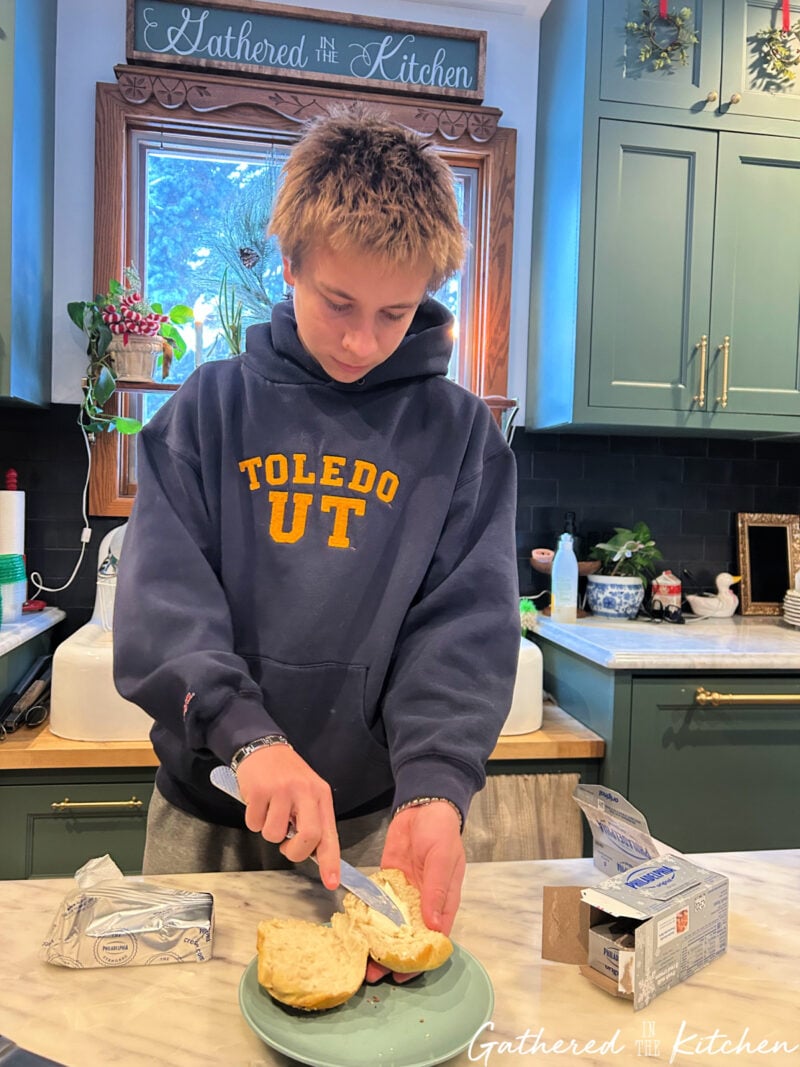
However, I only had a few to store because my son couldn’t resist these freshly baked bagels!! They were absolutely delicious!
More Sourdough Recipes from Gathered In The Kitchen
If you love baking with sourdough, here are a few more of my favorite sourdough recipes from Gathered In The Kitchen:
Printable Recipe Card
Soft & Chewy Homemade Yeast Bagels
Ingredients
- 1 1/4 c warm water
- 1 tbs dried active yeast
- 3 tbs white granulated sugar
- 2 tbs vegetable oil
- 4 c unbleached all purpose flour
- 1 tsp kosher salt
Instructions
- Bloom the yeast. In the bowl of a stand mixer, combine the warm water and sugar. Sprinkle the yeast over the top and let sit until foamy (about 5–10 minutes)
- Mix the dough. Add the remaining ingredients to the bowl and mix until a shaggy dough forms and most of the flour is incorporated
- Knead. Knead with a dough hook until the dough is smooth and elastic (about 6–8 minutes)
- First rise. Form the dough into a ball, place it in a lightly greased bowl, cover, and let rise until doubled in size (about 60–90 minutes)
- Divide and shape. Turn the dough out onto a clean surface and divide into equal portions. Roll each portion into a smooth ball
- Form bagels. Poke a hole through the center of each dough ball and gently stretch to form a bagel shape. Place on a parchment-lined baking sheet and cover while you prepare the water bath
- Prepare the water bath. Bring a large pot of water to a gentle simmer (not a rolling boil) and carefully add the baking soda. Working in batches, gently lower 2–3 bagels into the hot water. Cook for 45 seconds per side, then remove with a slotted spoon and return to the baking sheet
- Add egg wash and toppings. Brush each water-bathed bagel with egg wash, then sprinkle with everything bagel seasoning (or your preferred topping)
- Bake. Bake at 475°F for 15 minutes, or until golden brown
- Cool. Let bagels cool on the pan for a few minutes, then transfer to a wire rack to cool before slicing
Nutrition


Stephanie—home cook, DIY addict, seasonal decor fanatic, and proud chicken wrangler living in a Victorian house that’s always a project. Whether I’m cooking with garden-fresh ingredients, herding mischievous chickens, or tackling another DIY, I’m here to share the fun (and chaos).


