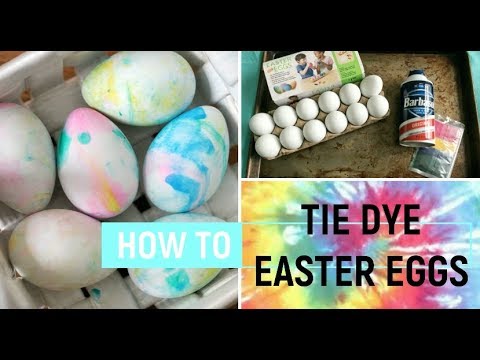
How To Make Tie-Dye Shaving Cream Easter Eggs
How to tie dye Easter eggs step by step video tutorial using shaving cream, eggs and food coloring.

I’ve always loved dying Easter eggs, ever since I was a little girl. I have so many fun memories trying different decorating tricks with my siblings from over the years. I’ve continued the tradition with my kids and we have fun dying our eggs every Easter. However, to be totally truthful, I’m not a big fan of hard boiled eggs so if my hubby doesn’t eat them, they get thrown away – I know, shame on us.
As luck would have it, however, one day I was browsing the Easter isles at Walmart and found these amazing plaster-like eggs! They are artificial and can be dyed colors!! I bought 4 packages of 1 dozen eggs and knew immediately I wanted to make them tie-dyed with shaving cream.
I have since made several “batches” of tie-dyed eggs with shaving cream – at my son’s preschool and once with a playdate at our house. They really are that much fun to make, just like these He Is Risen Easter Preschool craft! or even this fluffy slime!
This post may contain affiliate links, which means I’ll receive a commission if you purchase through my link, at no extra cost to you. Please read full disclosure here.
Let’s Make them Together!
This post contains affiliate links. See my disclosure here.
What You Need:
Easter eggs like these or hard boiled eggs
Dye or food coloring dye
Wooden skewer or knife

- Spray shaving cream all over a baking sheet

2. Using a spatula, spread the shaving cream evenly over the baking sheet

3. Carefully sprinkle food coloring all over the shaving cream

4. Use a wooden skewer and gently run it through the colors like so

5. Now the fun can begin!! Grab an egg and start rolling it throughout the shaving cream until it is completely covered.


6. Set aside and let the eggs rest while covered in the shaving cream for about 10 minutes. Using a baby wipe, wipe off the excess shaving cream and see the beautiful colors emerge!


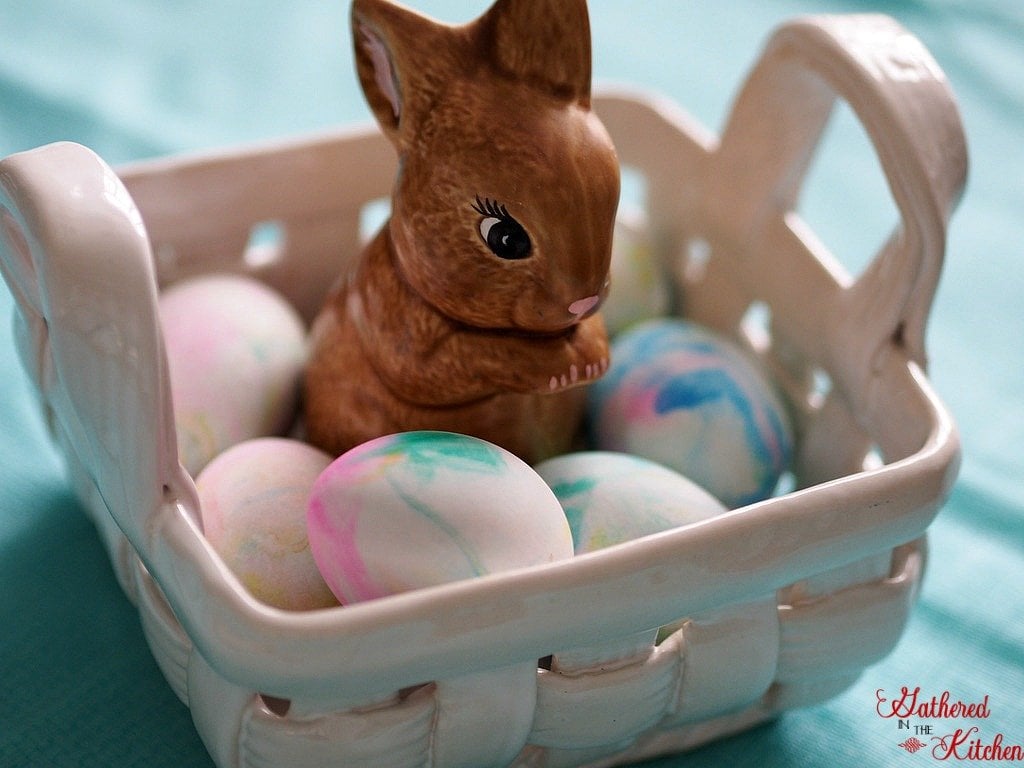 I love that the eggs can be kept from year to year. I placed the ones my son made in a ceramic basket with an adorable little handmade ceramic bunny that I bought at my favorite thrift store 🙂

Be sure to check out these other great Easter projects and recipes!
Here’s The Video Tutorial!
More Great Easter Ideas!
- Shaving Cream Tie Dyed Easter Eggs
- He Is Risen Preschool Craft
- Happy Easter Printable Tag
- DIY Easter Projects
- DIY Easter Baskets & Easter Shirts
- Easter Basket Liner Tutorial
- Easter Gifts for Teachers & Class + Free Printable
Easter Recipes!
- Crock Pot Holiday Ham
- Crock Pot Sweet Potato Soufflé
- Strawberry Pretzel Jello
- Celebration Salad
- Katie’s Goat Cheese Scalloped Potatoes
- Easter Sugar Cookies
- Easter Sugar Cookies with Carrot Decorations


Stephanie—home cook, DIY addict, seasonal decor fanatic, and proud chicken wrangler living in a Victorian house that’s always a project. Whether I’m cooking with garden-fresh ingredients, herding mischievous chickens, or tackling another DIY, I’m here to share the fun (and chaos).


You can use cool whip instead of shaving cream to do this also..