10-Minute DIY Wooden Garden Flag Holder with Scrap Wood
This DIY garden flag holder is a simple wooden garden flag stand made from a 4×4 post anchored in the ground, with a decorative top and a flag bracket on the side. It’s sturdy, doesn’t wobble like metal stands, and it keeps your garden flag display looking polished year-round.

If you’re tired of flimsy metal garden flag stands tipping over, getting in the way of the sidewalk, or being a total pain when it’s time to shovel… this DIY wooden garden flag holder is for you.
I built this wooden garden flag holder from scrap wood so it could be a permanent fixture that stays put (even in wind), looks more high-end than a metal stand, and still takes only about 10 minutes to put together. It’s a super beginner-friendly woodworking project, and you can customize it for any season.
If you’re in the mood to make the flag too, I’ve shared lots of DIY garden flag ideas over the years — you can browse all of my garden flag tutorials and inspiration here.
This post may contain affiliate links, which means I’ll receive a commission if you purchase through my link, at no extra cost to you. Please read full disclosure here.
Supplies Needed for a DIY Wooden Garden Flag Holder
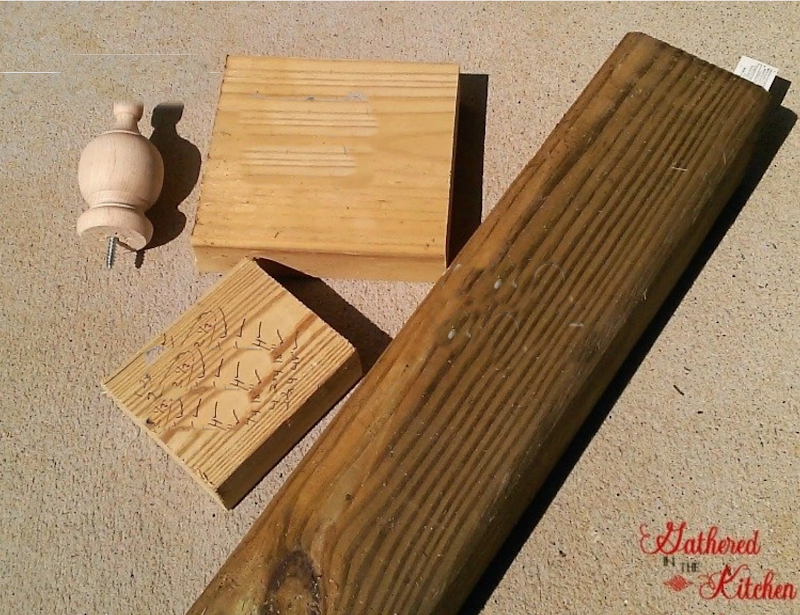
For most of this wooden flag holder, I used scrap pieces of wood I had laying around the garage.
- 1 – 4×4 – I used a 4×4 pressure treated post, which is great because I anchored it into the ground. Treated wood is the type of wood you use for exterior and ground projects
- 1 – 2×4 – this was a scrap piece of wood
- 1 – 2×6 – another scrap piece of wood
- 1 – craft finial – I purchased these at Lowe’s in the lumber section. However, I’ve had a hard time finding them since, so Amazon is your best bet
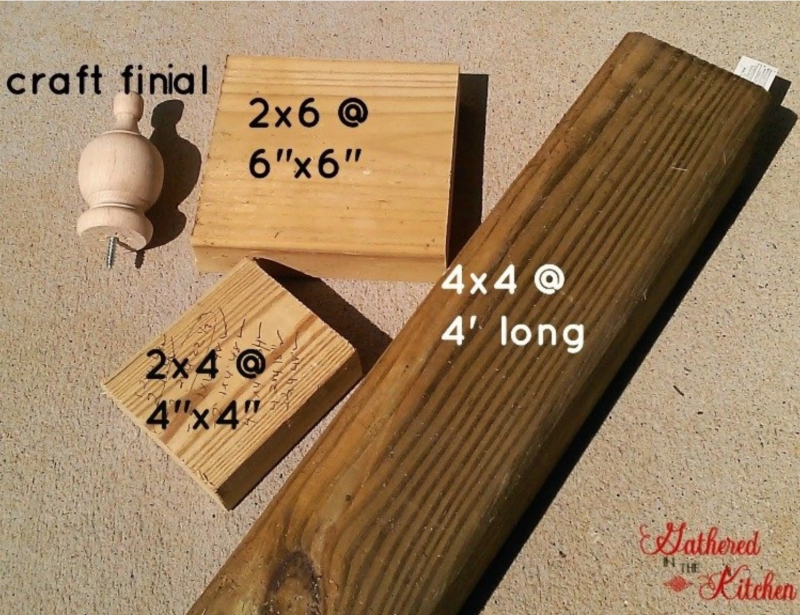
DIY Garden Flag Holder Cut List (Measurements Included)
In the image below, I show the sizes I cut each piece of wood. If I hadn’t of used a scrap piece of 4×4 that was already cut to 4 feet in length, I would have kept it longer (around 5-6 feet) to allow for the distance I needed to bury it into the ground for anchoring.
- 1 – 2×6 cut to 6 inches
- 1 – 4×4 cut to 4 feet
- 1 – 2×4 cut to 4 inches
- 1 – craft finial
How to Make a DIY Garden Flag Holder (Step-by-Step)
- Using a power drill and wood screws (preferably self tapping screws), screw the 6×6 to the top of the 4×4 post
- Using a power drill (my drill of choice) and wood screws, screw the 4×4 to the top of the 6×6
- Using a drill bit drill a hole in the top of the 4×4 according to the size of the screw in your finial
- Twist in craft finial
- Stain or paint – I stained mine using Minwax Dark Walnut
- Attach flag bracket (I bought THIS ONE from Amazon)
- Using a post hole digger or a shovel dig a hole deep enough to anchor the post, fill in around and hang your favorite garden flag!

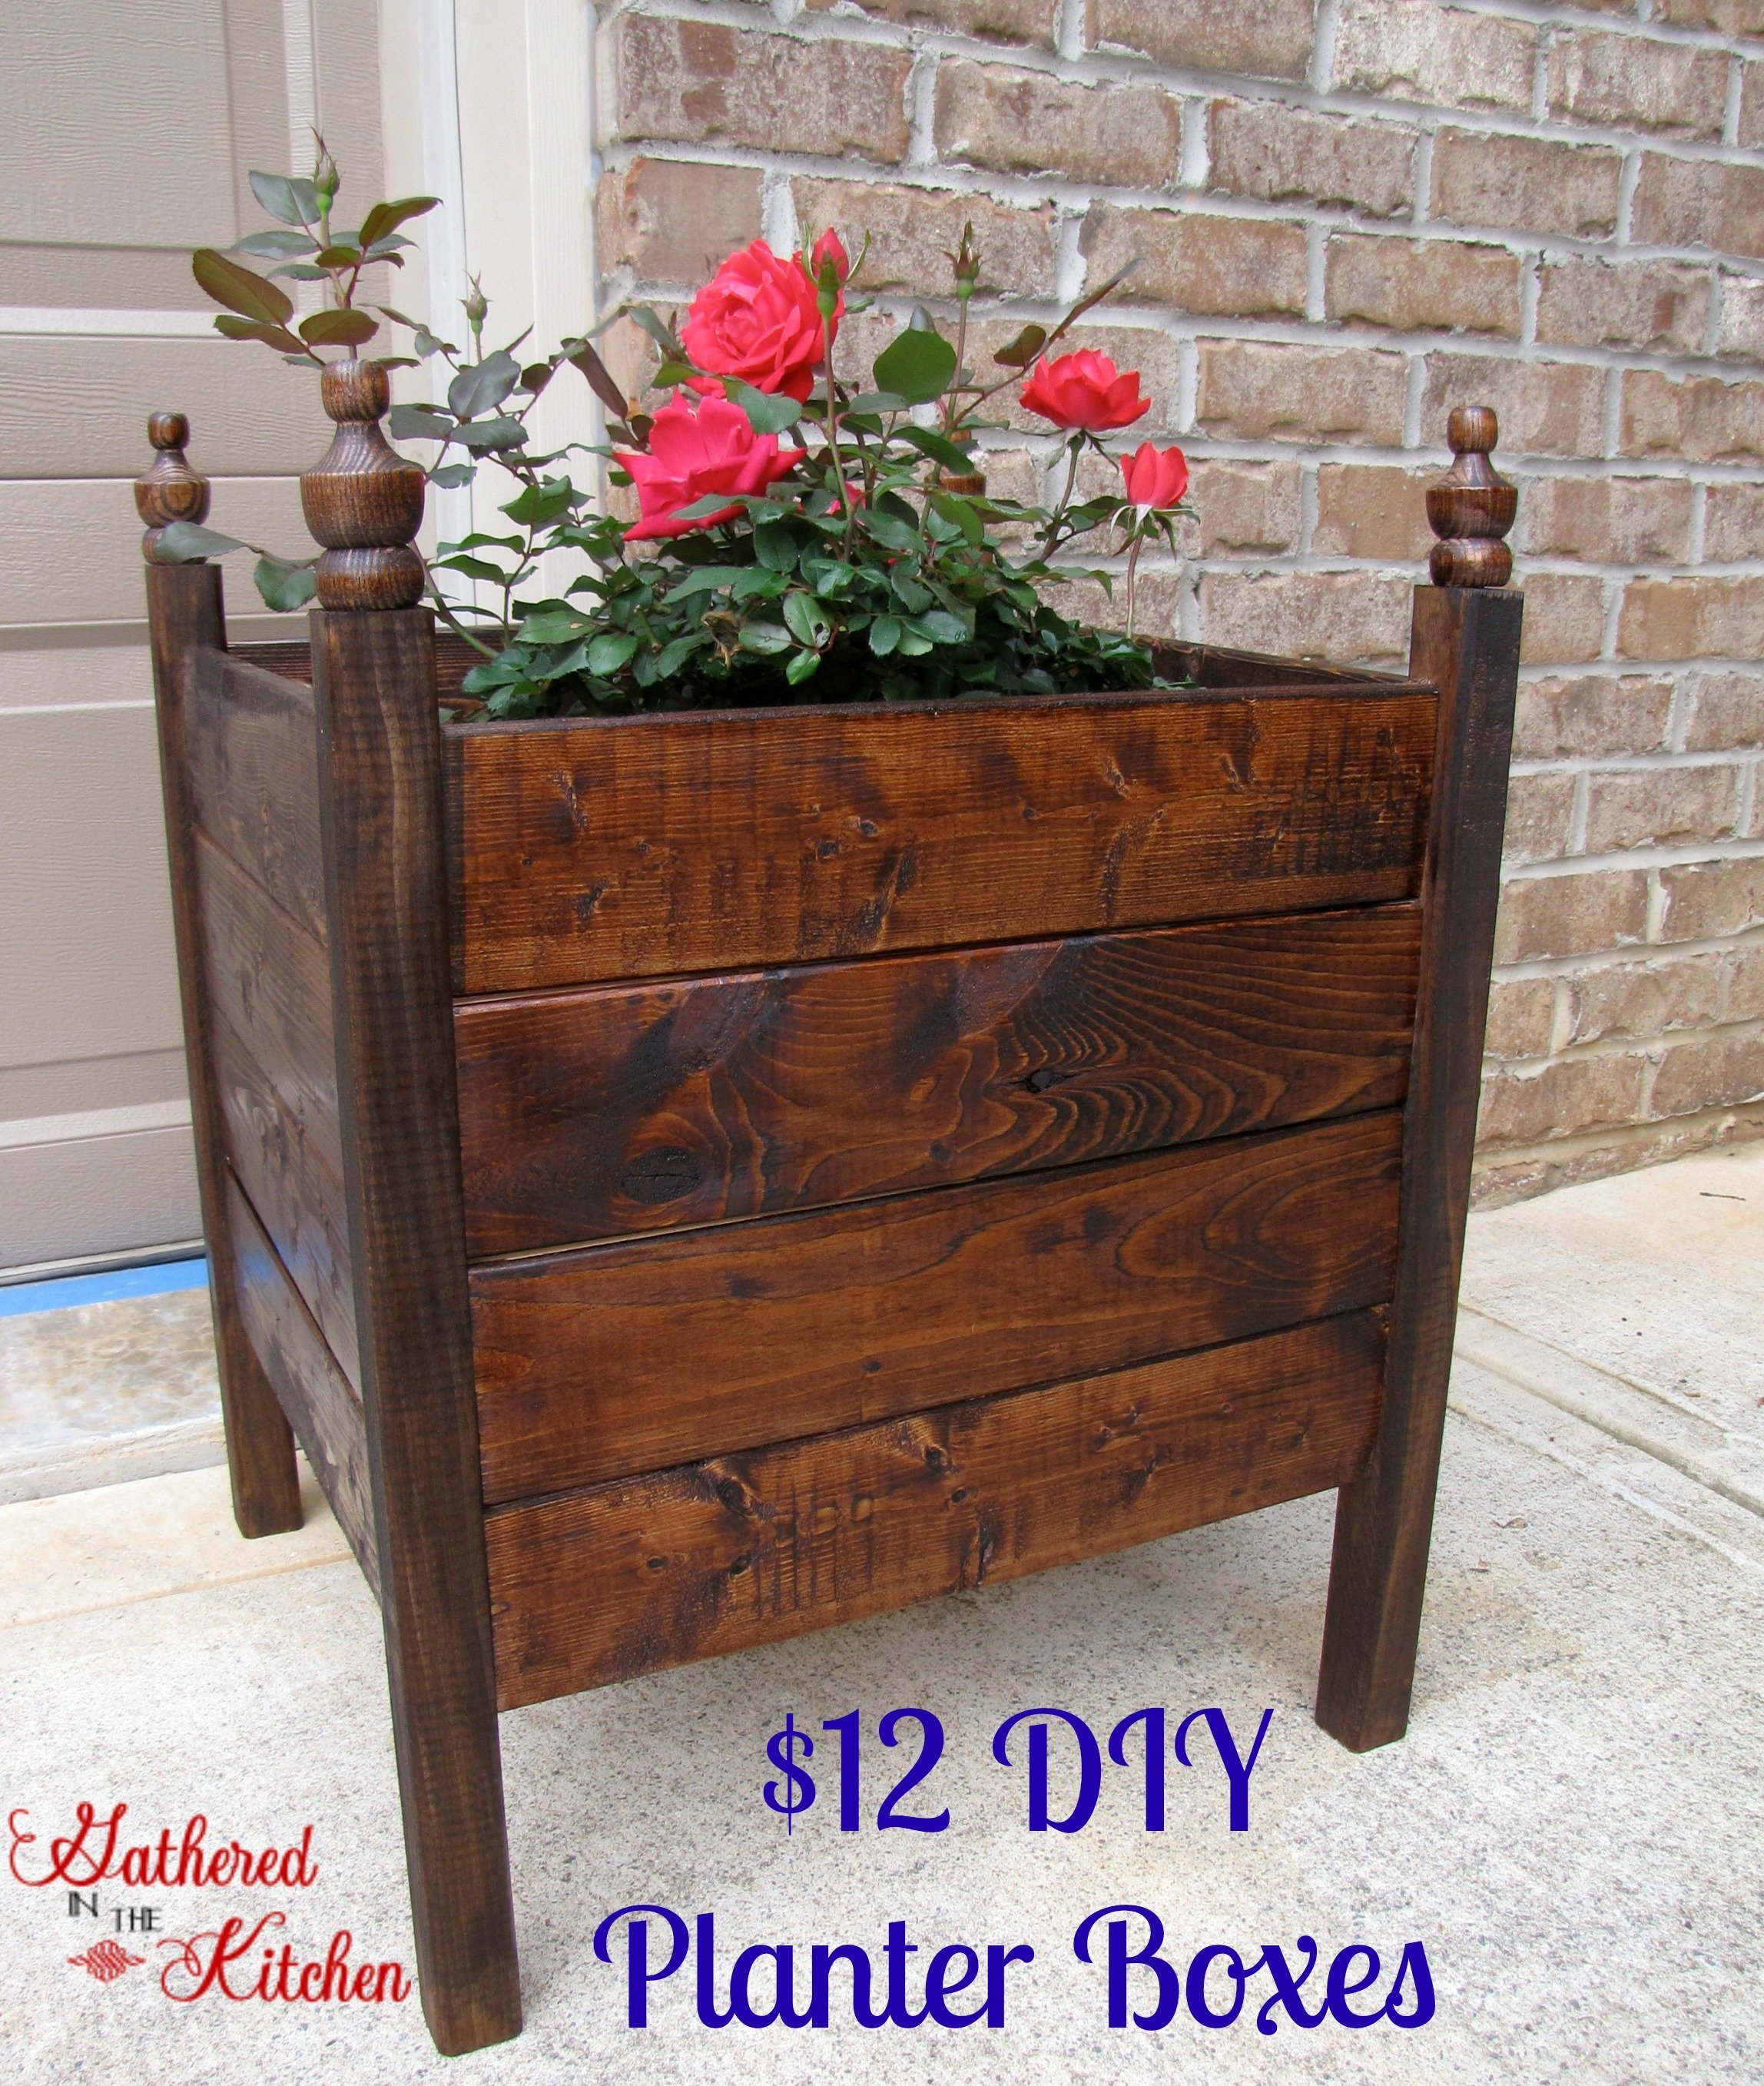
I love the way it turned out!! My kids posed for pictures by it for their first day of school!
My flag holder was inspired by a planter post that the girls at Shanty-2-Chic created.


More Easy Builds!
Here are a few other Shanty inspired projects that I’ve made:
01 | $12 DIY Planter Boxes
02 | Hook Board/Shelf


Stephanie—home cook, DIY addict, seasonal decor fanatic, and proud chicken wrangler living in a Victorian house that’s always a project. Whether I’m cooking with garden-fresh ingredients, herding mischievous chickens, or tackling another DIY, I’m here to share the fun (and chaos).


6 Comments