Fresh Jalapeño Cheddar Sourdough Bread with Grated Cheese
This jalapeño cheddar sourdough is one of those loaves that looks impressive but is actually very easy to make, even if you’re newer to sourdough baking. Below, I’ll walk you through the entire process step by step, showing exactly when and how to add the jalapeños and cheese, what to look for during fermentation, and how to handle the dough from start to finish.
Recipe Inspiration
After a beautiful wedding weekend in Point Reyes, California, we wandered into a local bakery and grabbed a loaf of jalapeño cheddar sourdough. It was delicious, but honestly, tt was so greasy that the bag was soaked.
I knew I wanted to recreate those flavors at home, but without the oily mess and with a bit more control over the heat. It can be tricky to add fresh jalapeños without ending up with a gummy center, but this version turned out exactly right—light, spicy, and a huge hit with everyone in my house.

Stephanie’s Recipe Rundown
Why You’ll Love It: This jalapeño cheddar sourdough has bold flavor without being overpowering. The cheese melts right into the loaf, the jalapeños add just the right amount of heat! Time Needed: About 24 hours total, mostly hands-off time with a few short moments of active work. Skill Level: Beginner-friendly (as long as you have an active sourdough starter). Flavor & Texture: Crisp, golden crust with a soft, airy interior and pockets of melted cheddar and jalapeños throughout. Would I Make This Again? Absolutely. This is one of those loaves that disappears quickly and gets requested again.xoxo Stephanie
Start With an Active Sourdough Starter
Before you begin, make sure your sourdough starter is active and ready to bake. You’re looking for a starter that has doubled in size, looks light and airy, and is full of bubbles throughout. This tells you that the wild yeast in your starter is strong enough to properly ferment the dough.
This post may contain affiliate links, which means I’ll receive a commission if you purchase through my link, at no extra cost to you. Please read full disclosure here.
If your starter hasn’t peaked yet, it’s worth waiting. Starting with an active starter sets the foundation for good rise, flavor, and texture in the finished loaf. If you’re unsure whether your starter is ready, I walk through the signs in When Is My Sourdough Starter Ready To Use?

Mixing the Dough
After weighing the active sourdough starter, mix it with the remaining ingredients until a rough, shaggy dough forms. At this stage, the dough will not look smooth or elastic yet, and that’s exactly what you want. This initial mix is simply about bringing everything together before the dough rests and fermentation begins.
If you’re new to sourdough, I walk through the full base recipe step by step in How to Make Sourdough Bread for the First Time.

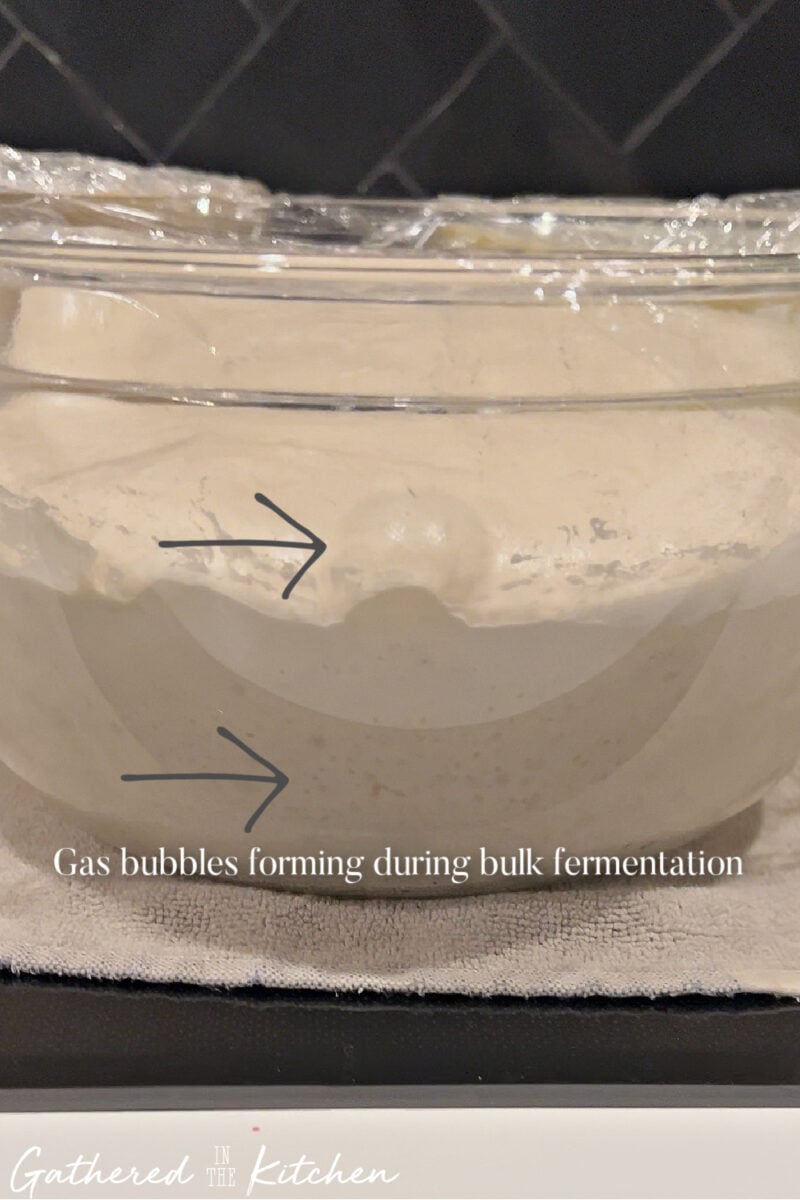
Bulk Fermentation and What to Look For
After mixing the dough, it will go through bulk fermentation. This is the first rise, where the dough rests at room temperature and begins to develop structure and flavor. During this time, the dough will slowly expand and become more elastic.
As the dough ferments, you’ll notice bubbles forming along the sides and bottom of the bowl. These gas bubbles are a sign that fermentation is happening and that the dough is building strength. This visual cue is often more reliable than watching the clock, especially for beginners.
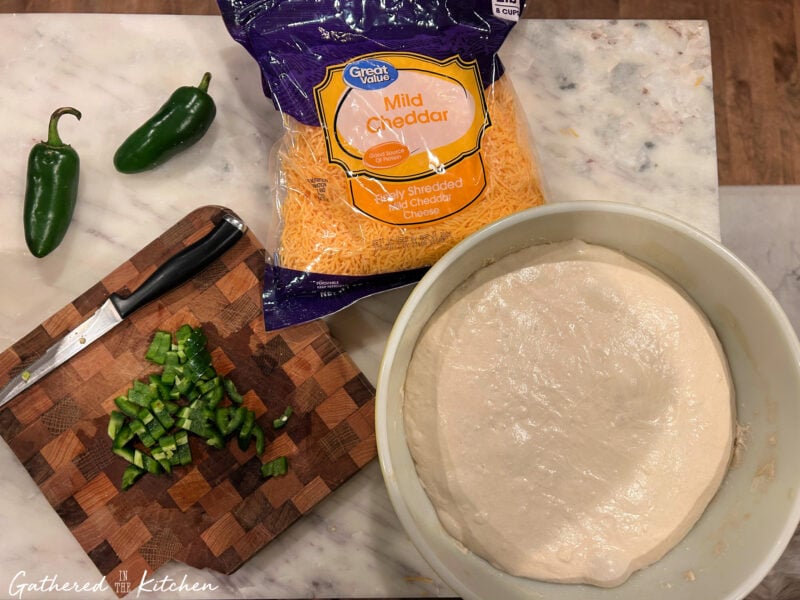
When to Add Jalapeños and Cheddar
The key to adding jalapeños and cheddar without weighing the dough down is timing. Inclusions are added after bulk fermentation, once the dough has developed enough strength to hold them.
Adding them too early can interfere with gluten development, while adding them too late can cause tearing. At this stage, the dough is strong, stretchy, and ready to handle extra ingredients without losing structure.
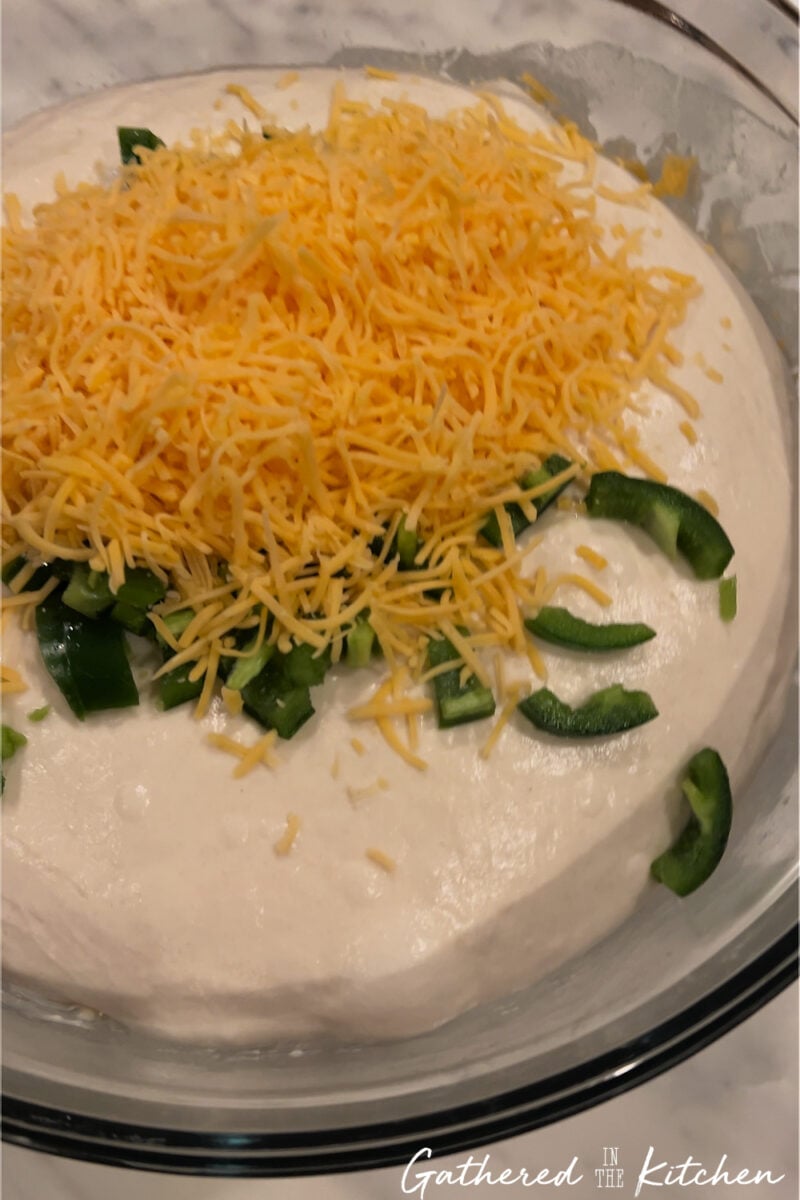
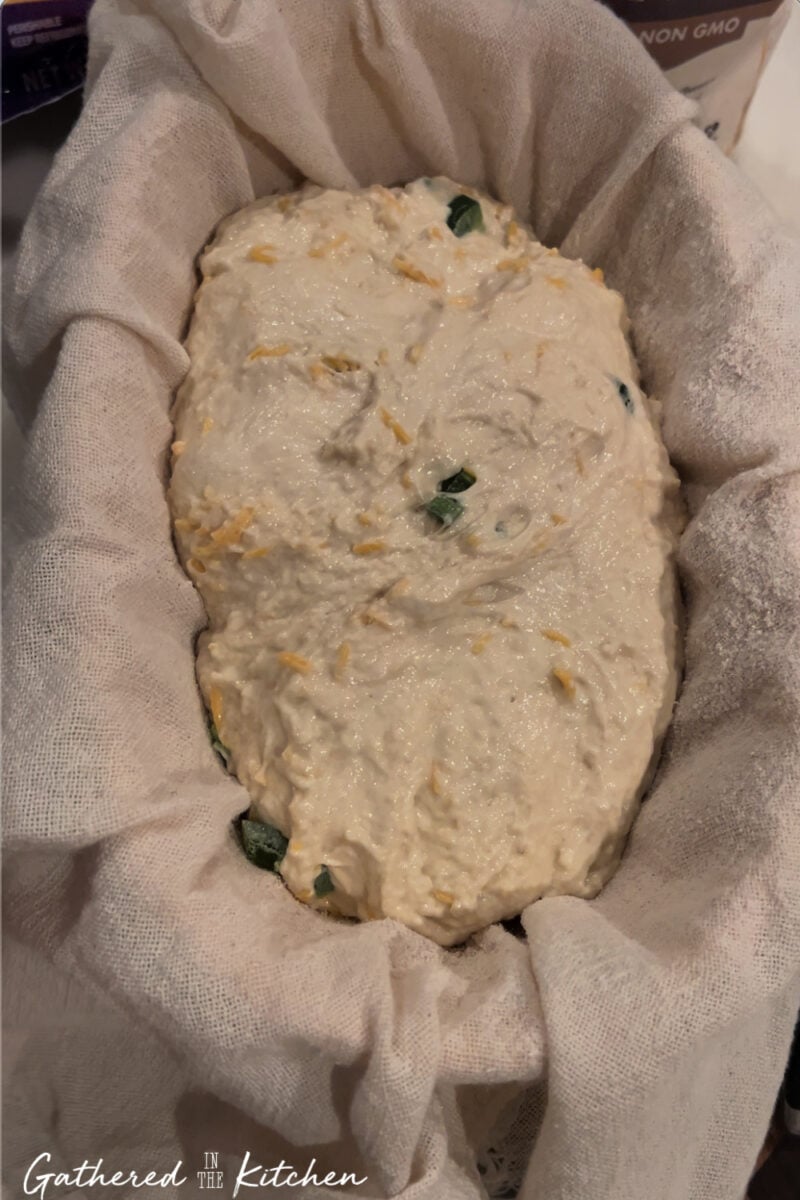
Folding In the Inclusions
To incorporate the jalapeños and cheese, gently stretch the dough and fold it over itself, layering the inclusions as you go. The dough should stretch easily without tearing, which is a good sign that the gluten is well developed.
Take your time here. The goal is even distribution, not perfection. A few exposed bits of cheese or jalapeño are completely fine and will bake up beautifully.

Shaping the Dough
Once the inclusions are folded in, shape the dough into a tight round or oval, depending on the shape of your banneton. Creating surface tension during shaping helps the loaf hold its form and rise upward instead of spreading out.
After shaping, place the dough seam-side up into a well-floured, cloth-lined banneton basket.
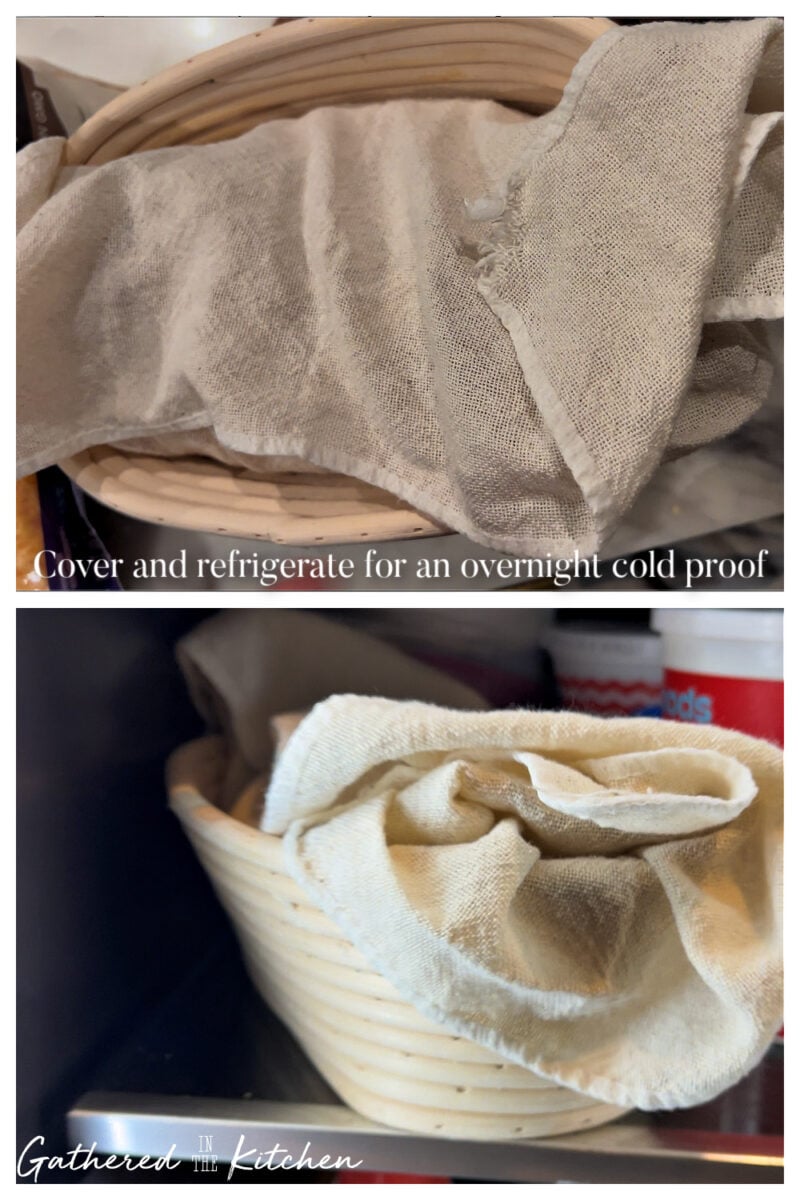
Cold Proofing in the Refrigerator
Cold proofing is the final rise, and it happens in the refrigerator. Cover the banneton loosely and refrigerate the dough overnight. This slow fermentation improves flavor, strengthens the dough, and makes scoring easier the next day.
Cold proofing is especially helpful for sourdough with inclusions, as it allows the dough to relax and set without overproofing. When you’re ready to bake, the dough can go straight from the refrigerator into a hot oven.
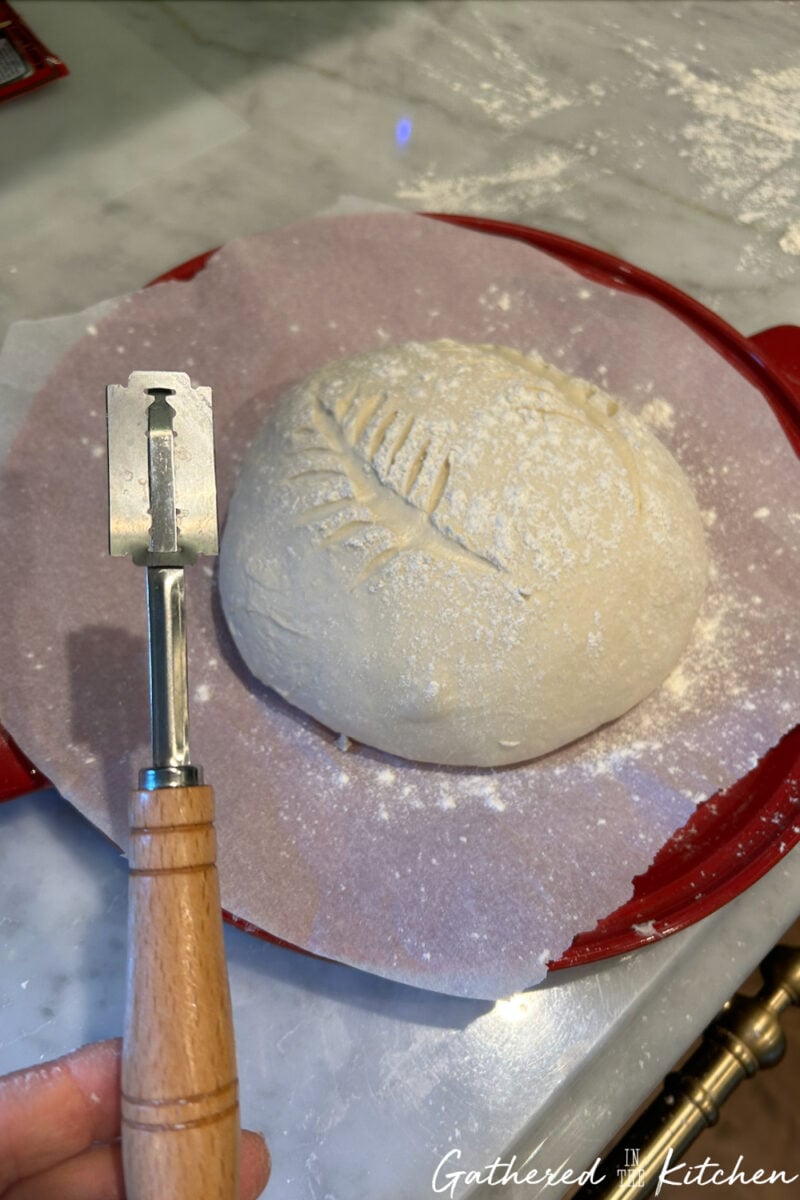
Scoring the Sourdough Before Baking
Just before baking, score the dough using a bread lame or a very sharp blade. Scoring gives the bread a controlled place to expand in the oven, which helps with oven spring and prevents the loaf from cracking unpredictably. Don’t overthink the design here — a simple slash works just as well as anything decorative, especially when you’re first getting started.
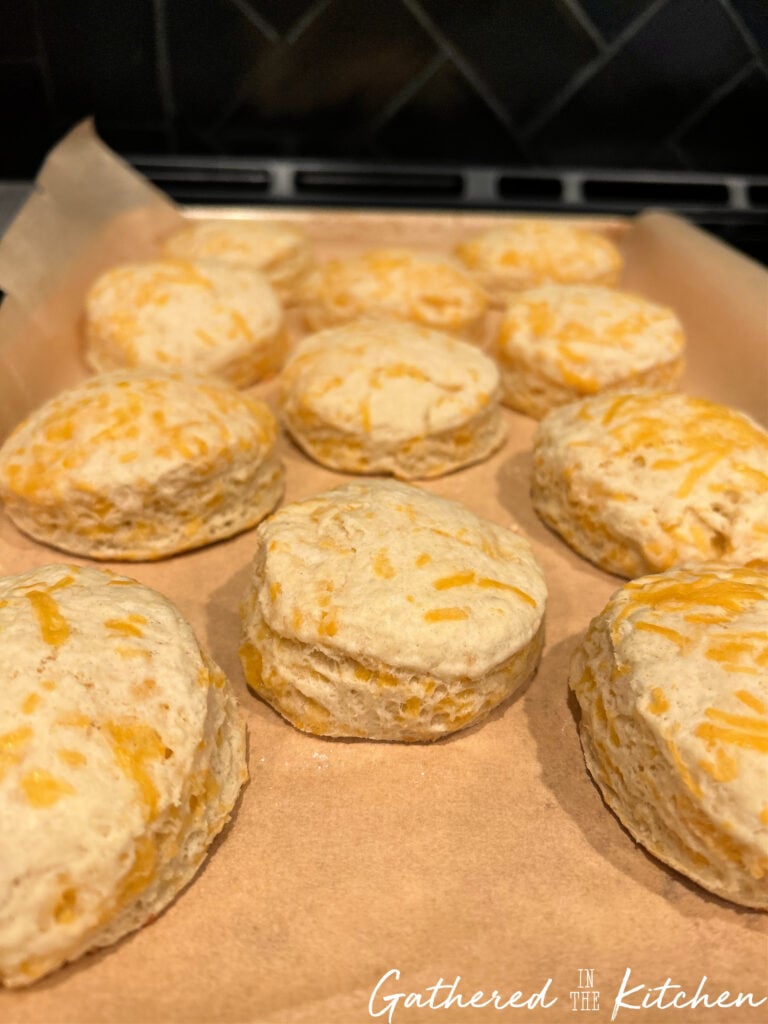
p.s. I realized after the fact that I forgot to photograph these steps on this jalapeño cheddar loaf, so the images shown here are from a different sourdough bake without inclusions. 🤦♀️ The scoring process is exactly the same either way.
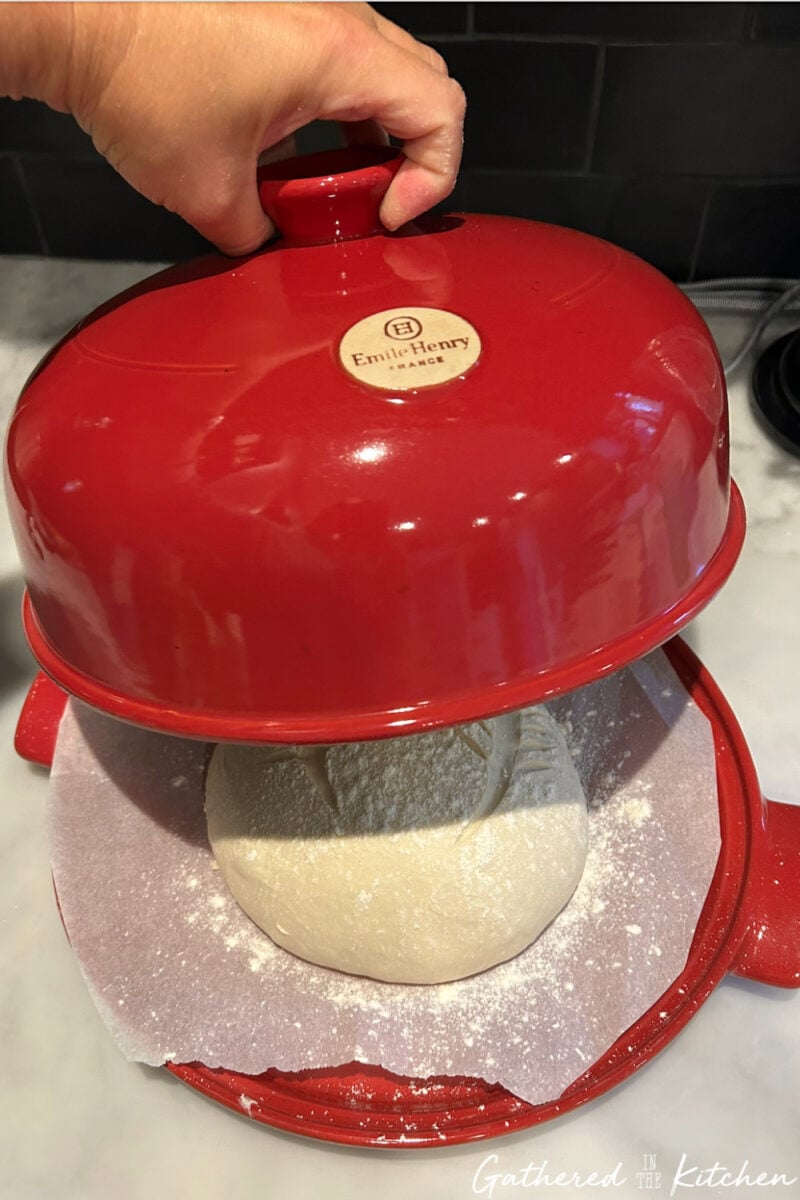
Baking Sourdough in a Bread Cloche or Dutch Oven
Baking sourdough in a bread cloche or Dutch oven creates a steamy environment that helps the loaf rise and form a beautiful crust. The lid traps moisture released from the dough during the first part of baking, which allows for good oven spring before the crust sets.
Whether you use a ceramic cloche or a cast iron Dutch oven, the process is the same. Bake the bread covered for the first portion of the bake, then remove the lid to allow the crust to brown and crisp. This method consistently produces sourdough loaves with great structure and a bakery-style finish, even at home.
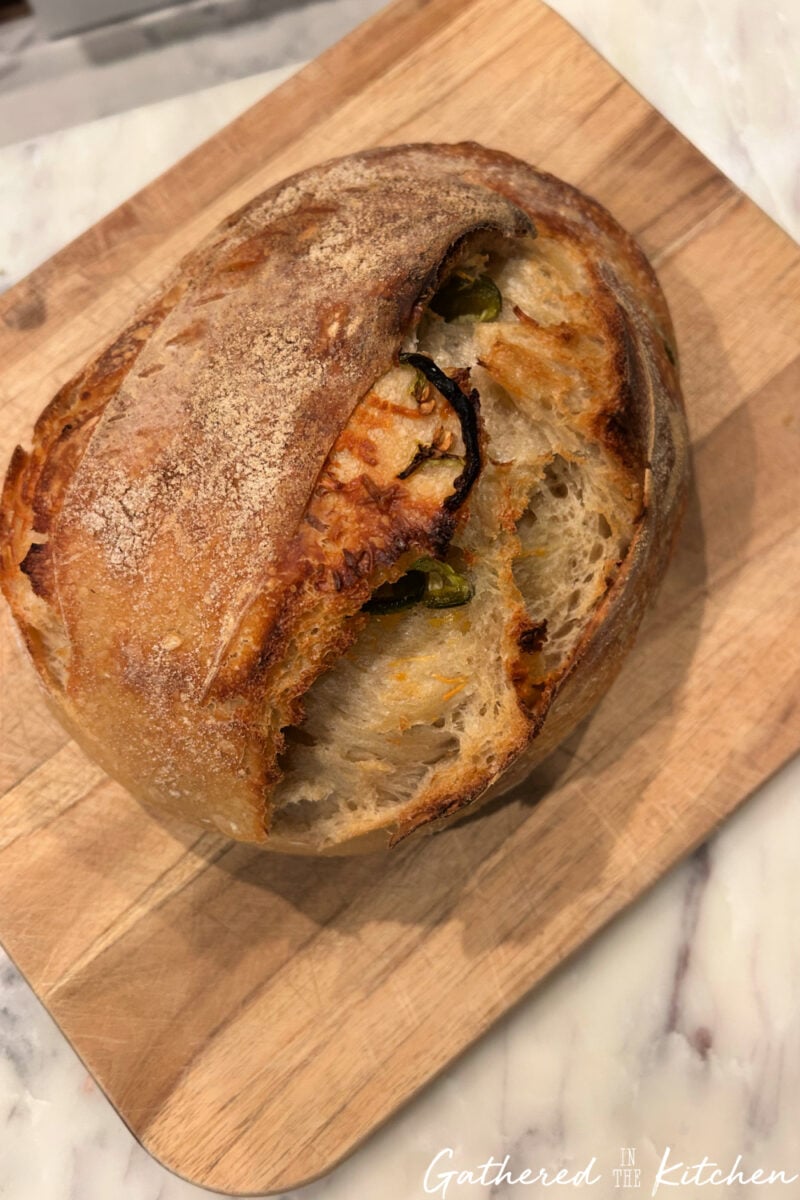
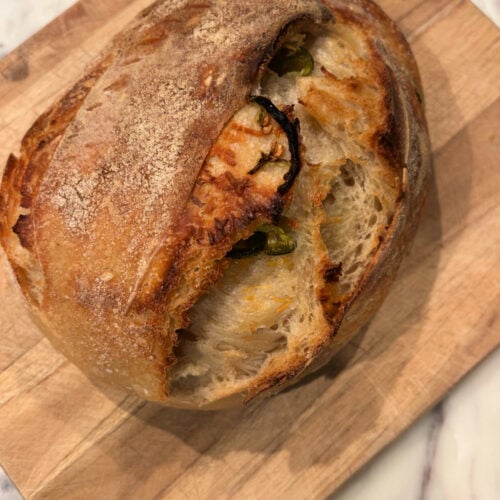
Cooling and Slicing Your Sourdough Loaf
When baked, this jalapeño cheddar sourdough has a crisp crust, a soft interior, and just the right balance of heat and cheese. Let the loaf cool completely before slicing, as cutting too soon can make the crumb gummy inside.
If you’re newer to sourdough, don’t overthink the process—focus on how the dough looks and feels at each step, and you’ll build confidence with every loaf, I promise. My very first loaf of sourdough bread looks way different from the loaves I bake now.
Printable Recipe Card
Jalapeño Cheddar Sourdough Bread
Equipment
- bread cloche or dutch oven
- lame or serrated knife
Ingredients
- 475 g all-purpose, unbleached flour
- 100 g sourdough starter active and bubbly
- 325 g water I used filtered refrigerator water
- 10 g salt I used course kosher salt
- 3 jalapeños deseeded and diced
- 1 c cheddar cheese shredded
Instructions
Feed the Sourdough Starter
- 4-12 hours before starting to make your dough, feed your sourdough starter (equal parts flour and water). Your starter should be active and bubbly before using
Prepare the Dough
- Combine water, active starter, salt, and flour with a wooden spoon in a large mixing bowl. Cover the bowl with plastic wrap to allow the dough to rest and the flour to hydrate
Stretch and Fold
- While the dough is still in the bowl, gently pull up on one side of the dough ball and stretch the dough until it is able to be pulled over itself. Fold down. Repeat on all sides of the dough ball – about 4 to 6 times. Cover again with plastic wrap and let sit for 30 minutes.
- Repeat the stretch and fold process for a second time 30 minutes later. Cover with plastic wrap and let sit fir another 30 minutes.
- Repeat the stretch and fold process for a third time 30 minutes later. Cover with plastic wrap and let sit for 6-12 hours to double in size.
Shape the Dough and Add Inclusions
- Once the dough has doubled in size, turn it out onto a lightly floured surface. Gently shape the dough by rolling it onto itself to form a round.
- At this stage, add the freshly chopped jalapeños and shredded cheddar cheese. Fold the dough over itself to evenly distribute the inclusions without deflating the dough.
- Place the shaped dough into a lightly floured bowl or banneton, cover with plastic wrap, and set in a warm place to rise for another 6–12 hours, or until slightly puffy.
Scoring the Dough
- Using a lame or serrated knife, carefully create a beautiful design in the dough by gently scoring the dough.
- Form dough into a round or oval shape. Lightly dust the top off the dough with all-purpose flour.
Bake
- Set oven to 500°F. Note: I did not preheat my oven to 500°, I placed my bread in the oven around 350°. Either method is fine)
- Place the dough onto the bread cloche pan or in the bottom of a dutch oven (you may choose to line the bottom of either of these pans with parchment paper). Cover and bake for 30 minutes.
- Carefully remove from oven when done baking, slice and enjoy! Serve with butter or jam.
Nutrition


Stephanie—home cook, DIY addict, seasonal decor fanatic, and proud chicken wrangler living in a Victorian house that’s always a project. Whether I’m cooking with garden-fresh ingredients, herding mischievous chickens, or tackling another DIY, I’m here to share the fun (and chaos).