DIY Plywood Ghost Lawn Decorations
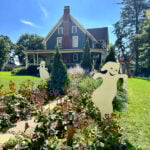
Create adorable outdoor Halloween yard decorations using plywood, paint, and metal pipes! These DIY plywood ghosts are a fun, budget-friendly weekend project that adds the perfect handmade touch of spooky charm to your yard or porch.
Servings: 2 ghosts
Cost: 40
Equipment
Ingredients
Instructions
Draw Ghost Outline
- Use a pencil or marker to sketch the shape of your ghosts directly onto the plywood. Keep the lines simple and flowing — think friendly, classic ghost shapes with wavy edges and rounded tops. Don’t worry about perfection — the charm of this DIY project is in its handmade look!
Cut Out Ghosts with Jigsaw
- Carefully cut along the ghost outlines using a jigsaw. Take your time around the curves and corners for smooth edges
Sand the Edges of the Ghosts
- After cutting, use sandpaper or a sanding block to smooth the edges of your plywood ghosts. This step removes any rough spots or splinters and helps the paint go on evenly. Plus, it gives your ghosts a clean, finished look that’s perfect for outdoor display!
Paint The Ghost, Eyes and Seal for Outdoor Use
- Paint each ghost with a few coats of white paint, then add black eyes and any fun facial details you like. Once the paint is completely dry, finish with a clear outdoor sealer to protect your ghosts from rain and weather. This step keeps them looking great all season long!
Secure Ghosts to Metal Pipes with Pipe Straps
- Attach the plywood ghosts to sturdy metal pipes using pipe straps and screws. This keeps your ghosts upright and stable when anchored into the ground. It’s a simple, reliable way to make sure your outdoor Halloween decorations can handle fall winds and stay standing tall all season!